Download
1 / 50
500 likes | 747 Views
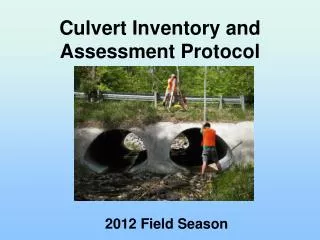
Culvert Inventory and Assessment Protocol. 2012 Field Season. Conduct Field Inventory. Coarse Filters. GREEN (Passable). GREY (Indeterminate). RED (Impassable). Further Analysis. Prioritize for remediation. Inventory and Assessment Process. Field Survey – Main Steps.

E N D
Culvert Inventory and Assessment Protocol 2012 Field Season
Conduct Field Inventory Coarse Filters GREEN (Passable) GREY (Indeterminate) RED (Impassable) Further Analysis Prioritize for remediation Inventory and Assessment Process
Field Survey – Main Steps • Navigate to predetermined road crossing using maps and/or GPS • Perform longitudinal survey • Complete site sketch • Take and document photos of site
Field Equipment $25 $30 $100 $15 $70 $200 $300 $200 $450 $300
Safety • All crew members must wear a safety vest and hardhat when performing surveys. • Slip resistant wading boots are required for all crew members, regardless of what job you are assigned. • Know the hazards in and around the stream channel (e.g., slick rocks, broken glass, wasp nests, snakes, etc.) • Follow all USDA Forest Service rules and guidelines when operating FS vehicles and equipment.
Non-surveyed crossings Natural Ford Bridge Insufficient Upstream Habitat Does Not Exist No access
Flow Condition Isolated pools, discontinuous flow Dry, no flow Wet, continuous flow
Pipe Shapes • Circular • Pipe Arch • Open Bottom Arch • Box • Ford • Vented Ford
Diameter Circular Circular
Span Rise Pipe Arch Pipe Arch
Span Rise Open Bottom Arch Open Bottom Arch
Width Height Box Box
Crossing Material • Corrugated Metal • Concrete • Plastic • Smooth Metal • Wood • Unknown
Continuous Substrate Continuous Not continuous Not continuous
Longitudinal Profile Survey Road surface P3 Tailwater control P6 culvert Pipe slope & slope x length Outlet perch Outlet drop Culvert inlet P2 Culvert outlet P4 Deepest point within 1 foot P5
Surveying the Crossing Establish Benchmark
Surveying the Crossing P2 inlet, and P4 outlet bottoms P2 = inlet P4 = outlet
Surveying the Crossing P3 Road Surface
Surveying the Crossing Max Pool Depth w/in 1’ Max Pool 1’ Max Pool Depth w/in 1’ AND Max Pool Depth 1’ P5 Max Pool Depth within 1 foot of Outlet
Surveying the Crossing P6 Tailwater Control Tailwater Control
Surveying the Crossing P6 Tailwater Control • Place rod at average depth of tailwater control x
Surveying the Crossing Where is the (P6)Tailwater Control?
Surveying the Crossing (P6) Tailwater Control
1 2 Surveying the Crossing Closing the Survey The survey must be closed to check for accuracy BM Rod Read + 100 = Height of Instrument (HI) HI - P3 Rod Read = Known Elevation for P3 Move Level New P3 Rod Read New P3 Rod Read + Known Elevation for P3= New HI New BM Rod Read New HI – New BM Rod Read = New Elevation 100 – New Elevation = Error (Must be within ±0.02) BM P3
Take Photos Photos of the inlet and outlet Good Photos • Items to capture in photos: • ID board with proper info • Entire culvert opening • Some adjacent channel • Stadia rod
Things to avoid in photos: • Blurriness • Zoomed in too far • Zoomed out too far • Cannot see board • Rod not included • Cannot see all the pipes • Light reflecting off the board • Incorrectly labeled board
Special Cases • No crossing in GPS, but you are at a crossing • Multiple pipe crossings • Fords • Vented Fords • Dry Streams • No Outlet Pool • Dry Stream and no outlet pool
We’re at a crossing, but it isn’t in the GPS! • Choose “NEW” crossing ID on Forms 5.1 • Add new waypoint in GPS • Enter the “NEW” crossing ID as waypoint name. • Complete survey as normal • Be sure to add new waypoint to hardcopy map at the end of the day.
Multiple Pipe Crossings • You will still follow the single pipe crossing Forms; there will just be more than one pipe for that crossing. • Pipes are counted from left to right when looking downstream.
Fords • Unnecessary fields will be hidden in the survey form (e.g. pipe width, pipe height) • Number of pipes for ford = 1 • Pipe number for ford = 0
Vented Fords • Survey all the points for the pipes and all the points for the ford • Number of pipes = pipe count + 1 • Ford pipe number = 0 • Photo: number of pipes = 5 • Photo: label the pipe numbers ? 0 2 3 1 4
Dry Streams • Dry streams are surveyed in the same manner as continuous flow or discontinuous flow streams. • Outlet drop (P4- P6) is used in the calculations, even without water being present.
No Outlet Pool • Sometimes there is no outlet pool • No outlet pool means no P6 • i.e. there is no tailwater control to make a pool • Leave P6 blank, but make a comment • We use P5 + water depth at P5 to calculate outlet perch in these situations
No Outlet Pool +Dry Stream • Unique situation, but it happens • Record all available points (excluding P6) • Record 0 for water depth at P5 • Be sure to record in comments: “Dry and no outlet pool”
Final Thoughts • Every crossing is unique, that’s why we have cameras and a comments field. • Pay attention to detail during the entire survey process. • Don’t cut corners to save time, it’s about quality not quantity. • You represent CATT & CMI, make sure your behavior and professional demeanor are reflective of all of us.
Calculations Tailwater control P6 Road surface culvert Pipe slope Outlet perch Outlet drop Culvert inlet P2 Culvert outlet P4 Water surface Elevations measurements P6>P2 = fully backwatered P4-P6 = outlet drop (in) P2-WSP5= outlet perch (in) pipe slope (%) x pipe length (ft) = slope x length
Tailwater control P6 Road surface culvert Pipe slope Outlet perch Outlet drop Culvert inlet P2 Culvert outlet P4 Water surface Calculations Elevations measurements P6>P2 = fully backwatered P4-P6 = outlet drop (in) P2-WSP5= outlet perch (in) pipe slope(%) x pipe length (ft) = slope x length
Calculations Tailwater control P6 Road surface culvert Pipe slope Outlet perch Outlet drop Culvert inlet P2 Culvert outlet P4 Water surface Elevations measurements P6>P2 = fully backwatered P4-P6 = outlet drop (in) P2-WSP5= outlet perch (in) pipe slope(%) x pipe length (ft) = slope x length
No Outlet Pool • The absence of an outlet pool results in the “leap” (usually calculated as the distance between the tailwater control (P6) and the culvert outlet (P4)) being calculated by using outlet perch (water depth at P5).