Download

1 / 5
50 likes | 52 Views
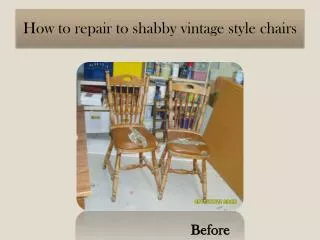
Whether you have an antique wicker chair or plastic wicker patio furniture, there are a few things you can do to repair it yourself.<br>

E N D
Saving Money and Memories How to Wicker Chairs Repair Yourself Jardin Wicker specializes in fine cane furniture restoration, serving Contra Costa, the East Bay, Marin and San Francisco. Whether you have an antique wicker chair or plastic wicker patio furniture, there are a few things you can do to repair it yourself. Start by determining the damage you are dealing with. Are there parts that are broken, or is the entire piece in need of repair? 1. Rewrap the Wicker
Often, wicker chairs will get some wear and tear as you use them. However, the repair process can be simple and doesn't take a lot of time. To begin, check for any broken pieces of wicker wrapping around the legs of the chair. Remove the damaged part and soak it in water for at least 30 minutes. This will make the wicker more pliable and easier to work with. ● Next, measure the length of the wicker reed you need to repair the damage. The reed should be at least 36 inches long to give you plenty of room to wrap it. It will also be longer than the old reed to help you weave it into place. ● You can cut the length of the new reed to fit, but you will want to leave a bit of extra if possible. This will be needed to wrap it around the back of the leg and secure it in place. ● If you have a wire tool, use that to help you weave the new reed in place. Then, glue the ends together and use tacks to keep the reed in place. ● Once the reed is dry, you can treat it to a finishing coat of paint or stain if you choose. This will preserve the reed and prevent it from getting dull or weathered over time. ● The reed can also be treated with a bit of olive oil to keep it soft and supple. It will also be easier to clean if you apply the oil regularly. After you have rewoven the wicker, it is important to protect your furniture from rust and other damage. Outdoor wicker furniture is prone to cracking and breaking from the sun, so it should be sprayed with a garden hose twice a year. Indoor wicker can also become cracked from dry heat, so it should be dusted regularly to help keep it looking good and to avoid mold. If you do not use the chair outdoors, you can use a spray-on clear coat of acrylic spray paint to protect the reed from weathering and keep it from drying out. This will also help the reed to last longer and look more beautiful. 2. Repair the Seating Whether you're looking to restore an old wicker chair repair or want to make some repairs yourself, there are a few things you need to know. First, you need to understand what type of wicker your furniture is made from. Generally, wicker chair repair are woven from natural materials such as willow, reeds or rattan. These are slender branches that have extreme flexibility, which allows them to be woven into sturdy baskets and chairs.
However, these same materials can be damaged or broken over time by weather and abuse. This can lead to the wicker strands and sterns breaking off or unwoven. If this occurs, you may need to replace the strands and sterns with new ones. You can do this yourself, using replacement material of the same thickness and type as the original wicker. You can also replace damaged reeds on the arms, back, or in the seat of your wicker chair repair. To start, remove the reed and carefully examine its shape and appearance. If the reed is broken or damaged, it may not be easy to replace it without damage. 3. Use small pair of needles Use a small pair of needle-nose pliers to open the reed, or bend a paper clip into a wire tool that will help you insert the reed into the woven part of the chair. Then, gently bend it into place. Repeat this process on the rest of the reeds on the chairs. If necessary, you can tuck the ends of the reeds under other parts of the furniture to conceal them. Once you have reeds of the same length, you can begin weaving them in to replace those that are missing or broken. It's important to carefully copy the weaving pattern that was originally used in order to make the repair look natural. After you've finished, you can reattach the loose reeds to the frame with wood glue. You can tack them in with a hammer or a small mallet, if necessary. If the reeds are still too loose, you can unwrap them and tuck the ends back in, or replace them with new ones. If you're doing a full replacement, you can soak the reed in water to make it more pliable before wrapping it in place. 4. Repair the Legs Wicker is a classic material that can turn your garden or patio into an inviting place to relax. It is lightweight and durable, making it ideal for both indoor and outdoor use. Over time, however, wicker will typically crack or break. If you want to save money and enjoy your wicker furniture again, you can repair the legs of your chair yourself instead of paying for an expensive replacement.
A broken wicker chair repair leg can be repaired in several ways, depending on the type of wicker used. Generally, a natural wicker chair will need repairs to its reeds, while synthetic wicker furniture may only require a fresh coat of paint. If your wicker is made from natural rattan, you can simply purchase a new strand of rattan from your local craft or hobby store and soak it in water for 30 minutes to make it more pliable. Next, cut a piece that is the same diameter as your damaged leg and wrap it around the broken end. Apply a small tack to secure it in place, and allow the rattan to dry before you paint or stain it. Another way to repair a rattan chair leg is by re-weaving the wicker. This can be more labor intensive than rewrapping, but it is an effective and cost-effective alternative to replacing the entire piece of furniture. 5. Rewave the wicker To re-weave the wicker, thread a replacement reed into the woven pattern starting from a point near the back that is less noticeable and weaving it throughout the chair. Once the reeds are all incorporated into the pattern, you can weave them into the rest of the wicker to create a new look. A wicker chair repair frame can also be repaired by applying a layer of linseed oil to the crack or gap in the wicker. This will strengthen the area and help you apply wood glue more easily. Once the wicker has dried, spray paint the new areas with the same color and finish as the rest of your wicker furniture. If your wicker has mismatched colors, you can blend them by spray painting the new areas only a light coat, then adding thinner layers as needed until they match the rest of the furniture. 6. Repair the Frame A wicker chair repair can look great and last for years with proper care. However, over time the rattan strips of the weave can loosen up or get broken or frayed. Fortunately, you can repair most of the problems that arise with your wicker chair repair yourself without paying a lot of money to have them repaired by a professional. The first step is to clean the rattan of any dirt, dust or residue that may be present. This can be done with a brush or sponge dipped in warm water. If
the wicker is stained, you can also use a solution of vinegar and water to remove the stains. Once the wicker is clean, inspect it for cracks or splits that may need to be repaired. These are generally minor, and can be corrected with a special wicker or wood glue. Next, check the weave pattern of the wicker to determine which reeds are missing or broken. Replace damaged reeds in the same direction as the original. It is a good idea to take a photo of the weave pattern for guidance, so that you can make sure that you are replacing the correct reeds. 7. Replace or missing Damaged Reed To replace a missing or damaged reed, start with the original one and pull it out of the weave, removing any tangled and loose ends. You should have enough of the original reed to cover and tuck under each cross member that has a loose piece - at least 1-2 inches. Then weave the replacement reed into the weave over and under the missing or broken pieces, making sure to flush the new reed against the other sections. Repeat this process until the faulty section is replaced. Depending on the condition of your wicker furniture, you can either touch up the repairs with a little spray paint or you can refinish the entire piece. Generally, you should wait until the wood glue has dried completely before applying a coat of spray paint to ensure that the repairs blend well with the surrounding area. If you want a completely different appearance, consider replacing the damaged reeds with upholstery tacks. Alternatively, you could use fake leather from the fabric store or from an old coat or belt at a thrift store. This type of material is not as durable as reeds, but it may give your wicker chair a more modern feel. If you want to know anout more how to repair wicker chair go to website