Download
1 / 4
40 likes | 49 Views
If your wicker furniture is in poor condition, it might be time to consider doing some slight repairs. Repairing wicker is a great DIY project and doesnu2019t take much time at all.<br>

E N D
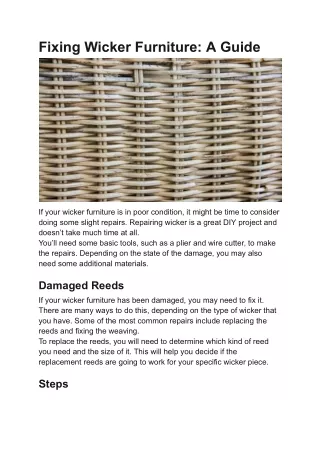
Fixing Wicker Furniture: A Guide If your wicker furniture is in poor condition, it might be time to consider doing some slight repairs. Repairing wicker is a great DIY project and doesn’t take much time at all. You’ll need some basic tools, such as a plier and wire cutter, to make the repairs. Depending on the state of the damage, you may also need some additional materials. Damaged Reeds If your wicker furniture has been damaged, you may need to fix it. There are many ways to do this, depending on the type of wicker that you have. Some of the most common repairs include replacing the reeds and fixing the weaving. To replace the reeds, you will need to determine which kind of reed you need and the size of it. This will help you decide if the replacement reeds are going to work for your specific wicker piece. Steps
Begin by soaking the reeds in water for half an hour to increase their flexibility. This will enable you to cut them into smaller sections that are simpler to manipulate and weave. ● After soaking the reeds, you can start threading them into your damaged wicker piece. It is vital to follow the original reed pattern to ensure a tight weave with the new reeds. ● Once you have woven the reeds into the wicker, apply a small amount of wood glue to both ends of each strand. You can use a wood glue gun, or you can do this manually. ● After completion, ensure to tuck the ends of each reed into the wicker frame to keep them hidden. This is an excellent method to protect the furniture from rusting or damage. ● If you prefer, you can also add a layer of paint or polyurethane to your damaged wicker furniture. These coatings will give your wicker an appealing finish and keep it looking amazing for years to come. ● Before beginning the repair process, make sure to thoroughly clean the furniture to remove any stains and dirt that may have accumulated over time. When you are done repairing your wicker, it should look and feel like new again. If you are lucky, you may even be able to restore it to its original glory with just a few simple steps. Damaged Weaving If your wicker furniture has become damaged or worn out, there are some things you can do to fix wicker furniture it. The most common repair is to replace the woven weaving. A woven design adds a natural look to your outdoor furniture, and it also helps to give the furniture a sturdy feel. However, even a small crack or loose end in the wicker can lead to damage over time. The good news is that if you know how to fix wicker furniture, you can have it look like new in no time. You only need a few tools, including a pair of needle-nose pliers, scissors or wire cutters, and epoxy or glue (a quick-drying resin epoxy works well).
● First, you’ll need to take a close look at the damage. You can do this by taking a picture of the area, or you can inspect it from different angles. ● Next, you’ll need to find a replacement piece of reed that will fit in the woven pattern. There are many dealers who sell reeds, and they can usually send you a sample to test in the spot that needs repair. ● Once you’ve found the right reed, it will need to be soaked in water for at least 15 minutes to soften it. This will make it easier for you to work with. ● After soaking the reed, cut off a small section with your wire tool or pliers and leave a few inches of the original reed tucked in under it to help hold it in place. Once you’ve done this, weave the new reed into the weave pattern over and under the original reeds. Repeat this process until the entire damaged area is covered. ● You’ll need to follow this exact pattern in order to get the new reed to blend in with the old reeds, so it’s important to do your research before you start. This will help you to avoid wasting time and money. If you’re not sure how to repair wicker furniture, you may want to consider hiring someone who is experienced with it to do the job for you. They may be able to fix wicker furniture for any type of damage and will cost less than if you tried to do it yourself. Damaged Frame When your wicker furniture has been damaged by the elements or accidents, it can be challenging to decide what to do next. However, it’s worth considering whether the damage is worth fix wicker furniture, as restoring your pieces can bring you years of joy. To determine if a piece is worth repairing, consider the material it’s made from. If it’s an antique or family heirloom, it may be worth the effort. However, if it’s a cheap, mass-produced plastic or resin piece, it’s more likely worth replacing than repairing.
For frame repairs, start with an oil-based primer and reattach the straps and slings with wood glue. Once secure, spray paint any new areas to match the rest of the piece. Before making any other repairs, take your wicker furniture outside to check if it needs a fresh coat of paint. If so, use an exterior-grade acrylic enamel for best results and apply a light coat with a touch-up brush. Damaged Seating If you want to revive your wicker furniture with minimal expense and effort, some minor repairs can do the trick. It may take a few days to complete the process, but with patience and a bit of elbow grease, you’ll soon be able to bask in the sun on your favorite seat again! When replacing broken or missing strands, it’s important to choose the right replacement material. For instance, if you have a cane or rattan chair with a broken seat, look for a replacement material that’s thick enough to withstand daily wear and tear. To get started, soak your replacement reed in a bucket of warm water for 30 minutes to make it more flexible and pliable. Then, simply cut and glue the length of the replacement material to the appropriate end of the broken strand. Use tacks to secure the ends once the glue has dried. For those who are passionate about wicker furniture, you can even treat your repaired piece with some olive oil to keep it looking fresh and new. To really enhance your experience, Thanks for visiting bcz


![[FIXING] HP Printer Troubleshooting guide](https://cdn4.slideserve.com/8187719/hp-printer-troubleshooting-guide-dt.jpg)