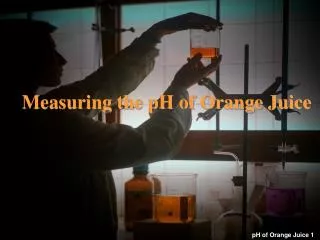
Measuring pH
Measuring pH. Vanderbilt Student Volunteers for Science Spring 2013. I. Introductory Demonstrations: Mystery Liquids. Tell the students you have some mystery liquids. Pour the contents of the bottles labeled A , W , and B into clear glasses (first, second, third, respectively).

Measuring pH
E N D
Presentation Transcript
Measuring pH Vanderbilt Student Volunteers for Science Spring 2013
I. Introductory Demonstrations: Mystery Liquids • Tell the students you have some mystery liquids. • Pour the contents of the bottles labeled A, W, and B into clear glasses (first, second, third, respectively). • Pour all the cabbage juice from bottle #1 into the fourth glass. • Test each glass of clear liquid by dipping first the red and then the blue litmus paper into the glass. • Tell the students to record the changes. • Hold each glass of clear liquid up for the students to observe as you pour cabbage juice into each. • Pour until the color is vibrant. • Ask students to record the color changes. • The cabbage juice was the indicator used to cause this color change. • Indicators are substances that change colors when mixed with an acid or base. • The liquids turned different colors because one is an acid, one is a base, and one is a neutral. NOTE: Some parts of the lesson say “V” instead of “A” W = water A = vinegar B = window cleaner
II. Discussion of Acids and Bases • Ask students: Can you name some common acids? • Responses may include: references to battery acid, acid indigestion, stomach acid, acid rain, citrus acid, and chemicals in a lab • Ask students: Can you names some bases? • Common bases include soaps, detergents
II. Discussion ofAcids and Bases (cont.) Acids Bases Bases taste bitter and feel slippery Some bases are used to settle upset stomachs Detergents and many cleaning solutions are basic Strong bases can burn the skin • Natural acids in food give sour, sharp flavor • Strong acids can burn your skin • Many acids are corrosive • Some acids can be helpful (e.g. stomach acid) • Two acids (sulfuric acid and nitric acid) cause damage in acid rain
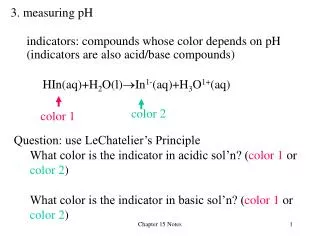
III. Explanation of pH Scale • Explain the pH scale (refer to manual for detailed explanations) and discuss the chart.
IV. Making a Color pH Scale Using Solutions of Known PH • Organize the jars in pH 1-14 order • All liquids are clear, but have different strengths of acidity or basicity • Start with pH 7 bottle and add cabbage juice until color is strong enough to see. • Continue adding cabbage juice to the other jars, moving outward from pH 7 to pH 6 and pH8, then pH 5 and pH 9, and so on.
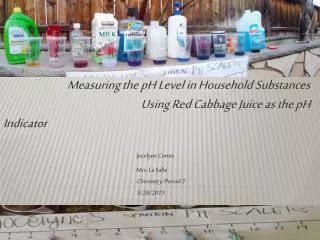
V. Testing household products • Tell students that they will test several household items to determine if they are acidic, basic, or neutral. • Put the Testing Household Items chart on the board (leave 2nd and 3rd column blank) • Student #1: add several squirts of cabbage juice to 6 of the wells in the 1st row and first 2 wells in the 2nd row. Student #2: add a squirt of each household liquid to the well, following the order on the Instruction sheet. • Record the following: • Whether the product is an acid, base or neutral • Estimate the closest pH value using the colored pH standards at the top of the well plate.
VI. Analyzing Introductory Demonstrations • Get the three glasses of mystery liquids • Ask students whether the liquids are acids, bases, or neutral. Then ask students to guess what they are (A: vinegar-acid, W: tap water-neutral, B: window cleaner-base). W = water A = vinegar B = window cleaner
VII. Magic Foam • Place the cut-off bottle in the center of the clear plastic container. • Pour all of container of red cabbage juice from container #3 into the tall bottle so that the bottle is about 1/3 full. • Have another VSVS volunteer carefully hold the plastic container with the bottle so all students can see the experiment. • NOTE: Be sure to hold the container with the bottle level since foam will come over the top of the bottle. • Add ALL of milk of magnesia to cabbage juice. Slowly swirl the bottle. Ask students what color the cabbage juice is now (green)
V. Magic Foam (cont.) • Add half of the pH Down solution (sodium hydrogen sulfate) and swirl. Be sure students note the color change (changes to red). • Add two spoonfuls of the pH Up solid (sodium carbonate). The foam will form quickly and reach the top of the bottle and probably overflow. The solution will change colors, showing blue, purple, and pink at different places in the foam. • Add the remaining pH Down solution and swirl. • NOTE: EYE OR SKIN CONTACT WITH pH UP OR pH DOWN SOLID SHOULD BE AVOIDED. IF CONTACT OCCURS, IMMEDIATELY FLUSH WITH WATER. • CLEANUP: One of the VSVS volunteers should take the magic foam demonstration bottle to the nearest sink and pour the contents out. Wash down the drain with lots of water and rinse out the bottle. Be sure to return the bottle with the kit.