Download

1 / 25
250 likes | 369 Views
Implementing various interactive exercises to enhance classroom participation, including One Voice at a Time, Gallery Review, A-Z Review, and more. These activities encourage communication and collaborative learning among students.

E N D
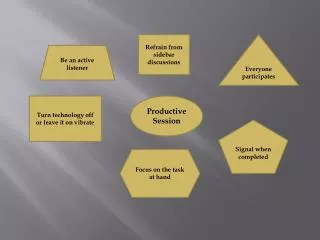
Principles for Participation Expectations for conversations: • One voice at a time. • Take turns speaking. • Respond using complete sentences. • Use your “group voice”. • Pay careful attention to what your group members say. • If your idea is similar or builds on someone else’s idea, acknowledge that. • Consensus doesn’t mean everyone agrees completely, it means that there is not a strong enough argument against a point to overturn it at this time.
Each One, Teach One 1. Prepare fact cards or fact strips. Each card should contain one piece of information or fact that the participant will share with other participants. 2. Hand out one fact card to each participant on a random basis. With larger classes, divide the students into two groups, then distribute the same set of facts to each group. 3. Participants (individually or paired) should spend a few minutes reading the information on the fact card. 4. Each person has ten minutes to "teach" or transfer his knowledge verbally and individually to as many other participants as possible and also to listen in order to learn facts from the other participants. The participants should be encouraged to give an example or raise a question about the information on the card. The teacher should circulate around the room to help with activity. 5. Ask a series of questions to go over the activity. Do not allow the person who taught the fact to answer the question, only those who learned it. Turn to the fact "teacher" to check whether the fact was understood correctly. • What did you learn about…? • What did you learn that surprised you? • What information is not clear? • What questions do you have? How might we find out the answer? • What information did you learn best?
Gallery Review • Post posters listing concepts around the classroom. 2. Divide the class into a number of groups corresponding to the number of posters. 3. Have each group view a poster and talk about what they remember about the concepts for a minute or two. 4. Rotate groups clockwise around the room until all posters have been reviewed.
Give One, Get One 1. Draw the table below and fill in three comments about the topic. 2. Find a partner - decide who will be A and who will be B. 3. Partner A shares one comment. Partner B paraphrases partner A’s comment, then adds it to their table. 4. Partner B shares one comment with partner A. Partner A paraphrases Partner B’s comment, then adds it to their table. 5. Find another partner and repeat steps 3 and 4 with your next comment. 6. Find a third partner and repeat steps 3 and 4 with your final comment.
Quiz, Quiz, Trade • Write one question about the material on a Post-It. Write the answer on the other side. • Find a partner. • Ask your question, wait for them to answer. • Your partner will ask you a question, try to answer it. • Share the correct answers with each other. • Exchange questions and find a new partner. • Repeat steps 3-6 until you’ve spoken with the designated number of partners.
Walkabout Review • Have an in-depth interview with a partner about a topic, concept, skill, or strategy. • Fill out one column of your chart per interview. • Have your partner interview you about a topic. • Change partners and repeat the process.
A-Z Review • Form specified number of groups, letter each group alphabetically, and issue each group a different colored marker. • Place posters on the wall with the group letters at the top. • Groups start at their letter and rotate through all the posters • Each group must come up with a word or phrase relating to the topic and beginning with the letter listed on the poster. • Groups record their phrase on the poster and rotate to the next poster when directed to do so. • To conclude, groups rotate through each poster one more time and decide upon the most important phrase.
Sign-In Graph • Pose a question that lends itself to graphing. • Make graph and label the x, y axes and scale on a flip chart. • Have students write their names on a post-it or sticker. • Have students place post-it or sticker on the flip chart graph indicating where they are. • Analyze the graph with the class, start by asking “ What does this graph tell us?”
Seasonal Partners • Divide your paper into quarters and list the four seasons - one in each quadrant. • Find a partner who has the same season open as you. Write down their name in that season square and have them write yours. • You may only write down a partner in a season that you both have open. Do this until all four seasons are filled in. • As directed, meet with your seasonal partner and discuss the topic given. • Repeat with new topics and a new seasonal partners as directed.
Clock Partners • Draw a clock on your paper. • Label each hour, with a number and a line. • Walk around the room and write down a partner to talk to next to each hour. • You may only write down a partner in an hour that you both have open. • As directed, meet with your 12 o'clock partner and discuss the topic given. • Repeat with a new topic and your 1 o’clock partner as directed.
Say Something • Form pairs or small groups. • One member starts by making a comment about the experience, reading, or subject. • In “round robin” fashion each group member makes a comment. • Once each person has made a comment, the group may continue to the next topic. Stems to use in Say Something include: “As I read this I was thinking…” “After doing that I think…” “This makes sense to me because…” “One question I have about this is…”
Final Word • Form small groups (generally 3 - 5 people) • Read the passage, selection or article silently and underline, highlight, or write down two or three statements that struck you in some way. • Once everyone is finished reading and underlining, one person goes first and reads one of their statements without adding any additional comments. • The person sitting to their right then makes a comment about the statement that the first person read. The other group members listen quietly. • Once the second person has commented, the process proceeds around the group until it gets back to the person who read the original statement. • The original person then says something about the statement and the comments (the final word) they heard from the other group members. • The process repeats with the second person and so on until everyone in the group has had a “final word”. Stems for use in the Final Word: “After hearing that I wonder…” “It seems that what that statement means is…” “It is interesting that you…” “I always thought that…”
Talking Sticks • Form groups (generally 3 - 5 people). • Each person places their pencil/pen (Talking Stick) in the middle of the table. • To make a comment you must pick up your “Talking Stick” - then you speak and hold onto your pen/pencil. • Once you have finished your comment hold onto your “Talking Stick” until all other group members have had a turn (group members may pass). • Once everyone has commented, place your “Talking Sticks” back in the center. • Continue until the time is up.
Think-Pair-Share • Take a silent moment to think about something (concept, idea, fact, etc) and write down your thoughts. 2. Pair up. • Share thoughts and ideas with your partner. • Class sharing can occur by having students tell the class about what their partner shared. Stems for using in Think-Pair-Share include: “What I was thinking was…” “My understanding at this time is…” “This made me think about…”
Dialogue Dots • Form groups. Each person in the group gets a sheet of different colored dots (you can use colored markers). • Use an index card or sheet of paper for the group. • One person starts by placing a sticker on the index card and making a comment related to the topic. • Everyone else takes turns placing a sticker and making a comment until each person in the group has made one comment. • Once everyone has made a comment, repeat the process.
Paraphrase Passport • Pair up, or form groups. • One person begins by making a comment related to the topic. • The next person to speak must paraphrase the first comment before stating their comment. • After paraphrasing the prior comment, the group member can add their comment. • Repeat the process (paraphrasing the person before you and adding your comment) continue for a predetermined time, or until the topic has been thoroughly discussed. * It helps if there is one person designated to facilitate this process.
Paired Verbal Fluency • Pair up. • Designate Person A and Person B. • Round 1: A speaks, B listens for 15 seconds. Pause then switch. B speaks, A listens for 15 seconds. Long pause. • Round 2: A adds to the topic, B Listens for 30 seconds. Pause then switch. B adds to the topic, A listens for 30 seconds. Long pause. • Round 3: A summarizes or adds, B listens for 45 seconds. Pause then switch. B summarizes or adds, A listens for 45 seconds.
Philosophical Chairs 1. Arrange desks in a |_| shape. 2. According to their position on the argument, students sit on either side, facing each other, or across the bottom of the U in the neutral zone. 3. Students will address each other by their first names. 4. A student must briefly summarize the previous speaker's points to that speaker's satisfaction before he/she begins his/her comments. 5. Think before you speak. Organize your thoughts. 6. After a student speaks, he/she must wait until two students on his/her side have spoken to speak again. 7. One speaker at a time; others are listeners. 8. The teacher can call time-out periodically to clarify, reflect on the process or content, or refocus. 9. Address the ideas, NOT the person. 10. One student from each team will provide a summary of the viewpoints presented during the discussion by his/her team. 11. A student in the neutral zone must take notes on both sides of the argument, and if his/her position changes, he/she must explain why he/she came to a new conclusion.
3-2-1 After the reading, lesson, or activity write down the following: 3 things that you learned. 2 questions you have. 1 new idea that made you think of something else or can make use of. Find a partner and take turns sharing your lists.
Four Corners • Hang one piece of poster paper in each of the room’s four corners. • Label the first poster with strongly agree, the second with agree, the third with disagree, and the fourth with strongly disagree. • State the issue or controversy and ask students to stand with the poster that tells how they feel about the issue. • Ask students to work as a group to list four or more reasons for their position on their poster. • Have each group present the ideas on their poster to the class. • Organize a debate in which the first group (those who strongly agree) makes a point by stating one of their arguments. • The second group (those who strongly disagree) can state a counterpoint from their poster and state their reason for their argument. • The third group (those who agree) can respond by telling why they agree but do not strongly agree with the argument. • Finally, the fourth group ( those who disagree) can contribute by telling why they disagree but do not strongly disagree with the argument. • Continue steps 6 to 9 for the remaining statements. • As a further extension, each student may use the statements to write a paragraph supporting their position.
OPTIC A critical strategy for analyzing and interpreting visual text features. • O is for Overview. Conduct a brief overview of the main subject of the visual. • P is for Parts. Scrutinize the parts of the visual. Note any elements or details that seem important. • T is for Title. Read the title or caption of the visual (if present) for added information. • I is for Interrelationships. Use the words in the title or caption and the individual parts of the visual to determine connections and relationships within the graphic. • C is for Conclusion. Draw a conclusion about the meaning of the visual as a whole. Summarize the message in one or two sentences.
Hot Seat • At the start of the unit assign groups of 2-4 students a topic that they will be responsible for knowing on the day of that lesson. • Following each lesson, have the group in the hot seat sit in front of the class. • Ask the group members questions on the day’s lesson, and encourage classmates to ask questions as well. 4. Bonus points may be earned for the percent of questions answered correctly.
Sources Principles for Participation: Kate Kinsella, San Francisco State University, 10/00 Each One, Teach One: Carolyn Pereira, 1987. Gallery Review: http://serc.carleton.edu/introgeo/gallerywalk/step.html Give One, Get One: Linda Bersinger, Coaching Based Teacher Leadership, 3/07 Quiz, Quiz, Trade: Linda Bersinger, Coaching Based Teacher Leadership, 3/07 Walk-About Review: Cognitive Coaching Learning Guide, page 119, 2002 A-Z Review: Adler, Mary and Eija Rougle. Building Literacy Through Classroom Discussion: Research-Based Strategies for Developing Critical readers and Thoughtful Writers in Middle School. New York: Scholastic, 2005. Sign-In Graph: Data Management and Probability, Grade 1 Teacher Package, Ontario, Canada. Lines of Communication: Kathleen Kenfield, Ed.D., ELL Strategies and Programs, Seasonal Partners: Cognitive Coaching Learning Guide, page 111, 2002 Clock Partners: Why didn’t I Learn This in College? Teaching and Learning in the 21st Century, page 247, 2002. Say Something: Beers, Kylene. When Kids Can’t Read: What Teachers Can Do. A Guide for Teachers 6-12. Portsmouth, NH, Heineman, 2002. Final Word: Patricia Averette, Annenberg Institute for School Reform Talking Sticks: Beers, Kylene. When Kids Can’t Read: What Teachers Can Do. A Guide for Teachers 6-12. Portsmouth, NH, Heineman, 2002. Think-Pair-Share: Paula Rutherford, Why didn’t I Learn This in College? Teaching and Learning in the 21st Century, page 98, 2002. Dialogue Dots: Linda Bersinger, Coaching Based Teacher Leadership, 3/07 Paraphrase Passport: Kagan, S. Gardner, H. and Sylwester, R. Trialogue: Brain Localization of Intelligences, 2002. Paired Verbal Fluency: Kagan, S. Cooperative learning resources for teachers. Resources for Teachers: San Juan Capistrano, CA, 1989. Philosophical Chairs: Seech, Zahary. “Philosophical Chairs: A Format for Classroom Discussion”. Teaching Philosophy. Volume 7, Number 1, pages 37-43, January, 1984. Key Concepts/ Key Ideas: Think Literacy, Cross Curricular Approaches, grades 7-12, Ontario, Canada. 3-2-1: Paula Rutherford, Why didn’t I Learn This in College? Teaching and Learning in the 21st Century, page 99, 2002. Four Corners: Feeney -Jonson, Kathleen, 60 Strategies for Improving Reading Comprehension in Grades K-8. Corwin Press, December, 2005. Dialogue Stems: Dalton, J. and Smith, D. Extending Children’s Special Abilities-Strategies for Primary Classrooms, pages 36-37, 1986. OPTIC: Pauk, W. How to study in college (7th ed.). Houghton Mifflin Company: Boston, 2000. Hot Seat: Anthony Crider, Elon University