Download
1 / 46
460 likes | 605 Views
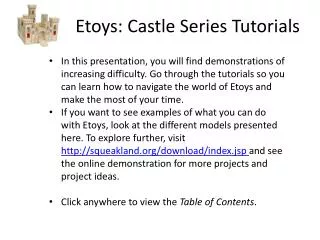
Etoys: Castle Series Tutorials. In this presentation, you will find demonstrations of increasing difficulty. Go through the tutorials so you can learn how to navigate the world of Etoys and make the most of your time.

E N D
Etoys: Castle Series Tutorials • In this presentation, you will find demonstrations of increasing difficulty. Go through the tutorials so you can learn how to navigate the world of Etoys and make the most of your time. • If you want to see examples of what you can do with Etoys, look at the different models presented here. To explore further, visit http://squeakland.org/download/index.jsp and see the online demonstration for more projects and project ideas. • Click anywhere to view the Table of Contents.
Etoys: Castle Series Tutorials • Special Sections: • Usability Testing • En Francais Navigating the Toolbar Exploring the Ten Halo Tools To move to trash To open a menu To pick up To move an object To duplicate an object To change color To change size To rotate an object To label an object To open a viewer Using Sectors Formatting Fonts Mastering the Menu Tool Painting Click this icon to return To this Table of Contents TOC
Navigating the Tutorials TOC This is the first screen you will see when opening up Etoys. We are going to look at Navigating the Tutorials.
Navigating the Tutorials TOC First, click on the Tutorials and Demos button. It will highlight when you put your mouse over it
Navigating the Tutorials TOC This is the tutorial page. There are four tutorials included with Etoys. We are going explore the first one, which is a video showing some examples of what you can do in Etoys
Navigating the Tutorials TOC Go ahead and click on the first tutorial. It will highlight when you place your cursor over it
Navigating the Tutorials TOC This will launch a video that will repeat after finishing. It shows off a few things you can do with Etoys. Feel free to mess around with the scripts while they are on screen. Once you have seen enough, click the Exit button and it will take you back to the main Tutorial screen
Navigating the Tutorials TOC The third tutorial is called the Etoys Challenge, and requires interaction to complete. When you want to try it out, click here
Navigating the Tutorials TOC The aim of these tutorials is to teach you basic scripting. The level will complete when you successfully navigate the red car into the green Goal area.
Navigating the Tutorials TOC Start by clicking on the script commands in the blue area, and dragging them to the green script box. The script will slot into the script box if you are doing it correctly. In the first example you only need to move the Forward script, but it will need editing
Navigating the Tutorials TOC The script box lets you control the scripts you place inside. There are lots of options here, but for now check out the yellow exclamation mark. Clicking it once will run the scripts once. Holding it down will run the scripts repeatedly. After clicking the ! Button, you will notice the red car moves, but only slightly. For the level to end, you need to get the car to move all the way to the green Goal, so you will have to edit the script in order to get the car to its final destination
Navigating the Tutorials TOC In order to get the car to the goal, you need to change the distance the car will travel. If you mouse over the script, you will see up and down arrows. Clicking these will change the value. Set the car to go forward by 400 It should be noted that at any time you can reset the car back to its original location by pressing the turquoise Car reset button
Navigating the Tutorials TOC Run the script by pressing the yellow ! Button, and the car will reach the goal and unlock the next stage Run script Click here to head to the next stage
Navigating the Tutorials TOC The next stages are very similar, but a little more complex. In this case, you have to turn the car 90 degrees before you move it forward. You change the angle the same way as you change the forward distance. Run script Once you have completed the stage, click here.
Navigating the Tutorials TOC The later stages get more difficult, but once you have the basics you can figure them out rather easily. You will see additional scripts, like tests and color which enable you to run scripts specifically when the car discovers certain colors
Navigating the Tutorials TOC Click here to return to the tutorial main screen Once you have finished all of the stages, you will have completed this tutorial.
Etoys: Castle Series Tutorials • Special Sections: • Usability Testing • En Francais Navigating the Toolbar Exploring the Ten Halo Tools To move to trash To open a menu To pick up To move an object To duplicate an object To change color To change size To rotate an object To label an object To open a viewer Using Sectors Formatting Fonts Mastering the Menu Tool Painting Click this icon to return To this Table of Contents TOC
Using the Sectors Tutorial TOC The final tutorial will help you create visuals for your Etoys application. Like the other tutorials, you just click it to begin
Using the Sectors Tutorial TOC This tutorial is about creating your own visuals. There is no pass criteria for these tutorials, you can advance or rewind at any time by using the navigation arrows
Using the Sectors Tutorial TOC Remembering what you learned from the Halo tutorial, you can right click and change the sector information. In this example, the size, angle and color of the section has been changed. Click here to get a visual section on your screen
Using the Sectors Tutorial TOC Continuing through the tutorial will test your ability to draw and edit the sectors. Continue to follow the steps to create your own copy. Once you have done this, you have completed all the tutorials
Using the Sectors Tutorial TOC Now you have successful completed the Etoys tutorials you should know enough to get started on your very own project. Remember, the help file is always available if you require more assistance
Etoys: Castle Series Tutorials • Special Sections: • Usability Testing • En Francais Navigating the Toolbar Exploring the Ten Halo Tools To move to trash To open a menu To pick up To move an object To duplicate an object To change color To change size To rotate an object To label an object To open a viewer Using Sectors Formatting Fonts Mastering the Menu Tool Painting Click this icon to return To this Table of Contents TOC
TOC Painting is the term in Etoys for freehand drawing. It lets you draw anything you like, and if you are familiar with programs like Microsoft Paint, then you will probably see the similarities in Etoys painting. Painting with Etoys In order to start painting, simply click on the easel button which you will find at the top of your Etoys screen
TOC Clicking on the Easel will bring up the following interface, which enables you to Paint. Next, we will discuss what the icons mean Painting with Etoys Easel
TOC The Bucket tool allows you to paint entire areas with one click The paintbrush. This will allow for basic painting Painting with Etoys The dropper. This enables you to click on something of any color and immediately have it as your current paint color This is the eraser. It will remove paint These are the available brush sizes The Undo button will undo the last action.The Keep button will save and exit Paint interface.The Clear button clears everything on screen.The Toss button will clear and cancel. Your color tool. Clicking this will allow you to change your current color Here you can save colors to the swatch Use the bottom buttons to draw vector shapes like rectangles or lines
TOC Using everything you learned, you should be able to paint anything you like. Using combinations of tools you can get very creative. Painting with Etoys
Etoys: Castle Series Tutorials • Special Sections: • Usability Testing • En Francais Navigating the Toolbar Exploring the Ten Halo Tools To move to trash To open a menu To pick up To move an object To duplicate an object To change color To change size To rotate an object To label an object To open a viewer Using Sectors Formatting Fonts Mastering the Menu Tool Painting Click this icon to return To this Table of Contents TOC
Exploring the Ten Halo Tools TOC Click to View Handles
Exploring the Ten Halo Tools TOC • Each of these icons surrounding the window represents a specific tool that enables you to alter the elements in your window. • They are called the “Halo Tools”because they surround the screen or its elements like a halo. Click to Begin
Exploring the Ten Halo Tools TOC TOC To move to trash Remove an object, drag it to the trash
Exploring the Ten Halo Tools TOC TOC To open the Menu Click this icon and the Object Menu opens.
Exploring the Ten Halo Tools TOC To open the Menu send to back - this puts the object behind other overlapping objects. bring to front - this puts the object in front of others. embed- this allows you to embed the object inside another object, acting as a new object. fill style - Options to choose color, and for solid color, gradient, bitmap, or default fill. border style - this option sets the style of the border based on color, width and style. drop shadow - this gives the user the option to set the color of the shadow, visibility, and the shadow offset.
Exploring the Ten Halo Tools TOC To open the Menu resist being deleted – cannot delete the object resist being picked up – cannot pick up object be locked – object cannot be changed provide clipping– object can be clipped for painting direction arrow– direction arrow will appear accept drops - objects can be dropped into script body. siblings -creates another instance of an object extras - a set extensions for more effects
Exploring the Ten Halo Tools TOC To pick up an object The black button that looks like a pair of tongs picking up a block of ice lets you pick up an object and place it somewhere else.
Exploring the Ten Halo Tools TOC To move an object The red-brown shape to the left of the green duplicate button “allows you to move the object.
Exploring the Ten Halo Tools TOC To duplicate Make a copy of the element you select by holding <SHIFT> and clicking the mouse.
Exploring the Ten Halo Tools TOC To change color The purple eye dropper appears for objects with a fill color. It brings up this Color Picker, documented in the Objects chapter. The red circle is the selector, shown here at the top of the grayscale bar.
Exploring the Ten Halo Tools TOC To change size Resize an element. Click and hold the button and push inward to make it smaller and pull outward to increase its size.
Exploring the Ten Halo Tools TOC To rotate an object Transform an object around its axis by holding the mouse button downand rotating in the direction you desire. An arrow assists you in the angle.
Exploring the Ten Halo Tools TOC To label an object Right click an object element, then type a text label of your choice to describe it.
Exploring the Ten Halo Tools TOC To open a Viewer The Viewer will open a new window with a list of an element’s changeable properties.
Exploring the Ten Halo Tools TOC To open a Viewer The Viewer contains script tiles. These tiles provide informationand control the actions and properties of objects. These are vary similar to the actual programming functions you could use in Office or any other software use to develop programs. The Viewer script tiles are organized into categories with some repeating in more than one area. This Viewer window controls the Size, color, and position of a rectangle used in your project.
Etoys: Castle Series Tutorials • Special Sections: • Usability Testing • En Francais Navigating the Toolbar Exploring the Ten Halo Tools To move to trash To open a menu To pick up To move an object To duplicate an object To change color To change size To rotate an object To label an object To open a viewer Using Sectors Formatting Fonts Mastering the Menu Tool Painting Click this icon to return To this Table of Contents TOC
Formatting Fonts TOC Different types of objects will have different halos, and there is an option for an extra handle. For example, a text object will have halo handles to change the font, size, and style. To format a font, right click on a text block and a view series of unique Halo Tools FF FF FF Change the emphasis or alignment Change the font Change the style
Etoys: Château Tutoriels Série TOC • Dans cette présentation, vous trouverez trois démos, de difficulté croissante. Nous recommandons que si vous êtes nouveau à Etoys, vous commencez avec le Château Tutoriels série. Aller à travers les tutoriaux afin que vous puissiez apprendre à naviguer dans le monde Etoys et tirer le meilleur parti de votre temps. • Si vous voulez voir des exemples de ce que vous pouvez faire avec etoys, regardez les différents modèles présentés ici. Pour une exploration plus poussée, allez à http://squeakland.org/download/index.jsp et voir la démonstration en ligne pour encore plus de projets et idées de projets.