Download
1 / 16
160 likes | 177 Views
Learn how to create a design using Morning Print's pre-designed templates, customize text and fonts, and preview and select printing options.

E N D
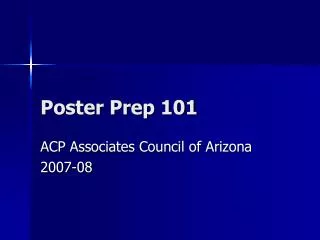
PRINTING PREP 101 HOW TO DESIGN USING MORNING PRINT’S “CHOOSE FROM OUR DESIGNS” TEMPLATE
The first thing we need to do is create a login. Once you are done getting into our system, choose your paper stock. We will be using the Standard Uncoated for our tutorial today. Once you choose your paper stock, you will see a section labeled “Select your design preference,” We are going to choose the first option, “Choose from our designs.”
Upon clicking this option, you will be brought to a page with all of our pre-designed templates. MorningPrint offers over 1000 pre-designed templates. Take your time and find the best fit for your design goals. Keep in mind that choosing a template with an image that fills the entire space of your card will limit your text color options, as darker images will need white or very pale colored text to show on the paper, and vice versa.
Let’s demonstrate this on template ID#2673 All templates have an ID# and it is this ID number that allows users to retrieve templates they used in prior designs. It also lets us know that your business card is being printed using one of our designs. If you know the ID# of the template you’d like to use, type in the number in the ID box at the top right of the page and click “GO” and choose your design.
We now are in our design template page. On the left are the fields that control the text on your design. Text must be edited here in order to show on the design.
We have the fields filled with the information we want to print. As you can see, some fields were not required. In order to get rid of unwanted fields, simply delete the text in the fields on the left.
They will not be visible on your card template once their field is deleted
Here’s the part where your design sensibility is front and center. Let’s change our font and move things around until we get it where we want it to be. We will again be editing any font on our left side fields, but we can move the text boxes on the template by simply clicking and holding them with our mouse. Images via yourinspirationweb.com
As you can see, we’ve moved the Company Name & the message to the other side. We changed the title font to Rockwell and increased the size to size 12. We’ve changed the rest of the font to Calibri, grouped words together and spaced them out so that our information is clear and easy to read. We recommend BOLDING font that is size 7 or 8 as it is quite small and thin, small fonts are difficult to read after printing. As you can see, shifting the Company Name & message to the right side has helped balance the text on the left, but now we are left with disappearing/hard to read text on the right. Let’s try changing the color.
After changing colors, the image is slightly improved, but still hard to read. How about deleting this from the front side altogether and moving it to the back?
Let’s test this theory. Before we can edit the back side, we need to click the “Agree to Terms” box at the bottom.
Here we have the back side image of your card. This template page is a bit different from the last. At the top left (A), we have “Choose back side options.” We can choose a blank backside (no text or image will be printed), convert the image to black and white or print a color backside. We are going to stick with the color backside for this tutorial. Underneath(B) those options are the text fields we need to again fill with our information. Let’s try putting our company name & message here.
Now that we have the whole card space to fill, we can up our font size. I’ve again used Rockwell for the Company Name & Calibri for the message text. Remember that the colors on your screen will not be the exact color printed. Card stock, finishing options and the printing process can all have an effect on the colors printed. Now that I’m happy with my design, I will again click the “Agree to terms” (A) box and then “Next” This will take me to my Proof page.
Here is the digital “Proof” of my design. Since the gang printing process prevents us from printing a physical sample, this is the last chance to see how your final design will print. You can click the “Print Size Preview” (A) and it will print out a sample on your personal printer. This will also give you a better idea of how your colors will print (but not 100% accurate). If you are unhappy with how it looks, click edit. This is also the final chance to change paper stocks by clicking the “change papers” (B) link. Since I’m happy with my design, I’m going to click “Next” and go on to select my printing options. You will first be brought to the “Choose your quantity” page. Choose how many you would like and click “next”
You are now in your “finishing options” page. Here’s where you can really make your text/design stand out. Since my card’s image is quite large, I’ll need my text to pop out. I’ve decided to choose Gold Foiling for both the Company Name & Message. I’m going to click the box (A) under “Foil Accents (back side)”. My first pull down arrow will have my foiling color options. I choose Glossy Gold Foil. My second pull down menu (B) asks me where I want to apply my foiling. Since I want to foil more than one spot, I’m going to click “Others” and scroll down to the box where I can enter a description (C) for my “others” choice. Once you are done entering your description/choosing your finishing options. Click “Next” We are now in our “Shopping Cart” Page. I can see my total cost (before shipping), my paper stock & finishing options. I can also enter a coupon code. If everything looks good, click “Check Out” and proceed with your order.
You’ve made your business card! We have now come to the end of our very first Printing Prep 101 course. I hope this has been a big help to designers and non-designers alike. Feel free to post any questions or comments. If there is a specific topic you’d like to see covered in this series, let us know in the comments & we will be glad to get a tutorial going. Image from cardsdirect.com