Download
1 / 19
220 likes | 478 Views
Autoclave Use and Safety. University of Massachusetts Boston Biology Department M. Kelly. An autoclave is used to sterilize utensils, containers, media, soil, used infectious materials and other waste. Never autoclave toxic, flammable or radiological agents.

E N D
Autoclave Use and Safety University of Massachusetts Boston Biology Department M. Kelly
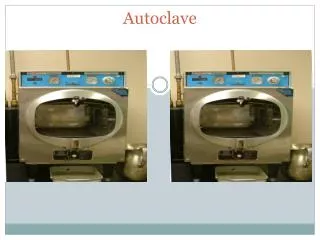
An autoclave is used to sterilize utensils, containers, media, soil, used infectious materials and other waste. Never autoclave toxic, flammable or radiological agents.
Standard Temperature and Pressure 121° C (250° F) 15 psi Temperature and pressure are preset – don’t change these Time: varies You can set the autoclave to run for the time you choose.
Proper Autoclaving Containers • Containers used for autoclaving must be able to withstand high temperature and pressure without melting or disintegrating. • Use: stainless steel, polypropylene or polycarbonate • If you are unsure whether a container is autoclavable or not, DON’T USE IT • Over time, the integrity of the container decreases
Autoclaving Liquids • Use a container that is twice the volume of the liquid you are autoclaving, for example, use a 2 liter flask to autoclave 1 liter of media • Always AlwaysAlways use a secondary container under your container of liquid • Loosely cover a container of liquid to be autoclaved with aluminum foil or a cap; never tighten a cover.
Autoclave Cycles There are 3 types of cycles (I only use 2): FAST LIQUID DRY
Autoclave Cycles • Fast – Fast Exhaust – after autoclaving, valves open and chamber rapidly returns to atmospheric pressure Use the fast exhaust to sterilize empty glassware, toothpicks, soil, pipettes and metal utensils (anything that does not contain liquid).
Autoclave Cycles • Liquid – Slow Exhaust – after autoclaving, valves partially open to allow super-heated liquids to cool slowly and reduce boil-over. Use the slow exhaust when sterilizing liquids such as media and water. Also use slow exhaust when sterilizing waste plates of solidified media because it will melt in the autoclave.
How Long to Autoclave Dry goods @ 121 °C Time (min) • Glassware, empty, inverted 15 • Instruments, wrapped 30 • Utensils, wrapped 30
How Long to Autoclave Biohazardous waste bags, @ 121 °C, loosely tied Time (min) 2 or more bags 100 + 1 bag, full 90 1 bag, half full 60
How Long to Autoclave Liquids, in bottles with vented caps Size (ml)Time (minutes) 75 25 250 30 500 40 1000 45 1500 50 2000 55
How Long to Autoclave The time you need to autoclave will depend upon: The volume in the flask The number of flasks in the autoclave How far apart the flasks are How high the sides are on the container The material of the container
Loading the Autoclave • Never overload the autoclave; steam needs to circulate • Never autoclave clean items and waste together • Use indicator tape to confirm temperature • Fill in log
Unloading the Autoclave • Turn autoclave OFF • Pressure gauge must be at 0 psi to open door • Open door very slowly and stand back from the door • Allow all steam to escape from autoclave • Open door; let materials cool; don’t remove any liquids that are boiling • Use gloves, have feet covered, lab coat
Smell Autoclaved waste usually doesn’t smell good. Be sure to let any waste cool completely in the autoclave room before it is put outside in the trash. Our neighbors in the offices across the hall don’t want to smell trash all afternoon and I wouldn’t either.
Cleaning the Filter • Occasionally clean out the filter before you autoclave • Filter is located under the rack that sits on the bottom of the autoclave • Unscrew the nut (when it’s cool) and lift out the small filter, dump out any material in it and replace the nut
Troubleshooting • If you have any problems with the autoclave, record it in the log • Tell you supervisor • Leave a note by the autoclave stating what the problem is • If you supervisor is not around you can tell: • Maureen Kelly • Charlie King • Maria Mahoney
The Autoclave Room Please help to keep the autoclave room clean and neat by cleaning up after yourself. Rinse out any containers used for autoclaving. Clean up any spills; put broken glass in the box and sweep up the floor. If you are waiting for your items to finish autoclaving, take a few minutes to clean up the sink or the counter, sweep the floor or put away the racks.
Finally If you are unsure of something we want you to ASK! We appreciate the work you do for us and the department We want you to be safe.