Download
1 / 3
30 likes | 51 Views
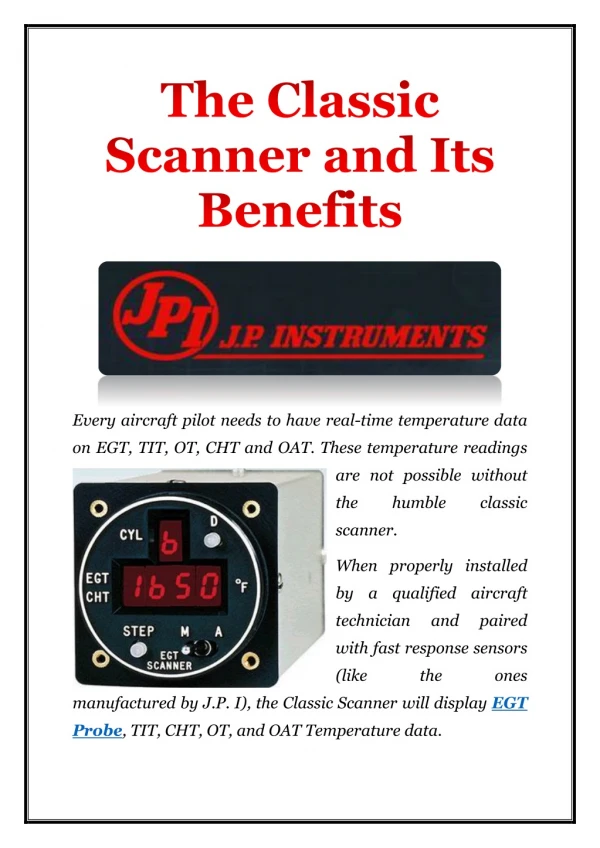
The dimming switch is placed at the top right side of the scanner. The bright or dimming option is selected via the same button with each press alternating between the two states.

E N D
Every aircraft pilot needs to have real-time temperature data on EGT, TIT, OT, CHT and OAT. These temperature readings are not possible without the humble classic scanner. When properly installed by a qualified aircraft technician and paired with fast response sensors (like the ones manufactured by J.P. I), the Classic Scanner will display EGT Probe, TIT, CHT, OT, and OAT Temperaturedata.
In a 6-cylinder aircraft engine, you can go for the TIT option in which case, the scanner would display TIT in EGT scan position 7 and OT in CHT scan position 7. One of the best scanners available in the market today, is the classic scanner manufactured by J.P. Instruments at Cal, USA. In the J.P.I classic scanner, the pilot can switch between automatic or manual operation via the mode switch; ‘M’ for manual and ‘A’ for automatic mode. In auto mode the Classic Scanner will scan through each measurement roughly every 4 seconds. For that extra bright sunny day, the Classic Scanner also has a convenient ‘dimming’ switch. The dimming switch is placed at the top right side of the scanner. The bright or dimming option is selected via the same button with each press alternating between the two states. The classic scanner manufactured by J.P.I. is also equipped with a programmable switch located at the bottom of the scanner. The pilot simply needs to turn the Scanner® on and place a small slotted screwdriver into the hole and rotate it until it aligns with the switch slot. Clockwise turn increases the number of channels scanned up to 8. This is easily verified by noting the initial cylinder number displayed. If the pilot wants to slow down (or crank up), the indexing rate, this can be achieved by inserting a small screwdriver through
hole below the CYL raised letters on the front panel and turning the screwdriver clockwise. The control will vary the indexing rate from slow (every 9 sec.), to a fast (every 1.5 sec). The classic scanner is also equipped with a visual alarm that is pre-set at 1650°F for TIT and 450°F for CHT. If the alarm sounds, pressing the STEP cancels the alarm and scanning resumes. However, the instrument will continue to stop on the out of range readout until the Temperature Sensor Aircraft falls within the normal range. The classic scanner works best when paired with JPI’s super accurate, fast-response probes. J.P.I. manufacturers a range of scanner models with different functionality and features. For more information on Classic Scanners, please visit: https://www.jpinstruments.com/shop/classic-scanner/ JPI Sales: 1-800-345-4574 714-557-3805 FAX: 714-557-9840 sales@jpinstruments.com JPI Technical Support: 1-800-345-4574 714-557-3805 support@jpinstruments.com J.P. Instruments Inc: 3185-B Airway Ave Costa Mesa, CA 92626