Download
1 / 5
50 likes | 59 Views
Guidelines for Canon imageCLASS MF264dw Printer Setup. Canon Imageclass MF264dw Setup<br>Have you bought a new Canon imageCLASS MF264dw printer and are searching for clear-cut setup guidance to set it up? If yes, your search ends here. Setting up a new printer for the first time is much simpler than you might imagine. The entire setup process includes two stages: hardware setup and software setup.For more assistance on HP printers, reach our tech experts at 1-909-751-0101.

E N D
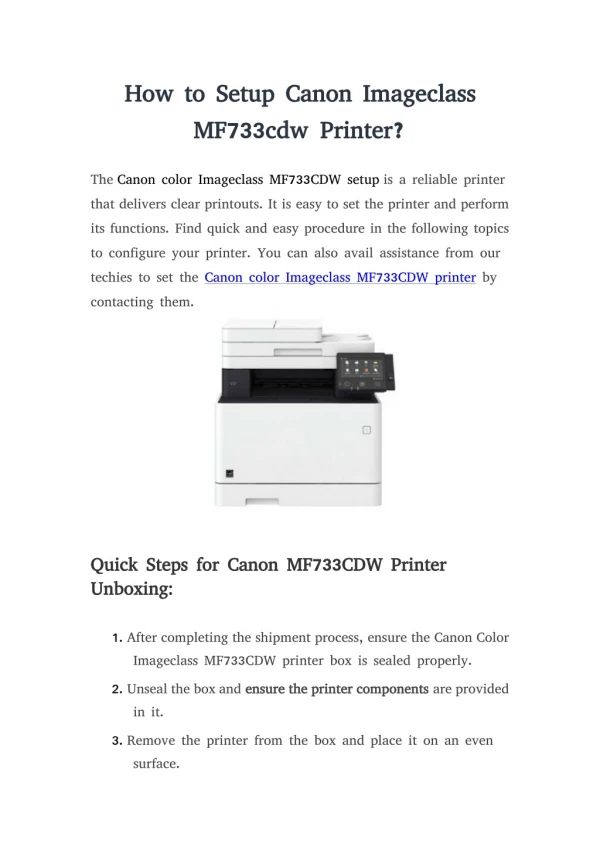
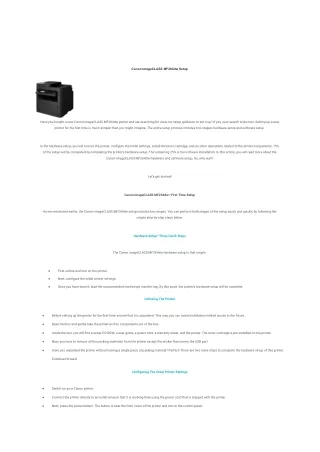
Canon ImageCLASS MF264dw Setup Have you bought a new Canon imageCLASS MF264dw printer and are searching for clear-cut setup guidance to set it up? If yes, your search ends here. Setting up a new printer for the first time is much simpler than you might imagine. The entire setup process includes two stages: hardware setup and software setup. In the hardware setup, you will turn on the printer, configure the initial settings, install the toner cartridge, and do other operations related to the printer components. 75% of the setup will be completed by completing the printer’s hardware setup. The remaining 25% is the software installation. In this article, you will read more about the Canon imageCLASS MF264dw hardware and software setup. So, why wait? Let’s get started! Canon ImageCLASS MF264dw—First Time Setup As we mentioned earlier, the Canon imageCLASS MF264dw setup includes two stages. You can perform both stages of the setup easily and quickly by following the simple step-by-step steps below. Hardware Setup—Three Quick Steps The Canon imageCLASS MF264dw hardware setup is that simple. First, unbox and turn on the printer. ● Next, configure the initial printer settings. ● Once you have done it, load the recommended media type into the tray. By this point, the printer’s hardware setup will be complete. ● Unboxing The Printer Before setting up the printer for the first time, ensure that it is unpacked. This way, you can avoid installation-related issues in the future. ● Open the box and gently take the printer and its components out of the box. ● Inside the box, you will find a setup CD-ROM, a user guide, a power cord, a warranty sheet, and the printer. The toner cartridge is pre-installed on the printer. ● Now, you have to remove all the packing materials from the printer except the sticker that covers the USB port. ● Have you unpacked the printer without leaving a single piece of packing material? Perfect! There are two more steps to complete the hardware setup of this printer. ● Continue forward. Configuring The Initial Printer Settings Switch on your Canon printer. ● Connect the printer directly to an outlet (ensure that it is working fine) using the power cord that is shipped with the printer. ● Next, press the power button. The button is near the front cover of the printer and not on the control panel. ●
Can you see the screen shown in the image below on your printer’s display now? If yes, that means the printer is booting up. This might take a few seconds or a ● minute to complete. Once the boot-up is done, the screens that ask you to configure the printer language, your region or country, time zone, etc., will open one by one. ● To continue using the printer, configure the initial settings correctly. ● Loading Paper The Canon imageCLASS MF264dw printer comes with a drawer and a multi-purpose tray. ● You can use either of these two to load paper. However, before loading papers, understand the benefits of the drawer and the multi-purpose tray. This will help you ● choose the right one to load papers for your printing and other printer-related needs. Loading paper in the multi-purpose tray is best if you want to print only one page at a time. ● You can load almost all paper sizes and types in the multi-purpose tray. ● Want to perform the print operation continuously? Then, load the paper into the drawer. The drawer also supports almost all paper sizes, like the multi-purpose tray. ● Open the front cover of your printer. Slide the paper guides outward using your hands. Are you doing well? Cool! You are almost there. ● Now, fan the paper stack and load it with its print side facing up into the drawer. ● Ensure that the paper is manageable. This way, you can avoid paper jams and feed-related issues. ● Remember to close the front cover after loading the paper. ● Open the front cover if you want to load paper in the multi-purpose tray. ● Gently lower the tray and slide the guides to the edges. ● Load the paper, align the guides, and close the front cover. ● Loaded paper? Yes? Now, you have to do a more important thing: specify the paper size and type on your printer. ● Usually, the Paper Settings screen will automatically open after loading paper into the drawer or tray. ● On the opened screen, select the MP tray if you have loaded paper in it. Similarly, if you loaded paper into the drawer, select Drawer. ● The printer will detect and display the loaded paper size and type on the screen. Select and confirm your paper size and type. That’s it! ● Suppose the printer fails to detect your paper size and type correctly; choose Other Sizes. ● This step completes the Canon imageCLASS MF264dw printer’s hardware setup. You came this far. Great job. Software Setup You must install the most compatible and latest Canon imageCLASS MF264dw setup software for Windows or Mac to access the printer effortlessly on your ● computer. How do you install the printer software on your computer? Well, it is not a big deal. You can do this using the setup CD that is provided with the printer or the ● downloaded driver file. Both of these methods are easy to perform. ● If you’re using a CD, insert it into your computer. The installer file will automatically detect your computer’s OS type and open the installation wizard. ● Finish the software setup by following the prompts displayed on the screen. (Refer to the instructions given under the ” Installing the “Canon imageCLASS MF264dw” ● Printer Driver” section to learn more about the software setup). Have you installed the printer software? Yes? Print a test page from your computer to the printer. ● You can confirm that the Canon imageCLASS MF264dw setup is done correctly if the printer prints your requested page or document. ● Congratulations! You have completed the Canon imageCLASS MF264dw setup. Free Canon ImageCLASS MF264dw Driver Download
Downloading the right Canon imageCLASS MF264dw printer driver for an OS type is challenging for everyone. We understand your concern. So, we have made the driver download easier for you on this page. With a single click, you can download the most compatible and latest Canon imageCLASS MF264dw printer driver for your Windows or Mac computer. Right-click on your printer and choose the Properties option from the drop-down list. ● Here, select the Ports tab and check all the port settings. In case you have to make any changes to these settings, you can do it now. ● Next, check if your printer can get connected to the Wi-Fi network. If not, try to reinstall the HP ENVY Pro 6452 driver on your computer by following the below steps. ● Driver Download for Windows 10 (64-bit) Driver Download for Windows 10 (32-bit) Driver Download for Windows 11 Driver for macOS 10.12.6 & 13 Installing The “Canon ImageCLASS MF264dw” Printer Driver Are you done with the Canon imageCLASS printer’s hardware setup? That’s great! Let’s begin the software setup for your printer now. You can use the setup CD or the downloaded driver file for the software setup. But before we start, ensure that your printer is powered on. Using The Setup CD Place the installation CD on your computer. ● The installation starts automatically. ● Read the license agreement and click Yes to continue with the installation. ● What do you see on the screen now? A screen titled “Select the Type of Connection” with two options: USB Connection and Network Connection (for network ● models), right? If you want to access the printer faster and from a single computer (on which you’re installing the printer software), then choose the USB Connection option and click ● Next. Connect the USB cable from the imageCLASS printer to your computer when prompted. ● You can finish the rest of the driver installation by following the prompts on the screen. ● Do you want to set up the printer for wireless communication or over a wired connection? Then, select the Network Connection (for Network Models) option and click ● Next on the Select the Type of Connection screen. The installer file guides you through connecting your printer to the computer over a wired or wireless connection. ● Using The Downloaded Driver File Extract the downloaded driver file if necessary, and open the printer’s MF driver for Windows or Mac. ● Accept the license agreement for the printer to continue the driver installation. ● The “Select the Type of Connection” screen will open as soon as you accept the license agreement. ● What do you find on this screen? The two options, USB connection, and Network Connection (for Network Models) displayed, right? ● Choose the connection type you wish to use by clicking the radio button beside it. ● Click Next. A screen allowing you to choose the drivers you wish to install will open. ● Choose the drivers you want to install and click Install. ● Finish the remaining steps of the Canon imageCLASS MF264dw software setup by following the instructions on the screen. ●
All right there? We hope that you have installed the printer software on your computer. Canon ImageCLASS MF264dw Wi-Fi Setup Do you want to access the Canon imageCLASS MF264dw printer from anywhere within the network range? If yes, set it up over a wireless connection. You can do this in two steps. In the first step, you will connect your printer to the wireless network. In the second or final step, you will connect your computer to the same network and install the most compatible and latest printer software on it. It is that simple.The section below provides detailed instructions on how to connect your Canon printer to a computer wirelessly, both with and without a router. With A Router Do you have a wireless-compatible router connected to a stable internet connection? Then, you can use any of the following methods to connect the printer to Wi-Fi: Wireless LAN settings ● WPS Pin Code Mode ● WPS Push Button Mode (You must have a WPS-enabled router to use this method.) ● All these methods are easy to perform. Connecting The Printer To Wi-Fi You must know your network’s credentials to use the Wireless LAN Setting method for the Canon imageCLASS MF264dw Wi-Fi setup. So, gather the credentials and ● then follow the instructions below. Open the menu screen on your printer. You can do this by directly pressing the Menu button on the printer’s control panel. ● Have you opened the printer’s menu screen? Yes? Perfect! Select the Network Settings option using the arrow buttons on the control panel. ● Press OK to go to the Network Settings screen. Select Wireless LAN Settings, and then press OK > OK. ● Can you see the Wireless LAN Settings screen with options “SSID Settings,” “WPS Push Button Mode,” “WPS PIN Code Mode,” ● “Power Save Mode,” etc., on the printer display now? Yes? Choose the method that you want to use from the list. The printer will automatically detect the networks that are available within its range and display their SSIDs on the screen if you have selected Wireless LAN Settings. ● Choose your network name from the list and type its password (if prompted) to connect your printer to it. ● Do you want to connect your printer to Wi-Fi with a single press? Then, select WPS Push Button Mode and press your router’s WPS button. The printer will connect to ● your network. Ensure to press the WPS button within two minutes after selecting the WPS Push Button Mode option on your printer. ● The WPS PIN code of your printer will show up on the printer’s screen if you have selected the WPS PIN Code Mode option. You have to register the displayed PIN ● with the wireless router (that you’re using) to connect your printer to the network. Can you see the “Connected” message and the Wi-Fi icon on the printer’s home screen? Yes? ● That means your printer is connected to Wi-Fi. Good Job! Only one step is left to complete the Canon imageCLASS MF264dw Wi-Fi setup. Let’s finish it. ● Completing The Wi-Fi Setup
Connect the computer (on which you want to install and access the printer) to the same wireless network. You can use the wired or wireless connection type for it. ● The choice is yours. Ensure that your computer (Windows or Mac that you’re using) meets the system requirements of the printer. This will help you perform the Wi-Fi setup efficiently. ● Run the printer’s MF driver for Windows or Mac on your computer. ● Choose the Network Connection option on the Select the Type of Connection screen and click Next. ● You can complete the rest of the process by following the prompts on the installation screen. ● credentials. ● Link :https://fixmyprinter.us/canon-imageclass-mf264dw-setup/ Tollfree : +1 909-751-0101