Using Visual Studio 2005
590 likes | 624 Views
Using Visual Studio 2005. Start/Microsoft Visual Studio 2005/Microsoft Visual Studio 2005. Choose the type of project you are most likely to be writing. Warning to the impatient: starting Visual Studio for the first time at a particular computer can take a few minutes. File/New File.

Using Visual Studio 2005
E N D
Presentation Transcript
Start/Microsoft Visual Studio 2005/Microsoft Visual Studio 2005
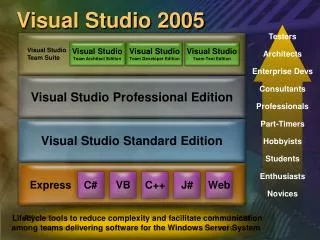
Choose the type of project you are most likely to be writing
Warning to the impatient: starting Visual Studio for the first time at a particular computer can take a few minutes.
File/Save HTMLPage1.htm As … (only use Save as some single files like this, never for anything more complicated)
Use Save in drop-down, New Folder button (if needed) and File name TextBox to determine name and location of file.
Add an HTML comment with your name. HTML comments begin with "<!--", end with "-->" and generally do not contain "--" or ">".
Add a meta tag. Note the IntelliSense drop-down list of options.
There is also IntelliSense for the tag attributes, choose name.
Finish the meta tag. Notice the color coding brown for tag name, red for attribute name, blue for attribute value, green for comment.
If one places the cursor in or between the body tags, then the document’s properties appear in the Properties Window. If the Properties Window is not present go to View/Properties Window on the menu. One can view the properties of other items by selecting them from the Properties Window’s drop-down list.
Place the cursor in the BgColor TextBox, then click on the ellipsis button that appears.
Click on the Design tab at the bottom to get a sense of what the page will look like.
Click on the ellipsis that results when the cursor is placed next to Text in the document’s properties.
Note the message suggesting that what we have done is old fashioned. Let’s redo it.
Click on the ellipsis button that appears when the cursor is placed next to Style.
Choose Font and then click the ellipsis button next to Color.
Change the size of the font. If one is happy with the sample text, click OK.
Use the Insert Table dialog to assign the table properties. Click Cell Properties.
Place the cursor inside the first cell and double click on the Image button on the Toolbox. If you don’t have the Toolbox, go to View/Toolbox. To keep the Toolbox in place, click on the icon that looks like a tack (look near the top of the Toolbox).
One should be able to click on the ellipsis button that appears after placing the cursor in the Src TextBox, but I had problems which I reported to IT.
Go to Source and type the file name including the extension. The file should be in the same folder as Memory.htm.
Added image attributes. <img src="Memory.gif" id="Card11" width="100" alt="memory card image"/> width: To control the size of the image. (There is also a height attribute, but if only the width is assigned, the aspect ratio of the original image will be maintained.) id: So we can distinguish one thing from another. alt: Some text in case an image cannot be found. May also be used by visually impaired users.
Result in Design. Next copy image code into each cell. The ids must be changed. No two ids can be the same.
Adding a click event to the image tag. Now when user clicks the first image The function FlipCard11 is called. We must now define it!