Download
1 / 25
250 likes | 320 Views
Chapter 36. Airbag and Pretensioner Circuits. FIGURE 36.1 (a) Safety belts are the primary restraint system.(b) During a collision the stretching of the safety belt slows the impact to help reduce bodily injury.

E N D
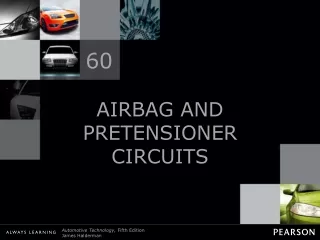
Chapter 36 Airbag and Pretensioner Circuits
FIGURE 36.1 (a) Safety belts are the primary restraint system.(b) During a collision the stretching of the safety belt slows the impact to help reduce bodily injury.
FIGURE 36.2 Most safety belts have an inertia-type mechanism that locks the belt in the event of rapid movement.
FIGURE 36.4 A small explosive charge in the pretensioner forces the end of the seat belt down the tube, which removes any slack in the seat belt.
FIGURE 36.5 A typical airbag system showing many of the components. The SDM is the “sensing and diagnostic module” and includes the arming sensor as well as the electronics that keep checking the circuits for continuity and the capacitors that are discharged to deploy the airbags.
FIGURE 36.6 A simplified airbag deployment circuit. Note that both the arming sensor and at least one of the discriminating sensors must be activated at the same time. The arming sensor provides the power, and either one of the discriminating sensors can provide the ground for the circuit.
FIGURE 36.7 The inflator module is being removed from the airbag housing. The squib, inside the inflator module, is the heating element that ignites the pyrotechnic gas generator that rapidly produces nitrogen gas to fill the airbag.
FIGURE 36.8 This shows a deployed side curtain airbag on a training vehicle.
FIGURE 36.11 A sensing and diagnostic module that includes an accelerometer.
FIGURE 36.12 A driver’s side airbag showing two inflator connectors. One is for the lower force inflator and the other is for the higher force inflator. Either can be ignited or both at the same time if the deceleration sensor detects a severe impact.
FIGURE 36.13 The airbag control module is linked to the powertrain control module (PCM) and the body control module (BCM) on this Chrysler system. Notice the airbag wire connecting the module to the airbag through the clockspring. Both power, labeled “driver airbag high,” and ground, labeled “driver airbag low,” are conducted through the clockspring.
FIGURE 36.14 An airbag diagnostic tester. Included in the plastic box are electrical connectors and a load tool that substitutes for the inflator module during troubleshooting.
FIGURE 36.15 After disconnecting the battery and the yellow connector at the base of the steering column, the airbag inflator module can be removed from the steering wheel and the yellow airbag electrical connector at the inflator module disconnected.
FIGURE 36.16 Shorting bars are used in most airbag connectors. These spring-loaded clips short across both terminals of an airbag connector when it is disconnected to help prevent accidental deployment of the airbag. If electrical power was applied to the terminals, the shorting bars would simply provide a low-resistance path to the other terminal and not allow current to flow past the connector. The mating part of the connector has a tapered piece that spreads apart the shorting bars when the connector is reconnected.
FIGURE 36.17 An airbag clockspring showing the flat conductor wire. It must be properly positioned to ensure proper operation.
FIGURE 36.18 An airbag being deployed as part of a demonstration in an automotive laboratory.
FIGURE 36.19 A dash warning lamp will light if the passenger side airbag is off because no passenger was detected by the seat sensor.
FIGURE 36.20 The passenger side airbag “on” lamp will light if a passenger is detected on the passenger seat.
FIGURE 36.21 A gel-filled (bladder-type) occupant detection sensor showing the pressure sensor and wiring.
FIGURE 36.22 A resistor-type occupant detection sensor.The weight of the passenger strains these resistors, which are attached to the seat, thereby signaling to the module the weight of the occupant.
FIGURE 36.23 A test weight is used to calibrate the occupant detection system on a Chrysler vehicle.
FIGURE 36.24 A typical seat (side) airbag that deploys from the side of the seat.