Download
1 / 25
250 likes | 276 Views
Discover how to manage settings, control participant permissions, and utilize interactive tools in the Blackboard Collaborate Interface as a presenter and moderator. Learn about session controls, connection speed settings, audio setup, teleconferencing integration, text chat, and managing participant permissions. Prepare for effective content sharing, Q&A sessions, and facilitating an engaging virtual classroom experience.

E N D
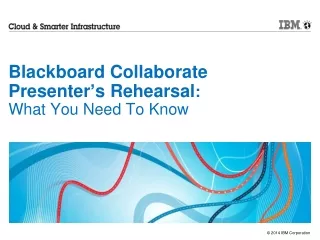
Blackboard CollaboratePresenter’s Rehearsal:What You Need To Know
Learning Objectives: This Rehearsal WILL… • Go over your job as a presenter and moderator • Revisit how to manage your settings and permissions • How to control participant’s permissions • Show the interactivity tools used in your presentation
The Blackboard Collaborate Interface (Moderator’s View) *Note you can expand or minimize these sections *Note: There are additional options inside these menu’s
Recording control Whiteboard / Application share / Web tour Content loading Audio wizard & additional tools Audio/Video tools Page options Slide options Facilitator tools Timer / info Response buttons Participant area Participant permission controls Markup tools Text chat area The Blackboard Collaborate Interface – Moderator’s Controls Media Window
Additional Session Options / Controls • There are many options available from several places • Familiarise yourself with these! Tools menu Edit > Preferences Audio, Video & Teleconference Text chat
Connection Speed The setting for your network connection speed is important! • Always test your connection speed: http://speedtest.net • Best results are when you are connected to a LAN and not Wireless because of the fluctuations that can occur using Wireless • Set the connection speed for your network results • Reset your connection speed if you find the setting you have is not stable Before your session: Reminder: Connection speed can vary – something may impact the speed, which may not have been picked up when you tested it earlier.
Adjusting Your Connection Speed • At the top left of the window click on Edit > Preferences… • Under Session > Connection • Adjust to the appropriate Connection Speed
As Moderator/Presenter Your Job is to… Present Moderator of Participants • Audio Checks • Microphone Distribution • Monitoring Text Chats • Clearing Yes/No’s & Raised Hands • Starting/Stopping Recording • Present Your Content • Q & A Reminder: There are more Moderator / Presenter responsibilities than noted here… this is just a summary.
Audio Tips Always run the Audio Setup Wizard • Or go to Tools > Audio > Audio Setup Wizard Blackboard Collaborate uses Voice over IP – telephone is not required! When you use computer audio within a Blackboard Collaborate session, you can speak & be heard using a headset or your PC microphone & speakers Before your session: Please check your master volume settings on your computer each time…
Voice Communication Audio indicator informs you if you or someone else is speaking To activate your microphone, simply click on the TALK button Remember: Click again to switch it off when you’re finished talking! The blue mic icon beside your name means your microphone is activated Reminder: Only one microphone should be active at a time to avoid background noise or feedback
Integrating Teleconference Call (1 of 3) • Note: Use US number • Blackboard Collaborate joins your conference call as a participant • The Event Manager will have this configured for you
Integrating Teleconference Call (2 of 3) • Moderators have the ability to mute / unmute the teleconference line • Right click on the teleconference in the participant area and select the appropriate option • Audio from teleconference will not come through to VOIP users • VOIP audio WILL be transferred through to teleconference Reminder: Be careful about handing out/removing universal audio access
Integrating Teleconference Call (3 of 3) • Control your conference call • Ensure that the conference call moderator knows how to reduce interruption in your Blackboard Collaborate • You may want to print this page for reference
Text Chat: Another Way to Communicate Experiment with the options! Message history Type your message here Who is your message for?
Participant Permissions (1 of 2) • Use the “Global Permissions” options to give your participants the appropriate level of access • Clicking the buttons either gives or removes access from ALL participants • Notes: • When participants enter they will have all permissions • You should grant them chat and mic access in the pre-session • During presentation only give them chat permissions • Other permissions should be granted/removed at appropriate times Also available here… Note: Plan in advance with your fellow presenters what should be granted and when
Participant Permissions (2 of 2) • For individual permissions, right click on the person’s name • You can also promote someone to Moderator (Presenter) by right clicking on the person and selecting “Give Moderator Privileges” • To Remove Moderator Privileges, right click and select “Take Away Moderator Privileges”
Loading Slides Into the Classroom • Load slides by clicking on the button • Notes: • The upload speed depends on the file size • 10 MBsize guideline • PowerPoint animations are not supported • The only supported File Types are PowerPoint or Whiteboard • Be sure to clearly label your file in this format: • YYYY_MM_DD_SpecificAgendaTopic.PPT/WBD • Blackboard will convert PowerPoint files to a Whiteboard format
Navigating Slides: Three Options • Use the forward and backward arrows to move forward or backward a slide respectively • Click on the slide title on the drop down box in the agenda area • Open Page Explorer from the options menu and double click on a slide thumbnail 1 2 3 Reminder: The best practiceis to have the person that is speaking, navigate slides.
Emoticons and Interaction Tools Emoticons / Step Away / Raise Hand / Polling Mark-Up Tool Bar is where you get your pointer Note: Step Away is just an indicator of your status, if your microphone is still on, sound will continue to be broadcasted
Application Sharing • The Application Sharing tool enables anyone inside Blackboard Collaborate share a remote application. • To activate, click on the Application sharing icon at the top of the media window • To stop, click on Tools > Application Sharing > Stop Sharing • To bring back the presentation view, select the Whiteboard icon • Best Practices: • Make sure the application is running on your desktop before launching • Ask your participants if they can see your application ok • Advise them they can scroll left, right, up & down, or “scale to fit” • The Blackboard Collaborate left hand panel should remain on the left of your screen • You should resize your application to fit the rest of the available window space Reminder: Control of the application can be given to any participant
Application Sharing • Setting your hosting preferences • Go to: Edit > Preferences > Application Sharing > Hosting Options • Here, you can set your color for an emphasized cursor
Recommended Screen Setup while Application Sharing Stop / Pause Application sharing Keep the Blackboard Collaborate left-hand panel visible so you can see your audience Resize your application to fit the rest of your screen • Reminder: If you don’t see the yellow controls… • To stop; click on Tools > Application Sharing > Stop Sharing
Recording the Sessions • Sessions can be recorded, and it will available after the session. • From a participant perspective, the playback includes controls for playing, pausing, forward & rewind and stopping the session • The recording feature can be paused in a live session, but the recording cannot be edited • Text chat, polling questions & markups can be viewed on the playback. • If desired, recordings can be converted into various multimedia formats • Recordings are automatically submitted and uploaded to the server when the session is concluded Reminder: As Presenter, you are responsible for the starting, pausing, and resuming the recording of the event!
Ending Your Session • Click to stop recording • Thank all the participants and conclude your session • Ask everyone to leave the session • Finally, exit the session by closing the Blackboard window, after everyone has exited • Blackboard will automatically publish the recording once everyone has left the session
Thanks & Good Luck! • If you, or your participants, need assistance with an issue related to Blackboard, initiate a SuperZero chat at: • http://szsupport.atlanta.ibm.com/chat/lvcCustomer.htm • Review the Presenter’s Modules #1-3: • https://csite.tivlab.austin.ibm.com/home/index/home?id=5110 • Review the Presenter’s Pre-Check Wiki: • https://w3-connections.ibm.com/wikis/home?lang=en-us#!/wiki/W456f5f27abe2_4b06_8a46_e91c6cbfb112/page/Presenter%27s%20Pre-Web%20Seminar%20Checklist • If you need further assistance with your event contact your Event Manager