Download
1 / 14
140 likes | 249 Views
This guide provides detailed instructions for removing, replacing, and reassembling components of check valves and RV (regulating valve) systems. Production began in 2003, with a lead-free version introduced in 2009. It covers essential steps like threaded cover removal, seat extraction, and diaphragm replacement. Important notes on reassembly ensure proper function, including checking the guide bore and aligning grooves. Ideal for maintenance personnel looking to efficiently service these systems while adhering to safety standards.

E N D
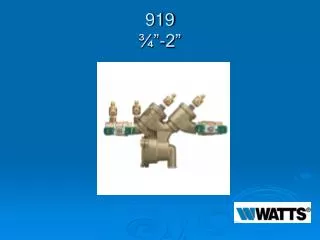
Modification Overview • Production began in 2003 and is current. • The lead free (LF) version was introduced in 2009.
Check Cover Removal • Cover is threaded into body and o-ring sealed. • Cover is spring loaded.
Check Valve Removal • Poppet style check assembly. • The poppet and spring are free once the cover is removed.
Check Seat Removal • The check seat (cage) is pushed into the body and o-ring sealed. • Simply pull the seat straight out of the body.
Check Disc Replacement • Remove screw and disc washer from poppet.
Check Valve Reassembly Notes • Inspect and clean the guide bore on the cover. • The stem must move freely in the guide. • Reassemble in reverse order.
RV Cover Removal • Cover is spring loaded. • RV cover is o-ring sealed. • While holding cover firmly, remove cover bolts and rotate the cover ¼ turn.
RV Module Removal • The RV stem and spring are free once the cover is removed.
RV Seat Removal • The RV seat is o-ring sealed. • Simply pull the seat straight out of the body.
RV Stem Disassembly • Use a wrench to gently loosen the RV stem assembly.
RV Diaphragm Replacement • Diaphragm is free once stem is disassembled. • The molded step of the diaphragm should point towards the RV stem and disc.
RV Disc Replacement • The RV disc is free once the retaining screw is removed.
RV Reassembly Notes • Reassemble in reverse order. • Line up the grooves on the cover with the grooves in the body, and turn the cover clockwise ¼ turn.