Download
1 / 30
350 likes | 681 Views
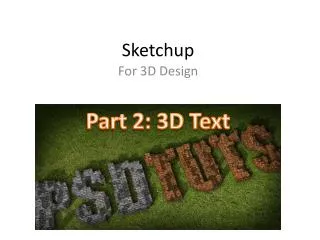
Sketchup. Part 2: 3D Text. For 3D Design. Use the 3D Text tool again and type your name. Place it on the ground. You should always place object where the three axes intersection, so place your mouse where the blue, green, and red lines intersect and click to place the text.

E N D
Sketchup Part 2: 3D Text For 3D Design
Use the 3D Text tool again and type your name. Place it on the ground. You should always place object where the three axes intersection, so place your mouse where the blue, green, and red lines intersectand click to place the text.
Use the ORBITand mouse wheel to zoom in to get the best view.
3D text is different than most objects because you cannot do much with it. Click the SCALE tool, select your text, and then drag one or more of the green dots up, down, in, or out to see what it can do!
Click the PAINT BUCKET tool and chose “Colors-Named” from the drop down box. Choose a color and “fill” your name with a color. Try several!
Finally, explore the other colors and textures available in Sketchup.Try a bunch of these out until you find one you like best.
Use the FREEHAND tool to hand draw (write) your name. Then go back to the PAINT BUCKET (fill)tool and you can now add multiple colors and/or textures to different sides of your name!
When finished, you have the option to save this as a sketchup file (for current or older versions) to work on later.Save this file as “3dname” to your network folder.
But if you are finished with the file, you can also EXPORT it (File -> EXPORT) as a 2D Graphic and save in a variety of image formats. Export this graphic to your network folder as 3dname and leave it as a .JPEG file.
Open Word and insert the 2Dimage you just saved. Use word art or a text box toadd your name and period tothe document. Save the document as“2dname” to your network folder.
With a special “extension” installed, Sketchup will export files asan “STL”. This format can be printed on 3D printers! If you don’t have the “Export STL” extension, as shown, let your instructor know!
Use the RECTANGLE tool to draw a square OR rectangle on the ground. QUESTION: How do you change the size of the objectafter you’ve already placed it? Which tool do you use?
Highlight just one end of your shapeand then “move” it (push or pull) The MOVE tool
Highlight the entire TOP of the objectand move it. Where can you move it?
Putting the object BACK where it started isnot always easy just by moving it. This object LOOKS pretty close to being lined back up at the axes of the three lines….but…
If you zoom in, you can clearly see that the object is still floating and not back at the intersection of the axes.
Select the PUSH-PULL tool, select the TOP ofthe object you drew, and pull it UP. Then pushit down. This is what makes the object 3D.
NEXT, add a circle, hexagon, triangle, both types of arcs, and a freehand shape. Then, PUSH or PULL them into 3D!
Can you PUSH or PULL the arcs?What did you have to do to PUSH or PULL the freehand shape?
Use the ORBITtool to rotate the screen around the objectsand then the PUSH-PULL tool to change specific SIDES (faces)of the objects. Which one has the most faces to PUSH or PULL?
Add your name in 3D text to one face of one of the objects. Then, use the PAINT BUCKET tool to give every side of eachobject a color or texture.
Question: What year was the first 3Dprinter invented?
The answer? 1983
Will the person who guessed the closest please… Send me your STL file of your 3D name and I will print it for you! You can email me the .stl file as an attachment, put it on a thumb drive, put it in the Google Drive, etc.