Download
1 / 34
340 likes | 366 Views
Atlas III expands on Atlas II capabilities with enhanced features such as faceted navigation, bulk downloading, larger thumbnails, and improved filtering options. It enables users to search through a vast collection of space imagery with ease and precision, offering a comprehensive interface for exploring missions, instruments, targets, and maps through intuitive controls.

E N D
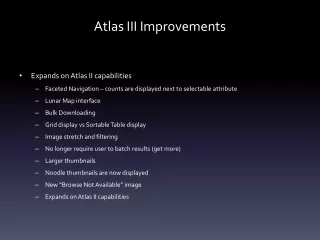
Atlas III Improvements • Expands on Atlas II capabilities • Faceted Navigation – counts are displayed next to selectable attribute • Lunar Map interface • Bulk Downloading • Grid display vs Sortable Table display • Image stretch and filtering • No longer require user to batch results (get more) • Larger thumbnails • Noodle thumbnails are now displayed • New “Browse Not Available” image • Expands on Atlas II capabilities
PDS Image Atlas III Faceted Navigation Later versions of Chrome and Firefox are recommended
Faceted Navigation • A way to assess and organize information according to a set of attributes. • Allows users to explore a collection of information by applying multiple filters. • Uses a system of classification that assigns an object to multiple taxonomies (set of attributes – i.e. pds keywords), enabling the classification to be ordered multiple ways, rather than in a single, predetermined, taxonomic order.
Faceted Navigation • Faceted Navigation has been around since early 2000. • By 2014 40% of largest US based online retailers have implemented it. Used by amazon.com and Google Shopping. • Typical implementation • Filters on left of screen • Grid of images to the right
Atlas III Search The URL for the AtlasIII search interface is http://pds-imaging.jpl.nasa.gov/search The Atlas initially displays a mission drop down menu. A specific mission can be selected by clicking on the mission name. Select a mission
Atlas III - Cassini This tutorial has the Cassini mission selected. The grid of images is automatically updated for the selected mission.
Atlas III - Instrument Click on the Instrument drop down menu to select your instrument of interest. Instrument drop down
Atlas III – Cassini ISS This tutorial has the Cassini ISS instrument selected. Notice that the images have been updated.
Atlas III - Targets Click on the target drop down menu to select a target of interest. Target drop down
Atlas III – Target Atlas This tutorial has the Atlas target selected. Notice that other targets are included when multiple targets are found in the returned records.
Atlas III – Lighting Geometry Sliders are used for range queries. Drag the handles on the slider to update the range. A user can also input a specific range in the text fields. The example below shows the use of the emission angle slider. Slider
Atlas III – Removing Selections Click on the (x) to remove specific selections or click on remove all. Remove selections
Atlas III - Maps Click on the map drop down menu to select images using a map interface. Maps
Atlas III – Cassini Maps The Saturn Moon Maps button is clicked for this tutorial.
Atlas III – Titan Map Select one of several maps in the map menu. This tutorial has Titan selected. Map Menu
Atlas III – Map Query Click on the map to select a bounding box. This will update the images in the grid display. Bounding Box
Atlas III – Titan images Notice the grid display has been updated with images that match the lat/lon bounding box for the selected area of the Titan map.
Atlas III – Sortable View Click on the Sort View icon to view a sortable table of images. Sort View
Atlas III – Sort Columns and Reports Click on the Report / Sort View Updates drop down menu to update the columns in the sort view or to generate a csv report. Report / Sort View Updates
Atlas III – Select Report Fields Click on desired fields to update the columns in the sortable table. Click on Update Fields to update the table. Click on Download CSV to get a comma separated representation of the report. Select Fields
Atlas III – Update Columns This tutorial has Center Latitude and Center Longitude selected. Table columns can be sorted.
Atlas III – Report CSV The CSV report can be opened in Excel.
Atlas III – Bulk File Download Click on the Bulk File Download drop down menu to download multiple selected files or generate a wget file. Bulk File Download
Atlas III – Bulk File Download Clicking Bulk Download Files will save files to your Downloads directory.
Atlas III – WGET File Clicking on the Create WGET file to generate a wget file.
Atlas III – Browse Image Display Click on the thumbnail of an image to view the browse image. Click on Thumbnail
Atlas III – Browse Image Clicking on the thumbnail will display a higher resolution image. If the Browser used supports webGL, a histogram stretch and filters can be added to the image. Later versions of Chrome and Firefox support webGL and are recommended.
Atlas III – Histogram Stretch This tutorial applies a histogram stretch in the selected image. The stretched image can be downloaded in a png image file format.
Atlas III – Histogram Stretched Image The downloaded PNG file can be viewed in a generic image viewer. This tutorial uses Preview.
Atlas III – PDS Label View Click on label icon to view the PDS label. Click on Label Icon
Atlas III – PDS Label View The PDS label will be displayed in a dialog box.
Atlas III – PDS Volume View Click on the PDS Volume folder icon to view the archive volume. Click on Volume Folder Icon
Atlas III – PDS Archive Volume The archive volume will be displayed in a dialog box.