Setting Up SQL Server Database in Visual Studio
Learn to create and populate a MS SQL Server database guided by Dr. Adam P. Anthony. Understand SQL DDL and DML basics, using SQLCMD, SQL Management Studio, and Visual Studio for database projects. Explore scripts, SQL commands, and data types.

Setting Up SQL Server Database in Visual Studio
E N D
Presentation Transcript
Creating and Populating a MS SQLServer Database Presented By: Dr. Adam P. Anthony
Prerequisites • Basic knowledge of SQL DDL (data definition language) • Basic knowledge of SQL DML (data manipulation language) • Standard professional installation of Visual Studio (incl. MS SQLServer 2005 Express)
CAUTION!! • Due to some unforeseen configuration issues, we do NOT have permission to create new databases on the lab machines! • Everything in here will work if configured correctly • We will be using tempdb, which is a special database that is erased every time you close the project
Getting Started • Ways to access SQLServer on a local machine: • Command line tool (SQLCMD) • SQLServer Management Studio Express • Running Scripts in Visual Studio • Running remotely: • Not covered in this class • Depends on server configuration (ask sysadmin) • Once connected, there is no difference, functionally, from working on a local instance
SQLExpress Command Line • Start Run… • SQLCMD -S localhost\SQLExpress • Load your database first: • use <database name> • Type your commands at the prompt: 1> SELECT * FROM Student • You can break up lines, without any trouble: 1> Select * 2> FROM STUDENT • Cycle through previously typed commands using the arrow keys
The GO Command • Type as much SQL as you want. • Nothing will happen until you type GO • Also usable in SQL scripts: • Less useful (not needed to allow line breaks) • Reports “number of rows affected” after each GO statement
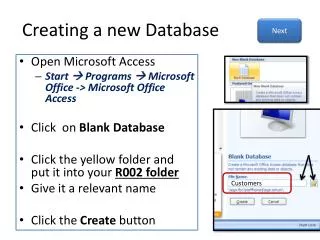
Visual Studio SQL Projects • Many choices, make sure you get the right one! • FileNewProject • Expand the ‘Other Project Types’ option, pick ‘Database Project’ • First window: Add a database reference (OR choose data source) • “Add New Reference” • Next window: New database reference • Server name: localhost\SQLExpress • Select or enter a database name: either pick an existing, or type in a new, name for DB you want to create • If you are just practicing/doing homework and don’t want the data to persist, use tempdb • CAUTION: tempdb is erased when you end your session!
VS Database Project Window • Three folders categorize SQL scripts: • Create (creating databases, tables) • Change (loading data, changing structures) • Queries (everything else!) • To get started: • Right click on Create Scripts and choose “Add SQL Script” • Create<DBName>Tables.sql sounds like a good file name • DO NOT ADD A QUERY!! • OK, you can add one if you want to but I’m not going to teach you how to use it. • When the script is finished, right click on the file, and chose ‘run’
Writing Code (Finally!) For This Class • Scripts vs. Command line: • Use command line to practice/test features you don’t understand • Use scripts to do your homework (e.g. I’ll expect .sql files) • In scripts: • Type your SQL just as you see it in the book • Indentation, line breaks are your friend! • Use a double dash (--) to leave an inline comment • Comments are Required!
SQLServer 2005 Data Types • Frequently-used types: int, float, numeric, datetime, varchar • Some types have only subtle differences: • char max size = 8000 • varchar max size = 232 • numeric == decimal • float == real • Numeric vs. float: Numeric uses soft representation, float uses IEEE hardware representation • More info on types: • http://technet.microsoft.com/en-us/library/ms187912%28SQL.90%29.aspx
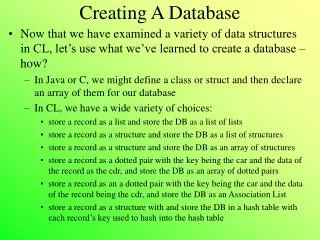
Creating an Entity Table • Subtle difference: no colon between column name, type • Primary key, foreign key syntax is same as SQL standard • Naming constraints: • Sometimes SQLServer requires you to drop constraints, and to do that you need to know the name CREATE TABLE student( snumnumeric(9), snamevarchar(30), major varchar(25), standing varchar(2), age numeric(3), CONSTRAINT student_pkPRIMARY KEY (snum) ); GO
Inserting Data • Standard notation for a single insert: INSERT INTO student (snum,sname,age) VALUES (111223333,"default student",18) • For more efficient bulk-inserts from a text file: BULK INSERT student FROM –- must be full path 'C:\bookTableScripts\student.txt' -- what separates the value of each field? WITH (FIELDTERMINATOR = ',')
Additional Resources • SQL in a nutshell: http://proquest.safaribooksonline.com/?uiCode=ohlink&xmlId=9780596155322 • Learning SQL on SQL Server 2005: http://proquest.safaribooksonline.com/?uiCode=ohlink&xmlId=0596102151 • MSDN SQL Server 2005 Reference: http://technet.microsoft.com/en-us/library/ms130214%28SQL.90%29.aspx
Practice Session snum Numeric(9) fid Numeric(9) sname Varchar(30) fname Varchar(30) major Varchar(30) deptid Varchar(4) standing Varchar(2) age int Faculty Student name Varchar(40) meets_at Varchar(20) fid Numeric(9) Enrolled Teaches room Varchar(10) Class