Explore the MITS Altair 680b: A Vintage Computer Hardware Overview
190 likes | 316 Views
Discover the MITS Altair 680b, a groundbreaking vintage computer introduced in 1976 featuring the 6800 microprocessor. With a clock speed of 500 kHz and 1K of RAM, this machine paved the way for personal computing. Learn about its unique front panel switches, how to manipulate memory using binary and hexadecimal systems, and the use of the ACIA for asynchronous communication. Whether you're a retro computing enthusiast or a historian of technology, this overview provides insights into the operation, programming, and historical significance of one of the earliest microcomputers.

Explore the MITS Altair 680b: A Vintage Computer Hardware Overview
E N D
Presentation Transcript
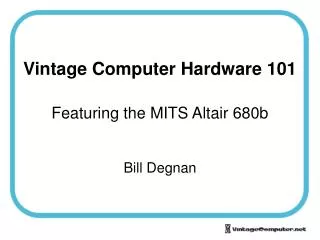
Vintage Computer Hardware 101 Featuring the MITS Altair 680b Bill Degnan
MITS Altair 680b Introduced - 1976 6800 microprocessor 500 Khz (.5 Mhz) clock speed 1,024 bytes of RAM memory (1K) 256 byte PROM monitor (ACIA) 11" x 11" x 5" (small)
Binary and Hexidecimal Review Dec Binary Hexidecimal 0 0000 0 1 0001 1 2 0010 2 3 0011 3 4 0100 4 5 0101 5 6 0110 6 7 0111 7 8 1000 8 9 1001 9 10 1010 A 11 1011 B 12 1100 C 13 1101 D 14 1110 E 15 1111 F
The Front Panel Switches • Used to load information into the microcomputer memory • Examine the contents of the microcomputer's memory • Control microcomputer operations • 1 address lamp = 1 bit of memory address • Switch up = "1" = "on" / Switch down = "0" = "off“ • Altair 680b has 16 address bits and 8 data bits • Control Switches Reset - (re) initialize the system Halt/Run - Halt - stops MPU activity, allows data addressing and input Run - Fetch the instruction in the program counter and activate/continue Dep - Used to enter data into a specific address
Operating the Front Panel When the "AC" light is on - you have power (unless the AC LED is bad) The ADDRESS and DATA lights are in HEX Each address is made up of 4 HEX numbers (A0 through A15) Each byte of data is made up of 2 HEX numbers (D0 through D7)
Operating the Front PanelExample: Address F0C2 • A15 = on (up) • A14 = on (up) = BINARY 1111 • A13 = on (up) • A12 = on (up) • A11 = off (down) • A10 = off (down) = BINARY 0000 • A9 = off (down) • A8 = off (down) • A7 = on (up) • A6 = on (up) = BINARY 1100 • A5 = off (down) • A4 = off (down) • A3 = off (down) • A2 = off (down) = BINARY 0010 • A1 = on (up) • A0 = off (down)
Changing Contents of a Data Location 1. Halt 2. Position the address switches to the appropriate HEX address 3. Position the data switches to the desired HEX data value 4. Flick the DEP (deposit) switch to store. 5. Reset (re-starts program counter) 6. Run
How to Interpret Machine Language from Program Listing Column 1 = program line number Column 2 = memory address in HEX Column 3 = data value in memory address from column 2 Column 4 = operands. Data values in Next memory addresses, following column 2 "starting" address Column 5+ = Assembly Language and comments (not needed for front panel operations) Example: Line from program listing: 00044 FF08 F4 F001 HEX address FF08 data byte should be set to F4 HEX address FF09 data byte should be set to F0 HEX address FF0A data byte should be set to 01
How to Test Machine Language from Program Listing Using Toggle Switches 1. Halt 2. Position the address switches to desired HEX memory location matching the program code listing 3. The data lights should display what is currently stored with the address
ACIA = Asynchronous Communications Interface Adapter "..data formatting and control to interface serial asynchronous data communications information to bus organized systems.." such as the Altair 680b 6800 processor. - Examine or change the contents of a memory location - Load paper tape into memory - Start a program at a selected address - Debugging ...But most important - No more toggle switching! Saves Time.
Using ACIA Monitor from a Terminal 1. Set the address switches to FF02 2. Turn on the Altair 680b 3. Turn on the terminal (assuming it's cabled to your computer correctly) 4. Switch the RUN/HALT to "Halt" 5. Actuate the RESET switch 6. The ACIA PROM will respond by sending a CR/LF to the terminal and the terminal will display a dot prompt (.)
ACIA Monitor Commands - M M - Memory Examine and Deposit 1. At the . prompt, type M (but do not press Enter) 2. The monitor will respond by printing a space 3. Enter the HEX memory location 4. The monitor will respond by first printing the data value in HEX stored in the memory location, followed by a space. 5. To change the contents of the byte, enter the new 2-digit HEX value (*do not* press Enter). 6. If you do not wish to change the value of the byte, press Enter without entering a new value THUS - This is the same thing as using the DEP toggle to change the value of data for a given HEX address.
ACIA Monitor Commands - N N = Memory Deposit and Examine Next 1. At the . prompt, type N (but to not press Enter) 2. The monitor will print the next memory address in sequence. 3. Just like the "M" command, you can opt to change the contents of the specified byte or leave as is.
ACIA Monitor Commands - J J = Jump to Specified Address 1. At the . prompt, type J (but to not press Enter) 2. The monitor will respond by printing a space 3. Enter the 4-digit HEX memory location (but don't hit enter) 4. The processor will jump to the specified memory location and start executing the program from that location.
ACIA Monitor Commands - L L = Load Paper Tape 1. At the . prompt, type L (but to not press Enter) 2. Place the paper tape in the reader, and start the reader. S0 = comments S1 = code S9 = done
ACIA Monitor Commands - P P = Proceed to Program Breakpoint 1. At the . prompt, type P (but to not press Enter) 2. The program will continue. NOTE: This is a debugging tool. The programmer sets breakpoints to halt a program and return control to the monitor prompt so that the memory can be evaluated.