Download
1 / 5
50 likes | 226 Views
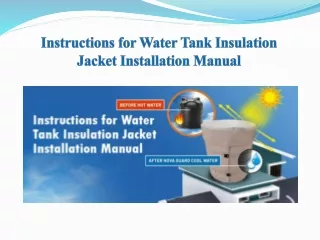
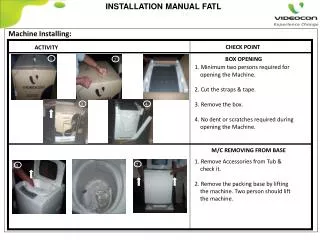
INSTALLATION MANUAL FATL. Machine Installing:. CHECK POINT. ACTIVITY. BOX OPENING. 1. 2. 1. Minimum two persons required for opening the Machine. 2. Cut the straps & tape. 3. Remove the box. 4. No dent or scratches required during opening the Machine. . 3. 4.

E N D
INSTALLATION MANUAL FATL Machine Installing: CHECK POINT ACTIVITY BOX OPENING 1 2 1. Minimum two persons required for opening the Machine. 2. Cut the straps & tape. 3. Remove the box. 4. No dent or scratches required during opening the Machine. 3 4 M/C REMOVING FROM BASE 1. Remove Accessories from Tub & check it. 2. Remove the packing base by lifting the machine. Two person should lift the machine. 2 1
INSTALLATION MANUAL FATL Rat mesh Installation and Machine Leveling: ACTIVITY CHECK POINT 1 ANTIRAT COVER FIXING 2 1. Spread bed sheet ( or cloths) on floor so that no scratch can come on M/C. 2. Lay down the machine by facing left side only on spread bed sheet. 3. Place the rat mesh on base as shown. (Gap should not be there between base and mesh) 4. Finally Put the machine straight. 3 4 MACHINE LEVELING 1. Place the machine where customer want to use. (Do not place the m/c on inclined floor) 2. Check leveling with respect to floor by up down movement and by filling water in machine up to pulsator level and check uniform distribution of water on pulsator. 3. Adjust the leg if up down movement is there or water distribution not uniform on Pulsator. 2 2 3
INSTALLATION MANUAL FATL Drain hose and Adaptor Installation: fix CHECK POINT ACTIVITY DRAIN HOSE FIXING 1. Keep the clamp back side. 2. Connect the Drain hose with M/C. 3. Lock drain hose by Clamp. 4. Check leakage after fitting. No Leakage required. 1 2 3 INLET HOSE MOUNTING WITH TAP 1 3 2 1. Separate the adapter from hose. 2. Do unscrewing of all 4 screws of adapter. 3. Loosen the lower unit of adapter. 4. Fix the adapter with the tap and tight all 4 screws as per the sequence given in fig 5. Tighten the lower unit of adapter. 6. Connect the inlet hose with the adapter. 7. Ensure no leakage from joint. 4 1 2 3 5 2 4 6 2
REGULAR MAINTENANCE FATL Inlet hose mounting with machine and Feed valve filter cleaning: CHECK POINT ACTIVITY INLET HOSE MOUNTING WITH M/C 1. Check filter present inside valve. 2. Tight other side of Inlet hose with M/C & tight it completely. 3. Open the Tap & check for leakage, No Leakage required. 2 1 FEED VALVE FILTER CLEANING ( TO EXPLAIN ) 2 1 1. Remove Filter Mesh from feed valve. 2. Clean Filter Mesh with help of tooth brush and clean water. 3. Pl do this activity fortnightly.
REGULAR MAINTENANCE FATL Lint filter and pulsator cleaning: CHECK POINT ACTIVITY LINT FILTER CLEANING 1. Take out the lint filter by pulling upward. 2. Reverse the lint filter. 3. Wash out the lint filer separately by clean water. 2 3 1 PULSATOR CLEANING 1. Clean the pulsator by pouring clean water after each use of machine. 2. Run the machine in spin to drain the water and switch it off.