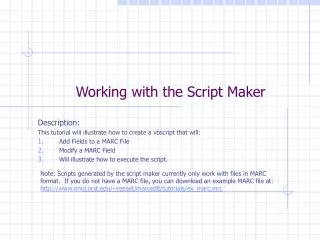
Working with the Script Maker
Working with the Script Maker. Description: This tutorial will illustrate how to create a vbscript that will: Add Fields to a MARC File Modify a MARC Field Will illustrate how to execute the script.

Working with the Script Maker
E N D
Presentation Transcript
Working with the Script Maker Description: This tutorial will illustrate how to create a vbscript that will: Add Fields to a MARC File Modify a MARC Field Will illustrate how to execute the script. Note: Scripts generated by the script maker currently only work with files in MARC format. If you do not have a MARC file, you can download an example MARC file at: http://www.onid.orst.edu/~reeset/marcedit/tutorials/ex_marc.mrc
Table of Contents • Opening the Script Maker • System Requirements • Testing your system • Creating a vbscript • Adding a field • Modifying a field • Saving the Script • Running the script • Conclusion This tutorial will covering the following topics. To get the most out of this tutorial, please open MarcEdit and follow along.
Getting Started • To open MarcEdit, simply click on the MarcEdit Icon on your Desktop or select MarcEdit from Start/Programs/MarcEdit. • When MarcEdit opens, it will look like the picture below.
Opening the MarcEdit Script Maker • The MarcEdit Script Maker can be opened from two locations. The Script Maker can be opened by either clicking on Add-Ins/Script Maker or by clicking on Start/Programs/MarcEdit/Script Maker. (See below)
Script Maker – System Requirements • The MarcEdit Script Maker currently only generates vbscript files. Vbscript files are script files that can be run natively on most Windows systems. By default, Windows 98SE, Windows ME, Windows 2000 and Windows XP have the Windows Scripting Host (WSH) installed, allowing users to execute script files. Users who have installed Internet Explorer 5+ also have the WSH installed by default. However, if you are unsure if you have the WSH on your system, try to execute the test file below:http://www.onid.orst.edu/~reeset/marcedit/html/test.vbsYou will prompted to Open or Save the file. Click open. If you have the WSH installed, you will see the message below. If you do not see this message, you can download the WSH from: http://msdn.microsoft.com/scripting/
Creating a vbscript • When you open the Script Maker, you will see the following startup screen.
Creating a vbscript: Adding a Field When a user wants to add or delete a field, the user has a number of options. First, the user has the ability to add or delete a field using a conditional argument. This is what the If checkbox is for. For this tutorial, we will not be using a conditional, so you would not what to check this box. Rather, for this tutorial, we will simply tell the script to add a 049 with the following data in the $aWOSA. • To add this data, do the following: • Type or select 049 from the combo box called Field: • Since the 049 has blank indicators, leave the indicators as \\ • In field data, enter the data that should be in the 049 field. By default, all data entered into the Field Data textbox is placed in the $a unless otherwise specified. • Go to the next slide to see how the fields should look.
Adding a Field: Screenshot To use these parameters, click the Add Field button. Go to the next slide to see what the window should look like now.
Adding a Field: Screenshot Once you click on the Add Field button, the add field arguments are transferred to the Parameters area.
Modifying a field Once you have clicked the Add Field Button, click on the Modify Field Tab. This will bring up the following tab.
Modifying a field The modifying field button is much like the Edit subfield function in MarcEdit. For this tutorial, we are going to add a 949$a. Currently, when new subfield data is added to a field, it is appended to the end of the field. The data that we are going to add is the following:*recs=bo;dflt=oclc,approv;
Modifying a field The Modify Field area should look like the following:
Modifying a field To accept this criteria, click on the Apply Button. This will move the Modify Fields data into the Parameters area like below:
Saving the Script Once you have set your parameters, you are ready to save the script. To save the Script, click the OK button at the bottom of the dialog.
Saving the Script When you click the OK button, you will be prompted with the Save As dialog box. Select the location where you would like to save the file, and click save. Remember where you saved your file, since you will need to double click on the file to execute the script.
Executing the script Running a vbscript is a lot like running a regular program. Like a regular program, you simply double click on the program icon. Running a vbscript is no different. In this tutorial, I named my vbscript file, shirley1.vbs. To run this file, I would simply double click on the icons (see below).
Executing the script Once you double click on the script, the script you will have to tell the script where the MARC file is that you want to edit. Depending on the files on your system, this prompt will occur two different ways. For users who have the following file: %windir%\%sysdir%\Comdlg32.ocx They will be prompted for a file like the following:
Executing the script For users who do not have the following file: %windir%\%sysdir%\Comdlg32.ocx They will be prompted for a file with an input box that looks like the following: When prompted with an input box, remember that you must type the entire path to the MARC file that you wish to edit. (example: c:\documents and settings\reeset\desktop\test.mrc
Executing the script Once you have specified the MARC file to edit, the program will process the files. When the file has been processed, you will see the following message (though the number of records processed will change): The edited file will be located in the same directory as your original source file with the following name: c[name of original file]rev.mrc. Congratulations, your MARC file should now be edited.
Conclusion If you have suggestions on how this tutorial could have been more helpful for you, feel free to contact: terry.reese@orst.edu