Download

1 / 20
200 likes | 299 Views
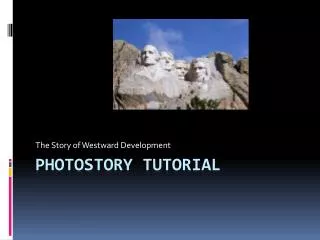
The Story of Westward Development. PhotoStory Tutorial. What is PhotoStory?. PhotoStory is a free program from Microsoft that allows you to create a digital story. You can personalize your photos with titles and captions You can also add voice narration to your story. Step 1 - Download.

E N D
The Story of Westward Development PhotoStory Tutorial
What is PhotoStory? • PhotoStory is a free program from Microsoft that allows you to create a digital story. • You can personalize your photos with titles and captions • You can also add voice narration to your story.
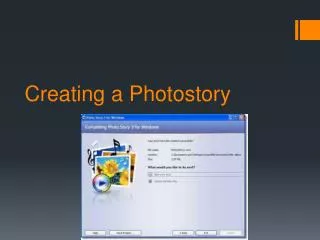
Step 1 - Download • Download the program • Click here to download: http://www.microsoft.com/windows/windowsmedia/download/AllDownloads.aspx • Click on the Photo Story 3 program and download. • Follow the steps on the screen to download the program. • Helpful hint: You will also need Microsoft Media Player downloaded as well. If you need this you can also download that from the above site. Just choose windows media player instead of photostory.
Step 2 – Begin Story • Click on Photo Story 3 to open it. • Click Begin a new story. • If you are editing a story you have already started then click edit story.
Step 3 – Import Pictures • You will have to import the pictures you want to use in your story. • The way you do this is to go in your picture folder and click on the pictures you want to use. You should be careful to label pictures carefully. • Photostory allows import of most common image formats, including .bmp, .dib, .eps, .gif, .jhif, ljpe, .jpeg, .jpg, .pcd, .pcx, .png, .psd, .rle, .tga, and .tif. • You can import a maximum of 300 images per project.
Helpful Hints • You can either import pictures one at a time or you can click on the first picture. • Hold down the shift key to the bottom • Then, click “OK”. • If you wanted to import some photos, but not all, you would click on the first photo, then hold down the CTRL key and select only those photos you want by clicking once on them, then click "OK.“ • Also, you should remove the black borders on your pictures if it gives you the option.
Step 4 – Arrange your pictures • Put your pictures in the correct order that you want them. • Just drag them into the correct order. • Helpful hints: • If there is a picture you don’t want, click on it so that it gets a blue border and click “delete” • Choosing the right image format can make a big difference in the final story. The key here is the resolution of the image. The higher the resolution, the better the final product (but also, the larger the file size).
Step 5 - Save • Save your project just to make sure you have a copy. • Be careful, it will automatically save it to my videos so make sure you save it in your personal folder as well.
Step 6 – Edit Your Photos • Click on the Edit button
Other Edits • Reduce red eye • Rotate and crop • Auto Fix • Add Effects • Remove Black Borders
Step 7 – Add Titles • Add titles to the slides you choose • Font • Color • Size • Placement
Step 8 – Customize Motion • Customize motion • You can zoom in, out, etc.
Hints • When you customize motion make sure to click set duration automatically. • The next step is to add transitions • Be sure you check the box that says "Start current picture using a transition." • Then select the transition you want . • Be sure to set the transition duration to be automatic. • Finally, preview your selections. When you are satisfied, click Save.
Step 9 - Narrate • There is a text box where you can copy and paste the text of your narration so that when it comes time to actually verbalize it, you will have it right in front of you. • It is best to prepare your story FIRST, then record it. • Do not try to "ad lib" -- the hems and haws will drive your viewers nuts
Helpful Hints • To begin recording, press Record. When you reach the end of the narration for the first slide, press Stop. • If you are using a laptop you can directly record your narration, if not, you will need to use a microphone. • If you want to test it out (and I urge you to do so!), click the Preview button to listen to what you've got. If you're not satisfied, click the Delete button and try again. • When you are satisfied with the narration for the first slide, select the second slide and repeat the process. Continue until you have recorded the narration for all slides. • You can record up to a maximum of five minutes per slide.
Step 10 – Add music • Background music should not have words because it is distracting to the narration. • You can use downloaded music from your computer or music from Photo Story. • If you choose to use music from photo story you can choose the genre, style, band, mood, tempo and intensity that suit your piece. • To test out your choices, press Play. When you're satisfied with your choices, press OK.
Step 11 – Save Your Project • Save your project frequently!!!! • You should save it after each step! • Make sure you save it to your personal folder (Your Student I Drive).
Step 12 – Export your story • Select Save your story for playback on the computer. • Next, click the Browse button to select the location where you want to save your project – Your Student Folder as a WMV File named as your first and last name with topic!!!! • Click Next and then preview your wmvfile. • Exit out of PhotoStory • Open My Computer and click on your I Drive so that you can see your wmv file. • Then, Open the student Share folder (V Drive) and click on A Clifford (do this so both screens are open at the same time) • Drag your project from your I Drive to the Student Drop Folder • You are done!!!!