0 likes | 3 Views
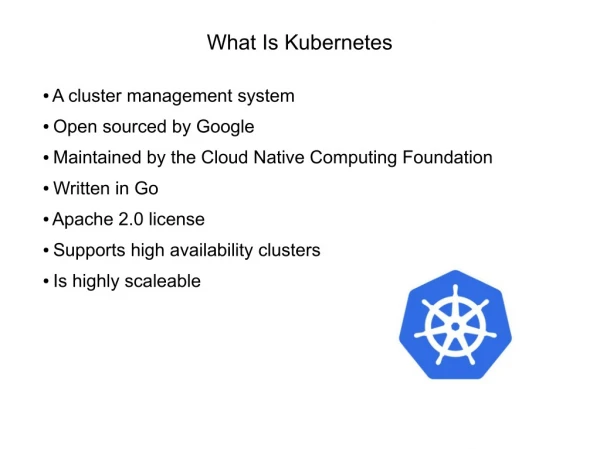
This resource is designed for efficient study and quick reference on Kubernetes application development and deployment.
E N D
Linux Foundation CKS Certified Kubernetes Security Specialist (CKS) Questions & Answers PDF (Demo Version – Limited Content) For More Information – Visit link below: https://p2pexam.com/ Visit us at: https://p2pexam.com/cks
Latest Version: 6.0 Question: 1 You are managing a Kubernetes cluster that uses a private Docker registry for storing container images. You need to secure the registry by restricting access to authorized users and teams. Design a solution using role-based access control (RBAC) to enforce the following policies: - Developers in the "dev" team should be allowed to push and pull images to the registry. - Operations team members should only be allowed to pull images. - Security team members should have read-only access to the registry's metadata A. See the solution below with Step by Step Explanation. Answer: A Explanation: Solution (Step by Step) : 1. Create a Service Account for each team: - Dev Team: - Operations Team: - Security Team: - Apply these ServiceAccount YAML files to the cluster using 'kubectl apply -f sa.yaml’. 2. Create a Role for each team: - Dev Team Role: Visit us at: https://p2pexam.com/cks
- Operations Team Role: - Security Team Role: - Apply these Role YAML files to the cluster using 'kubectl apply -f roles-yaml’. 3. Bind the Roles to Service Accounts: - Dev Team: Visit us at: https://p2pexam.com/cks
- Operations Team: - security Team: - Apply these RoleBinding YAML files to the cluster using ‘kubectl apply -f rolebindings.yamr 4. Configure the Registry: - Ensure that your private Docker registry is configured to authenticate users and teams based on the specified RBAC rules. This may involve using a registry-specific Plugin or configuration file. 5. Test the Setup: - Use the created Service Accounts to access the registry. - Verify that each team nas the expected permissions and limitations. - For example, try pushing an image using the ‘dev-sa’ account and verify it is successful. Then, attempt to push an image using the Sops-sa- account and verify it is unsuccessful due to the missing permission. Visit us at: https://p2pexam.com/cks
Question: 2 You are using a container image signed by a trusted entity. Describe the steps involved in verifying the signature of the image during the image pull process in Kubernetes. A. See the solution below with Step by Step Explanation. Answer: A Explanation: Solution (Step by Step) : 1. Generate the Signature: - The trusted entity uses a signing key and algorithm to create a signature for the container image. - The signature is typically stored as a separate file or within a manifest file associated with the image. 2. Configure the Kubernetes Cluster: - Enable the 'ImageSignatureVerification’ feature gate in your Kubernetes cluster. This feature gate enables the cluster to verity image signatures- - Configure the 'ImageP01icyWebh00k’ to point to a custom webnook server that will handle the signature verification process. 3. Implement the Webhook Server: - Create a custom webhook server that will be responsible for verifying the image signature. - This server will: - Receive tne image manifest and signature from Kubernetes. - Validate the signature using the trusted entity's public key. - Return a success or failure status to Kubernetes based on the verification outcome. 4. Pull the Signed Image: - When you pull the signed image from the registry, Kubernetes will: - Fetch the image manifest and signature. - Send them to the 'ImagePolicyWebhooR for verification. - If the webhook returns a success status, the image will be allowed to run. - If the webhook returns a failure status, the image will be rejected. 5. Example Implementation: - You can use tools like 'cosign' or 'sigstores to generate and verify image signatures. - Implement the webhook server using a programming language like Go or Python. # Example using cosign to verify a signature cosign verify -key - This command will use the provided public key to verify the signature of the specified image. 6. Security Considerations: - Ensure that the webhook server is secure and only accessible to authorized Kubernetes components. - Use robust authentication and authorization mechanisms for the webh00k server. - Consider implementing rate limiting to protect against potential denial-of-service attacks. Question: 3 Visit us at: https://p2pexam.com/cks
You have a Kubernetes cluster with a network policy that allows access to specific ports on pods within a namespace. However, you need to restrict access to specific users based on their identity. Describe how you can implement identity-based access control using network policies in Kubernetes. A. See the solution below with Step by Step Explanation. Answer: A Explanation: Solution (Step by Step) : 1. Configure Network Policy with Ingress Rules: - Define a network policy tnat allows incoming traffic to specific pons on pods within the namespace. - This policy should include an 'ingress' rule specifying the allowed ports and protocols. - For example: 2. Enable Identity-Based Authentication: - Use a Kubernetes authentication plugin to enable identity-based authentication for users connecting to the cluster - This Plugin can be configured to authenticate users using external identity providers like OpenID Connect (OIDC) or SAML. 3. Configure Network Policy with Peer Identity Rules: - Extend the network policy to include rules that specify the required user identity for incoming traffic. - Use the 'peer field within the ‘ ingress' rule to define the identity requirements. - For example: Visit us at: https://p2pexam.com/cks
4. Associate Users With Groups: - Associate the authenticated users with the appropriate groups defined in the network policy. - This can be done by configuring your authentication Plugin to map user attributes to Kubernetes groups. 5. Test the Configuration: - Test the network policy by attempting to access the pods from different users with varying identities. - Verify that only users belonging to the "developer' group can successfully connect to the specified ports. 6. Security Considerations: - Use strong authentication mechanisms for user logins. - Implement a robust identity provider to manage user identities and groups. - Ensure that the network policy rules are carefully defined to minimize the attack surface and prevent unintended access. Question: 4 You are building a container image for your application that uses a third-party library. Describe the steps involved in scanning the third- party library for vulnerabilities before incorporating it into your image. A. See the solution below with Step by Step Explanation. Answer: A Explanation: Solution (Step by Step) : 1. Choose a Vulnerability Scanner: - Select a vulnerability scanner that supports the language and dependencies of your third-pady library. - Some popular options include: - Snyk - Aqua Security - Anchore Visit us at: https://p2pexam.com/cks
- Trivy 2. Scan the Third-Party Library: - Use the chosen vulnerability scanner to scan the third-pany library for known vulnerabilities. - Provide the scanner with the library's source code, package manager lock file, or other relevant information. 3. Analyze the Scan Results: - Review the scan results carefully. - Identify any high-severity vulnerabilities reported by the scanner. - Determine the impact of each vulnerability on your application's security. 4. Remediate Vulnerabilities: - If any high-severity vulnerabilities are found, consider the following options: - Update the Library: Check if a newer version of the library addresses tne vulnerabilities. - Use a Different Library: If an updated version is not available or the vulnerabilities cannot be mitigated, consider using a different library. - Apply Patcnes: If the vulnerabilities are in the code itself, apply patcnes to fix them. - Accept the Risk: If the vulnerabilities are deemed low-risk or the impact is minimal, you may decide to accept the risk 5. Integrate Scanning into CI/CD Pipeline: - Integrate the vulnerability scanning process into your continuous integration and continuous delivery (CI/CD) pipeline. - This will ensure that the library is scanned automatically during each build process, providing early detection of vulnerabilities. 6. Example using Snyk: - Install Snyk: npm install snyk --global - Scan the library: snyk test --package-manager --package-name - This command will scan the specified library for vulnerabilities. - Remediate vulnerabilities: snyk upgrade --package-manager --package-name - This command will upgrade the library to the latest version that fixes the vulnerabilities. Question: 5 Your Kubernetes cluster iS running a web application that requires access to a database hosted on an external Cloud provider. Describe how you can secure the connection between the application and the database using TLS/SSL encryption and identity-based authentication. A. See the solution below with Step by Step Explanation. Answer: A Explanation: Solution (Step by Step) : 1. Configure TLS/SSL Encryption: - Generate Certificate: Obtain a TLS/SSL certificate from a trusted certificate authority (CA) or use a self- signed certificate for development purposes- Visit us at: https://p2pexam.com/cks
- Install Certificate on Database Server: Install the certificate on the database server, making it available to the database service. - Configure Database Service: Configure the database service to accept connections only over TLS/SSL. - Configure Application Container: - Mount Certificate: Mount the TLS/SSL certificate into the application container as a secret. - Configure Application Code: Update the application code to use the certificate when connecting to the database. 2. Implement Identity-Based Authentication: - Create Database User: Create a dedicated database user specifically for the web application. - Grant Permissions: Grant appropriate permissions to the database user, limiting access to the necessary tables and data. - Use Authentication Plugin: Configure the database service to use an authentication plugin that supports identity-based authentication. - Generate Database Credentials: Generate database credentials (usemame and password) for the application. - Store Credentials Secretly: Store the database credentials securely as a Kubernetes secret. - Access Credentials from Application: Configure the application to access the database credentials from the secret. 3. Connect Application to Database: - Configure Connection String: Update the application's connection string to use TLS/SSL and the database user credentials. - Example Connection String: jdbc:postgresql://database-host:5432/database-name?ssl=true&sslmode=require&user=app user&password=app-password 4. Security Considerations: - Certificate Validation: Ensure the certificate is validated by the application to prevent man-in-the- middle attacks. - Secure Credential Management: Implement strong security measures to protect the database credentials stored as secrets. - Access Control: Limit access to the database to only authorized users and applications. - Network Isolatiom Consider using network policies to isolate the web application from other workloads and restrict unnecessary network traffic. Question: 6 You are using a Kubernetes cluster running on a cloud provider. You are concerned about the security of the underlying cloud infrastructure. Describe now you can use Kubernetes security features and cloud provider security services to assess and mitigate risks related to the cloud infrastructure. A. See the solution below with Step by Step Explanation. Answer: A Explanation: Solution (Step by Step) : 1. Kubernetes Security Features: Visit us at: https://p2pexam.com/cks
- Pod Security Policies (PSPs): Use PSPs to enforce security restrictions on pods, such as limiting the privileges and resources they can access. - Network Policies: Implement network policies to restrict network traffic between pods and external services, reducing the attack surface. - Admission Controllers: I-Ise admission controllers to enforce security checks on incoming requests to the cluster, such as validating resource requests or checking for malicious code. - RBAC Implement role-based access control to grant specific permissions to users and service accounts, limiting their access to resources. 2. Cloud Provider Security Services: - Vulnerability Scanning: Use the cloud provider's vulnerability scanning services to identify and remediate vulnerabilities in the underlying infrastructure. - Security Monitoring: Leverage cloud security monitoring tools to detect unusual activities, suspicious connections, and potential security threats. - Intrusion Detection and Prevention (IDS/IPS): Configure cloud-based IDS/IPS solutions to protect the infrastructure from known attacks and malicious traffic. - Security Auditing: Enable security auditing features to track changes to infrastructure configurations and user activities, allowing for forensic analysis in case of security incidents. 3. Combined Approach: - Security Posture Assessment: Use a combination of Kubernetes security features and cloud provider security services to conduct regular security posture assessments of the cluster and underlying infrastructure. - Security Best Practices: Adhere to cloud security best practices, such as regularly patching systems, rotating credentials, and implementing least- privilege access. 4. Example with AWS: - AWS Security Groups: I-Jse AWS Security Groups to control inbound and outbound network traffic for your Kubernetes cluster. - AWS GuardDuty: Leverage AWS GuardDuty to detect threats and suspicious activity in your cloud environment - AWS Inspector: use AWS Inspector to scan your Kubernetes cluster for security vulnerabilities. 5. Security Considerations: - Security Awareness: Ensure that your team is aware of cloud security best practices and responsibilities. - Continuous Monitoring: Implement continuous monitoring of security logs and events to detect and respond to threats in a timely manner. - Incident Response: Have a well-defined incident response plan to handle security incidents efficiently and minimize potential damage. Question: 7 You are tasked with securing a Kubernetes cluster that runs a critical application using ‘gcr.io/google- samples/hello-app:vl' image. You need to ensure that all deployed containers for this application adhere to strict security policies and prevent any unauthorized modifications. How would you implement a solution that utilizes KubeLinter to enforce these security policies and prevent unauthorized modifications to the deployed containers? Provide a step-by-step solution outlining the specific KubeLinter configurations, rules, and integration methods for achieving this security objective. Visit us at: https://p2pexam.com/cks
A. See the solution below with Step by Step Explanation. Answer: A Explanation: Solution (Step by Step) : 1. Install KubeLinter: - Install KubeLinter using ‘pip install kube-linter’ 2. Configure KubeLinter: - Create a .kube-linter.yamr configuration file in the root directory of your project. This configuration file defines the security policies and rules you want to enforce. Visit us at: https://p2pexam.com/cks
3. Integrate KubeLinter with your CI/CD pipeline: - Use a tool like GitLab Cl, Jenkins, or CircleCl to integrate KubeLinter into your CI/CD pipeline. This ensures that KubeLinter runs automatically whenever a new version of your application is built and deployed. 4. Run KubeLinter: - Run the KubeLinter command: ‘kube-linter --config=.kube-linter.yaml --verbose' 5. Interpret and resolve KubeLinter results: - Review the results ot the KubeLinter scan and address any reported violations. This involves modifying the 'deployment-yaml file and container configuration to adhere to the defined security policies. - ‘container-image-whitelist rule: This rule enforces whitelisting of container images to ensure only authorized images are deployed. It verifies that all deployed containers use the specified ‘gcr.io/google-samples/hello-app:vl' image. ‘pod-security-policy' rule: This rule entorces strict Pod Security Policies for all Pods. It ensures containers have appropriate security contexts, including 'fsGroup’ and ‘runAslJser' settings, to prevent unauthorized access and privilege escalation. - ‘privilege-escalation' rule: This rule prevents containers from running with elevated privileges, reducing the risk of potential attacks. - ‘host-network’ rule: This rule ensures that containers don't access the host network, restricting potential network-based attacks. - 'host-ports' rule: This rule prevents containers from exposing ports on the host network, further limiting the attack surface. By implementing these KubeLinter rules and integrating them into your CI/CD pipeline, you can enforce strong security policies, prevent unauthorized container image modifications, and enhance the security of your Kubernetes cluster. Question: 8 Visit us at: https://p2pexam.com/cks
You are deploying a critical application on your Kubernetes cluster. You want to ensure that only certified and trusted container images are allowed to be deployed- How can you implement an Image Signature Verification process to ensure that all images pulled from your Docker registry are signed with a trusted key? A. See the solution below with Step by Step Explanation. Answer: A Explanation: Solution (Step by Step) : 1. Generate Key Pair: Generate a public and private key pair for signing container images. bash openssl genrsa -out private-key 2048 openssl rsa -pubout -in private-key -out public-key 2. Sign Container Image: use the private key to sign the container image- bash docker build -t my-app:latest cosign Sign --key private.key my-app:latest 3. Push Signed Image: Push the signed image to your Docker registry. bash docker push my-app:latest 4. Configure Kubernetes Image Policy: Configure a Kubernetes ImagePolicyWebhook using a tool like Admission Webhook Controller to enforce image signature verification. The webhook can be configured to check for the presence of a valid signature using the public key and to reject images without a valid signature. 5. Deploy Image Policy Webhook: Deploy the ImagePolicyWebhook configuration using 'kubectl apply -f image-policy-webhook.yamr 6. Test Image Signature Verificatiom Create a new Deployment using an unsigned image. The deployment should be rejected by the webhook. Visit us at: https://p2pexam.com/cks
Note: This is a basic example. You can configure more advanced image signature verification policies based on your security needs and requirements. For example, you can enforce specific image signing policies, use multiple keys, and configure different failure policies. Question: 9 You have a Kubernetes cluster with a deployment running a critical application. You need to restrict inbound network access to the pods in this deployment to only allow traffic from a specific service within the cluster. How would you achieve this using NetworkPolicy? A. See the solution below with Step by Step Explanation. Answer: A Explanation: Solution (Step by Step): 1. Create a NetworkP01icy: Define a NetworkPoliCY resource that specifies the allowed ingress traffic. - Name: 'allow-service-access (you can choose any name) - Namespace: The same namespace as the deployment you want to restrict. - Spec: - PodSeIector: This should match the pods in your deployment. You can use labels to select the pods. - Ingress: This defines the allowed incoming traffic. - From: Define the source of the allowed traffic. - PodSeIector: If the traffic is coming from another deployment within the cluster, you can define the pod selector for that deployment. - Namespaceselector: It the traffic is coming trom a service within the cluster, you can define the namespace selector. - IPBIock: If the traffic is coming from a specific IP range, you can use 'IP310ck' to define that. - Ports: This defines the specific ports that are allowed. - You can either specify individual (e.g., ‘tcp:80') or a port range (e.g., ‘tcp:80-8080'). Visit us at: https://p2pexam.com/cks
2. Apply the NetworkPolicy: - Use 'kubectl apply -f networkpolicy.yamr to create the NetworkPolicy. Example YAML for NetworkPolicy: - The NetworkP01icy allows inbound traffic from any pod in the namespace With label - This traffic can access port 80 (TCP) on the pods with the label ‘app: Important Notes: - NetworkPolicies are enforced at the pod level. If no NetworkPolicy is defined, all traffic is allowed by default. - If you need to allow traffic from multiple sources, you can define multiple 'ingress' rules within the NetworkPolicy. - Make sure you have sufficient understanding of Kubernetes Networking and NetworkPolicy concepts before implementing this. Question: 10 You have a Kubernetes cluster with a sensitive workload running in a specific namespace. You need to restrict access to this namespace to only authorized users- How would you achieve this using Role-Based Access Control (RBAC)? A. See the solution below with Step by Step Explanation. Answer: A Explanation: Solution (Step by Step): 1. Create a Role: Define a Role that grants only the required permissions to access the sensitive namespace. - Name: ‘namespace-access-role' (you can choose any name) - Namespace: The namespace you want to restrict access to. - Rules: Visit us at: https://p2pexam.com/cks
- Resources: Specify the resources that the role allows access to. For example, ‘pods", 'deployments', ‘services', etc. - Verbs: Define the allowed actions on tne resources. For example, ‘get', 'list, ‘watch', ‘create', ‘update' , 'delete', etc. - ApiGroups: Specify the API group that the resources belong to. For example, ‘apps’, ‘extensions' , etc. - You can use wildcards to grant access to all resources or all verbs. 2. Create a ROIeBinding: Associate the Role with specific users or groups. - Name: 'namespace-access-binding' (you can choose any name) - Namespace: The namespace you want to restrict access to. _ RoleRef-. - Kind: 'Role’ (since you are using a Role) - Name: The name of the Role you created. - ApiGroup: ‘rbac.authorization.k8s.i0’ - Subjects: Define the users or groups that should have access to this Role. - Kind: Specify whether it's a user or group. - Name: The username or group name. - ApiGroup: ‘rbac.authorization.k8s.io’ 3. Apply the Role and Role3inding: - Use 'kubectl apply -f role.yaml' and 'kubectl apply -f rolebinding.yamr to create the Role and RoleBinding respectively Example YAML for Role and Role8inding: Role (role-yaml) Role8inding (rolebinding.yaml) - The Role ‘namespace-access-role' grants permissions to access 'deployments' , 'pods' , 'services', and 'secrets' in the Visit us at: https://p2pexam.com/cks
- The RoleBinding ‘namespace-access-binding' associates this Role with the user - This setup Will restrict access to the namespace to only tne user Important Notes: - R8AC is a powerful mechanism to control access to resources in Kubernetes- - It's important to understand the different RBAC components (Role, RoleBinding, ClusterRole, ClusterRole8inding) and their usage. - Define granular permissions to ensure least privilege access and enhance security. Visit us at: https://p2pexam.com/cks
For More Information – Visit link below: https://p2pexam.com/ Thanks for Using Our Product Pass Your Certification With p2pexam Guarantee Use coupon code “20off” for 20USD discount Sales: sales@p2pexam.com Support: support@p2pexam.com Visit us at: https://p2pexam.com/cks