Download
1 / 16
170 likes | 306 Views
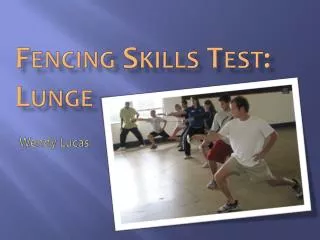
Fencing Skills Test: Lunge. Wendy Lucas. Purpose. The purpose of this Skills test is to evaluate the process and product of the student’s two attempts to lunge in fencing. The lunge is a basic attack made by moving the front leg forward and keeping the back leg in place. Examples.

E N D
Fencing Skills Test:Lunge Wendy Lucas
Purpose The purpose of this Skills test is to evaluate the process and product of the student’s two attempts to lunge in fencing. The lunge is a basic attack made by moving the front leg forward and keeping the back leg in place.
Examples Watch the fencer on the right around 0:20 in this video: http://www.youtube.com/user/senorshoebrush#p/u/10/eJKAIJK6s5E The uniform is not white because it was fashionable when fencing started. It was actually a way of determining if someone scored a point! • Image from http://www.tcnj.edu/~fencing/glossary.htm
Equipment • A foil or a rod representing a foil (110 cm/43 inches) • Tape on the ground representing the start line and the goal line 20 inches from the start line or a tape measure taped to the ground. • A coin to place on the ground. The goal is to keep the heel close enough to the ground so that the coin is kicked forward. • A target for the student to aim the foil at during the lunge. This can be an X of tape on the wall (far enough away so that the student will not touch the target with the foil, but close enough so that it is visible).
Process Evaluation • Process (20 points total) • Foot Placement (5 points total) • The front foot’s toes should face forward. (2 points) • The rear foot’s toes should face to the side. (2 points) • The feet should be perpendicular to one another. (1 point) • Foot Movement (14 points total) • Raise the toes on your front foot, pull the front heel up slightly. (3 points) • Move front foot forward as if you are kicking. (3 points) • Kick the coin on the floor with your heel. (2 points) • Force yourself forward using your back leg. (3 points) • Bend front knee over front toe while landing. (3 points) • Arm Placement (1 points total) • Keep the weapon arm in front of the body as if you are about to force the weapon at the opponent. (1 points)
Product Evaluation • Product (10 points total) • The student lunges at least 20 inches.(2 points) • Front leg should end with thigh parallel to the floor. (2 points) • Back foot should be firm on the floor with the back leg straight. (2 points) • The student aims the foil at the target during the advance. (4 points)
Scoring • For each attempt, the possible point value is half of what is indicated in the parenthesis. For example, for arm placement there is a possible .5 point for the first attempt and an additional .5 point for the second attempt. • Those who are not testing should be practicing the lunge along the wall. Extra coins are set out to help with footwork.
Lunge Scoring Sheet This score sheet is set up so that the teacher can have one paper with all needed descriptions and all grades. When I was scoring in class, I simply marked a line in a box if the attempt for a component was not successful. I went back and typed in everyone’s scores.
Class Scores Average (Skills test total) = 29.7 (98.95%) Range = 1.5 (5%)
Problems with the Skills Test • Start line not clearly marked. • Closeness to target – individuals may focus more on hitting the target, than on performing the skill correctly. • Pennies were the same color as the floor (hard to see in practice and testing)
Changes for the Skills Test • Mark a piece of tape for start rather than just using the end of the tape measure. • Move the testing area further from the target. • Use coins that are different colors than the floor.