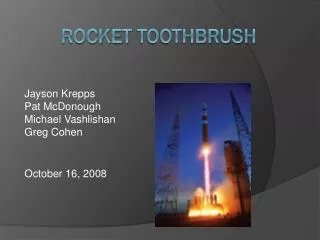
BOTTLE ROCKET INVESTIGATION
250 likes | 674 Views
BOTTLE ROCKET INVESTIGATION. An investigation is really a series of experiments all trying to solve different pieces of the same problem. Your task is to determine what it takes to propel a pop bottle rocket to its maximum distance. Background Information. Your research.

BOTTLE ROCKET INVESTIGATION
E N D
Presentation Transcript
BOTTLE ROCKET INVESTIGATION • An investigation is really a series of experiments all trying to solve different pieces of the same problem. • Your task is to determine what it takes to propel a pop bottle rocket to its maximum distance.
Background Information • Your research. • What do you already know? • What have others who are working similar problems found out that might help you with your problem • Examples of background info might include: • What components do rockets have that you could or should • include in your rocket design? What size and shape should these components be? • How should the weight be distributed? • What creates the thrust to launch a rocket?
All information in this presentation is taken from http://www.geocities.com/rocketcorps/index.html The main part of the rocket will be A 2 liter bottle. Don’t cut or puncture the pressure chamber (bottle) Don’t use: hot/boiling water knives or razor blades chemical solvents
FLOUNDER NOSE CONE The first type illustrated here is called "The Flounder". It is the easiest to make but lacks flight stability. The cone is made from poster board or tag board. You can make the cone by simply cutting a large circle out of the poster board (about a 6 inch radius). Cut a line from the outer edge of the circle to the center on the radius. Overlap the cut edges and turn the circle while holding one edge stationary until you get the desired cone shape. Secure the cone with staples or tape. Attach to the bottle with tape or similar adhesive.
As I mentioned before "The Flounder" lacks flight stability, this can be fixed to a degree by pressing a small lump ( a few ounces) of clay to the inside of the nose cone. This will add mass to the cone and keep your rocket from flipping end over end while in flight. This new and improved rocket could be called "The Bullet". You can also put a golf ball or tennis ball in the nose cone for top weight.
“Bertha” Nose Cone The "Bertha Series" nose cones are easy to make as well but require a little attention to detail. The "Bertha" nose cones are made by cutting the bottom off a spare bottle and attaching the top portion onto the pressure chamber. One strip of tape should be enough to hold the cone on. (Note: Never cut the pressure chamber) Using this method you can even make your "Bertha" rocket two or three nose cones tall! (we call that a "Big Bertha") Within the top nose cone you can add a small lump of clay to increase the mass. Pay attention to keep all the cones in a straight line. A curvy rocket will not be safe coming off the launcher.
“Space Needle” Nose Cone The "Space Needle" style of nose cone can be made from a spare bottle, empty paper towel roll, and a tennis ball or racket ball. This type of nose cone adds a great deal of inertial mass to the rocket and makes it really stable. Simply, attach the towel roll to the top of a single Bertha nose cone and then fix the tennis ball to the top of the roll. Take your time building this set up because you want the entire assembly to be straight as an arrow. Cut tabs in an index card and glue or tape the card to the tube. This will hold the tube upright. Then glue or tape the tabs onto the nose cone top.
Additional Ideas: A used foam pool noodle will make a fantastic soft, spongy nose cone. Use a serrated knife to shape the foam noodle and hot glue it onto your nose cone. Plastic egg halves will also fit nicely onto the "Space Needle" assembly.
FINS Fins are the guidance system for your rocket. Without them a rocket would tumble end over end. Fins can give your rocket life and beauty. Fins can portray aggressive power or aerodynamic grace. However, fins tend to be the single greatest downfall of many young rocket builders. With the incredible speeds and frightful acceleration generated at launch, many fins get ripped off the rocket body within a fraction of a second. I will discuss the reasons for this later, but for now let's list some common building materials
Materials: (remember lightweight but sturdy)Index cardsClear packing tape, or duct tape Cardboard (cheap, plentiful, soggy when wet) Chipboard (cereal boxes)Foam core (a little tougher but more $, some water damage)Sturdy-board (like plastic cardboard, great stuff, $$, no water damage)Balsa wood (might be a little heavy, fragile on impact)
How many fins do I need? To ensure stability and safety, the minimum number of fins on a rocket is three (3). Many people choose a 3 or 4 fin design. There is no maximum number of fins you may have but keep in mind that the more fins you have the more drag you will create and drag slows a rocket down.
Constructing fins1. Be creative and cut out 3 or 4 identical fins. You can use any shape except "forward swept" fins. 2. Lay the fin on a flat surface. 3. Glue and/or tape an index card onto the side of the fin. Be sure to leave a one-inch tab on the index card. You will later bend this tab out 90 degrees to make an attachable area for the rocket.4. Repeat the same for the other side of the fin.5. Repeat with other fins. You should now have 3 or 4 fins each with two-index card tabs on the backside. (I like to laminate the entire fin surface with clear packing tape to reduce the amount of water damage to my cardboard fins.)
Fin placement The fins of your rocket can't be placed above the halfway point of your pressure cylinder. You want to place your fins at the base of the rocket to lower or maintain the center of gravity. If you were to place the fins above the center of gravity, the rocket would tumble and spin out of control once it left the launch pad.
Attaching the fins • Apply a piece of tape to the index card tabs and • them carefully tape them to your rocket. • 2. Look at your fin. Make sure it doesn't curve • or it isn't crooked. It should be in a direct line with the • body of your rocket. If it isn't perfect, take it off • and try again.3. Attach the other fins. If you are using 4 fins • they should be at 90-degree angles. 3 fins should • be at 120-degree angles.4. Test the wiggle of the fins. Your fins • shouldn't wiggle more than a few centimeters • from side to side. Adding more tape to the top • and bottom areas of the fin might fix this problem.
YOUR GROUP LAB REPORT Your group needs to write one lab report, so find someone who will be a good scribe. I suggest that you keep the report in the “In box” so if the scribe is absent, the group can continue and have someone else write. Make sure that the name of everyone in your group is on the report. You will be graded by the quality of the report, so make sure everyone in the group is happy with the report. The report should have the following information:
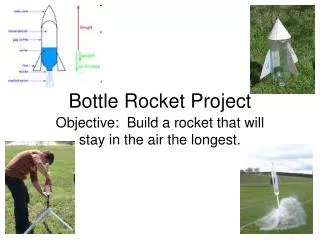
PURPOSE The purpose for this investigation is to construct a water bottle rocket that will travel the farthest distance down the football field.
Variables Independent variable is the one thing you are testing In your experiment, remember to test only ONE new thing at a time! Testing more than one variable at a time makes it so you can’t tell if the outcome is because of one, the other, or both changed variables.
Variables Dependent variable is the data measured as a result of testing the independent variable. In this case it will be the distance traveled down the football field. Controlled variables: Everything that you are keeping the same and not changing. Write down what you are keeping the same such as: same pressure (all launches will be at 60 psi) same launch angle, same fins or same nosecone, or same amount of water, etc.
PROCEDURE Write down what you are using (aluminum foil, cardboard, tape, clay, posterboard, etc.) and how you’re using all the stuff. Drawing pictures and labeling them is a really great idea. Then go test your ideas.
DATA • How did it go? What distance did it go? (make sure • you include units of feet, meters, yards, etc). Write • down everything that happened and what you • observed, such as: • how did it fly (straight, crooked, etc), did parts fall off, • how did it come down, how did it land, etc. • You will also need to include the following calculations: • Solve for height: 4.9((ave. time)/2))2 • 2) Solve for initial velocity: V0 =(∆x/(∆t cos 45º))
MODIFY PROCEDURE This investigation is a series of loops. Using what you learned on your first attempt, “tweak” it (make adjustments) and test it again, or try something entirely different, but only change one variable at a time. If you change the nosecone, keep the same fins water amount, and body style etc. If you decide to “tweak” or change the fins, then keep the nosecone, body style and water amounts the same, etc. Tell what you are doing to improve or change the independent variable, and what you are keeping the same as before. Be specific.
CONCLUSION Based on your launches, tell how the factor (or factors) you were testing affected the flight of the rocket, and what design you found to work the best.