Download
1 / 4
0 likes | 19 Views
Enjoy the benefits of coconut wax in your homemade candles! This renewable resource burns cleaner than traditional paraffin, producing minimal soot and offering longer-lasting fragrance

E N D
Introduction In an era where stress and turmoil appear to be the standard, producing a tranquil environment in the house can seem like a high-end. What better method to accomplish that than by lighting up your area with homemade candles? In this guide, we will explore the art of crafting coconut wax candle lights-- a wonderful mix of sustainability and luxury. Coconut wax is not only eco-friendly but also burns cleaner and longer than traditional paraffin wax. Whether you're aiming to boost your home ambiance or develop thoughtful presents for loved ones, making homemade candles with coconut wax is a fulfilling experience. So, are you ready to start on this fragrant journey towards harmony? Let's dive into Crafting Calmness: A Detailed Guide to Homemade Coconut Wax Candles! Homemade Candles Coconut Wax Why Choose Coconut Wax? Coconut wax has actually emerged as a popular option amongst candle makers for numerous reasons: Eco-Friendly: Sourced from renewable resources, it decreases environmental impact. Clean Burning: Produces very little soot and toxins compared to paraffin. Long-Lasting: It burns slower, extending the life of your candle. Excellent Fragrance Throw: Holds scent well, guaranteeing a strong scent when lit. Essential Tools for Candle Making Before we embark on our crafting adventure, let's collect the fundamentals: Double Boiler: For even heating of the wax. Thermometer: To keep track of wax temperature. Wicks: Cotton or wood wicks work best with coconut wax. Containers: Glass jars, tins, or molds. Fragrance Oils: Select natural aromas for a calming experience. Color Dyes (Optional): For including color to your candles. Understanding Candle Making Terminology To ensure we're all on the same page, here are some common terms you'll experience: Melt Point: The temperature level at which the wax melts. Pouring Temperature: The ideal temperature level for pouring melted wax into containers. Cold Throw vs. Hot Throw: Cold Throw: Scent strength when the candle is unlit. Hot Throw: Scent strength when the candle is burning. Step 1: Collect Your Ingredients To develop lovely homemade candle lights using coconut wax, you'll need: |Active ingredient|Quantity|| ---------------------|---------------------|| Coconut Wax|1 pound|| Scent Oil|1 ounce (or as desired)|| Wick|1 per container|| Dye (optional)|As preferred| Choosing Your Fragrance Wisely Selecting the right fragrance can set the mood for your area. Consider these alternatives: Lavender for relaxation Citrus for stimulating vibes Vanilla for heat and comfort Step 2: Prepare Your Workstation Creating candle lights can get messy; hence, preparation is essential! Here's how to establish efficiently:
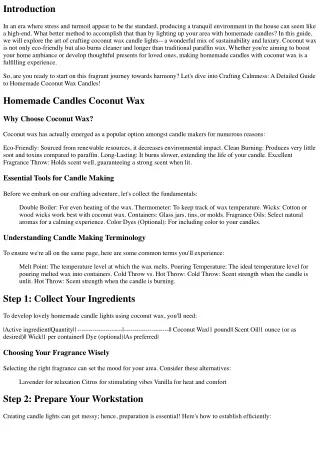
Clear your workspace of any clutter. Lay down newspaper or an old cloth to capture spills. Have all your tools within arm's reach. Step 3: Melting Coconut Wax The melting process is essential in making homemade candles with coconut wax. Fill the bottom pot of your double boiler with water and bring it to a gentle simmer. Add coconut wax into the leading pot and stir periodically up until completely melted-- this normally takes about 10-- 15 minutes. Temperature Check Using a thermometer, check that your melted wax reaches approximately 180 ° F(82 ° C). Step 4: Adding Color and Fragrance Once melted, it's time to instill personality into your candles: If utilizing dye, include it now and stir till totally incorporated. Remove from heat and allow it to cool somewhat before including fragrance oil-- ideally around 170 ° F( 77 ° C). Step 5: Preparing Containers and Wicks While waiting for the mix to cool: Secure wicks in location using wick sticker labels or hot glue at the bottom of each container. Center them carefully so they stay upright during pouring. Step 6: Putting The Wax Now comes the minute you have actually been waiting for! Carefully put melted coconut wax into each container-- fill them about three-quarters complete, leaving some area at the top. Allow them to cool undisturbed for about 4 hours or until solidified completely. DIY coconut wax candles Tips for Perfect Pouring Pour gradually to avoid air bubbles. Tilt containers somewhat if you desire an artistic effect. Step 7: Cutting Wicks Properly
After cooling totally: Trim wicks down to about 1/4 inch above the surface area of the candle. This assists avoid excessive flickering when lit. Step 8: Treating Your Candles For ideal scent release and efficiency: Allow your candle lights to cure for a minimum of two weeks before burning them. This boosts their fragrance throw significantly! Why Remedy Candles? Curing permits scents to bind properly with the wax, leading to a more powerful aroma while burning. Crafting Tranquility Through Personalization Now that you've mastered crafting coconut wax candles let's talk about ways you can personalize them further: Custom Labels Creating customized labels can add an individual touch: Use ornamental paper or printable label sheets that show your style. Unique Container Choices Experiment with various containers: Mason jars Vintage teacups Decorative bowls Gift Packaging Ideas If gifting these charming creations: Wrap with twine or ribbon in addition to a handwritten note describing aromas or uses! FAQ( Frequently Asked Concerns) What makes coconut wax various from other kinds of candle wax? Coconut wax stands apart due to its eco-friendliness and clean burn compared to paraffin or soy options. Can I use important oils rather of fragrance oils? Absolutely! Just guarantee they're suitable for candle making as some vital oils might not hold up well during combustion. How do I fix sinkholes in my candles? Heat a heat weapon over sinkholes briefly after cooling; this will allow additional melted wax from above to fill gaps! Why did my candle light burn unevenly? This could be due to inappropriate wick sizing; make sure each wick size corresponds correctly with its container's diameter!
Can I reuse old candle light containers? Yes! Simply ensure they're completely cleaned up before repurposing them for brand-new tasks-- eliminate Homemade Candles Coconut Wax any residue left first! Is there any unique upkeep required for coconut wax candles? Keep wicks trimmed frequently after each usage; prevent placement near drafts which could trigger uneven burning patterns too! Conclusion Crafting your own homemade candles utilizing coconut wax not just promotes relaxation however likewise supports imagination! With just a few basic steps described in this guide titled"Crafting Tranquility: A Detailed Guide to Homemade Coconut Wax Candles,"anyone can change basic materials into fragrant masterpieces that enhance atmosphere at home-- or act as wholehearted gifts! So why wait? Dive headfirst into this fragrant experience today! You might simply find that developing these gorgeous pieces triggers happiness within yourself-- and brings calmness back into day-to-day life!