Download

1 / 5
0 likes | 1 Views
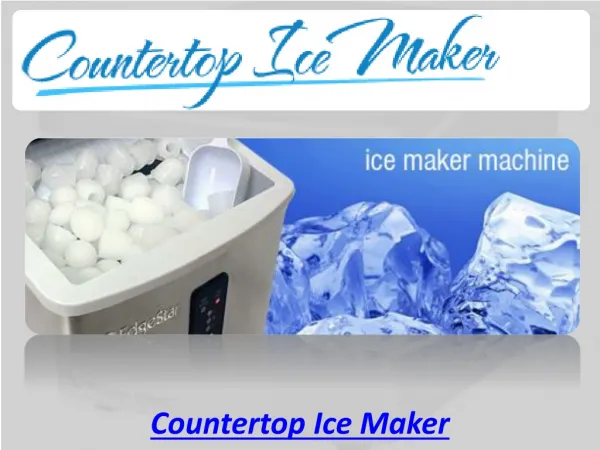
Repair Clinic is a trusted online retailer dedicated to genuine Whirlpool OEM parts for appliances, HVAC systems, and outdoor equipment

E N D
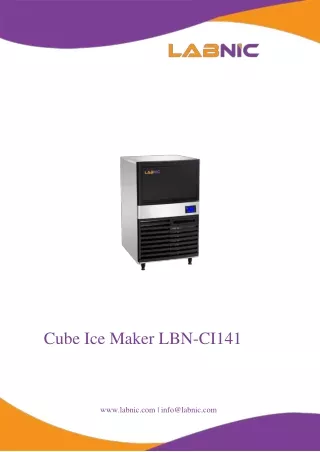
When a Whirlpool refrigerator stops making ice, the household rhythm changes. You start rationing cubes, pitchers sit warm, and someone eventually reaches for those silicone trays you swore you would never use again. The good news, if your model uses the OEM Whirlpool ice maker replacement W10659156A, is that swapping in a new assembly is straightforward with the right prep and a few practical checks. Below, I walk through how I approach these jobs in the field, what to verify before ordering parts for a Whirlpool refrigerator, and the common Whirlpool refrigerator troubleshooting steps that avoid repeat visits. What OEM Whirlpool Refrigerator Parts Mean, and Why They Matter Whirlpool refrigerator parts, including the W10659156A ice maker assembly, are engineered to the exact electrical loads, water fill volumes, motor torque, and mechanical timing your model expects. Aftermarket kits sometimes claim universal fit, but I have seen fill cups that do not line up with the chute, harvest arms that bind on the tray, and connectors that sit loose enough to arc. OEM Whirlpool refrigerator replacement parts reduce those risks, keep installation time predictable, and protect the control board from out-of-spec components. If a control board fails after an off-brand part goes in, the savings vanish fast. When customers ask how to find parts for a Whirlpool refrigerator, I point them to the model and serial tag, typically inside the fresh food compartment on the right or left wall, or behind the lower crisper drawers. Matching Whirlpool refrigerator parts by serial number helps avoid mid-run design changes that use different harnesses or brackets. And yes, manuals matter. Whirlpool refrigerator manuals and care guides often include exploded views, wiring colors, and the Whirlpool refrigerator parts diagram that confirms screw counts or hidden clips. If you can, download the Whirlpool refrigerator troubleshooting manual for your exact model before you pull a single panel. One quick note on symptoms, since the ice maker often gets blamed unfairly: a Whirlpool refrigerator not cooling, or a Whirlpool fridge not cold enough in the fresh food compartment while the freezer stays fine, suggests airflow or defrost problems not an ice maker fault. Before installing a new W10659156A, make sure frost is not choking the evaporator and that the evaporator fan motor is running. If the freezer is a snow cave, solve defrost first. How I Diagnose Before Installing W10659156A
On service calls, I run through a short, repeatable checklist to separate water supply issues, control problems, and mechanical faults inside the ice maker. This avoids installing an assembly only to discover the water inlet valve never opened, or the freezer temperature sits at 20 degrees Fahrenheit and never reaches ice-making range. Start with freezer temperature. Whirlpool ice makers generally need the freezer at or below 10 degrees Fahrenheit, with 0 to 5 degrees ideal. If you only have a built-in display, use a small standalone thermometer. If the Whirlpool refrigerator not cooling but freezer is working, check actual temps, not just the feel. Poor airflow from a blocked return vent, an iced- over evaporator, or a Whirlpool refrigerator fan not working will stall ice production. Assess water supply next. Close the saddle valve back at the source, then open it fully to clear restriction. Inspect the refrigerator water line for kinks. Listen for the click and short hum when the ice maker calls for water. If the ice maker cycles but no water enters, suspect the water inlet valve or a frozen fill tube. A frozen tube often means a seeping valve that drips between cycles and ices the line, or a weak freezer door seal that lets warm air condense at the tube. Warm the tube gently, not with open flames. If the Whirlpool ice maker overflowing water, aim your attention at the valve and the ice maker’s fill calibration, not the tray itself. If the ice maker does not move at all, check the harness connection at the rear wall or the side panel, depending on configuration. Tug gently, do not yank. Corrosion or a half-seated plug will cause intermittent harvest. On some models a door switch or the ice maker on-off arm being stuck in the off position will disable cycling. I have seen the arm fall off during a packed freezer shove, so yes, “Whirlpool ice maker arm fell off” comes up more than you think. Re-seat the arm or replace it if the pivot is cracked. Step-by-Step: Installing the OEM Whirlpool Ice Maker Replacement W10659156A The process is very similar across bottom freezer, side-by-side, and French door models. Clear a workspace and take photos before removing anything. Photos save time when re-routing the harness or aligning the fill cup with the chute. This is my condensed field method that works on most configurations. Safety first. Unplug the refrigerator. If the cord is hard to access, switch off the breaker. Do not work a live harness. Remove ice bin components and, if necessary, shelves that block access. On side-by-side units, the ice maker is often mounted with two 1/4-inch hex screws on the side wall and one stabilizer tab. On bottom freezer units with ice in the freezer, the assembly mounts under a cover panel that comes off with a couple of screws and clips. Back out the mounting screws while supporting the ice maker, then tilt and lift to unhook it from the tabs. Find the wire harness connector. Release the locking tab with a small flat screwdriver or your thumb. If the connector fights you, do not pry on the wires. Work the tab itself. With the old unit free, compare the new W10659156A to confirm match: same tray style, same connector, same shaft length on the ejector. Install in reverse: plug in the harness until it clicks, set the fill cup into the water chute, and hang the assembly on its tabs. Tighten screws snug, not gorilla tight. If the alignment is off even a few millimeters, the fill stream will splash and freeze in odd places. Verify the on-off arm or switch is set to on. Restore power and perform a test cycle, either by using the ice maker’s test port (if present) or waiting for it to initiate. On models with a harvest test hole, a jumper wire between designated test points will start a cycle. Use the service sheet behind the toe-kick or hinge cover to confirm the correct points. If you do not have it, the Whirlpool refrigerator parts list manual or technical sheet for your model will show the test procedure. When the Ice Maker Still Will Not Produce Assume your install went smoothly and the W10659156A looks correct, yet the bin remains empty. Work the problem logically. Check water pressure at the dispenser. If your Whirlpool fridge water not working or the stream is weak, you will not get a reliable ice fill either. Replace a clogged filter or use a bypass plug to test. If the water dispenser is fine but the ice maker does not fill, measure voltage to the water inlet valve during the ice maker’s call for water. No voltage points back to the ice maker or control, while proper voltage with no flow suggests a failed valve or blockage. For Whirlpool ice maker not dispensing ice on models with an in-door bucket, inspect the auger motor and the dispenser switch. Bins can freeze together, stall the auger, and trip a motor protector. Remove the bucket, thaw, and ensure the chute is clear. If the auger does not turn at all when commanded, perform Whirlpool refrigerator control board troubleshooting and test the auger motor circuit. If the auger turns but nothing exits, you may have a clumped bin from warm air infiltration. Replace a torn door gasket and check the dispenser flap for a good seal.
Related Whirlpool Refrigerator Troubleshooting That Impacts Ice I get called for “ice maker not working” and end up fixing three other issues. The common ones: Whirlpool refrigerator leaking water, either from a clogged defrost drain or a brittle water filter housing, and the Whirlpool fridge sounds like a helicopter when ice hits the fan blades due to a frost build-up around the evaporator shroud. A clogged defrost drain Whirlpool owners can clear by removing the rear freezer panel, thawing the drain with warm water, and snaking a small line down to the drain tube. Replace a cracked duckbill check valve under the unit to stop repeat clogs. Noise complaints link back to ice intruding into the evaporator fan or a failing fan motor. If your Whirlpool freezer Repair Clinic OEM Replacement Parts fan not working, ice production drops, fresh food temps rise, and the ice maker stalls because the freezer cannot hold 10 degrees. The evaporator fan motor location is behind the rear freezer wall, and access means emptying the compartment. Expect brittle plastic on older units, so warm panels slightly before prying clips. If you need to remove the ice chute on certain French door models, pry the trim carefully, release the hidden tabs, and disconnect the solenoid plug. Force cracks the bezel and leads to a second repair. Lighting, Bins, and Small Parts That Are Worth Replacing While You Are There While the freezer is empty, I often address minor issues customers live with: Whirlpool refrigerator LED light replacement, a cracked Whirlpool refrigerator drawer slide rail, or a broken dispenser drip tray. LED boards can fail in a chain, so if your Whirlpool refrigerator lights not working or a WRQA59CNKZ light not working after a door slam, test the switch and module. Some models use a main LED driver, such as the Whirlpool refrigerator LED light control module W10289592. If that control fails, multiple lights go dark. Replace with the correct Whirlpool led light module and avoid mixing old and new assemblies without confirming compatibility. Drawers run smoother with new slide rails, and it is an easy win for everyday use. A fresh Whirlpool refrigerator drip tray replacement prevents water from wicking onto the floor during dispenser use. For aesthetics, a clean grille kickplate and level doors make the fridge feel new even after a repair. Customers notice the difference. Maintenance Habits That Keep the New Ice Maker Happy I tell folks to treat the ice maker like a small, patient machine that expects a steady environment. Keep the freezer between 0 and 5 degrees and the fresh food section around 37 to 38. Clear the condenser coils at least twice a year. On pet-heavy homes, do it quarterly. Poor airflow at the condenser raises sealed system pressures and heat, which quietly impacts freeze times. Replace water filters on schedule or measure dispenser flow to decide. If you find the Whirlpool fridge beeping or the display panel not working, document the code before a power reset. Defrost drains matter here too. If the refrigerator drain tube clogged, water pools, freezes near ducts, and can creep into the ice maker area. Know your Whirlpool refrigerator defrost drain location from the service manual, and keep it flowing. If you ever see Whirlpool refrigerator leaking water on floor after a defrost cycle, go Repair Clinic Parts straight to the drain and the duckbill under the unit. These small fixes prevent the kind of humidity and frost that shorten ice maker life. Quick Reference: Parts and Documentation Having the right references and a short list of high-failure parts cuts repair time. For OEM sourcing, service literature, and diagrams, bookmark a reliable parts catalog. You can browse OEM Whirlpool refrigerator replacement parts with diagrams and fitment filters, check thermistor specs when a Whirlpool refrigerator freezing food complaint appears, or confirm the exact dispenser bucket for your side-by-side. Pay attention to part revisions in product notes so you do not mix old and new harness styles. When in doubt, look up by model and verify by serial range. If the issue shifts from ice to water dispensing, remember the filter head and valve are prime suspects. A Whirlpool water filter housing replacement solves intermittent leaks and air intrusion that cause sputter or weak flow. For control symptoms or harvest timing faults after a power surge, review the technical sheet for error modes and test points before condemning the board. Two Focused Checklists You Can Use On-Site
Use these concise lists only when needed, then go back to normal prose troubleshooting. Pre-install checks for W10659156A: freezer at 0 to 10 F, water line not kinked, filter fresh or bypassed, fill tube clear, valve not seeping. Post-install checks: harness fully seated, fill cup aligned, on-off arm set to on, test cycle completed, first batch discarded. When the freezer is cold but no ice: verify ice maker power, door switch operation, inlet valve voltage during fill, and water pressure at dispenser. When cubes are hollow or small: replace filter, check household water pressure, inspect for partially frozen fill tube. FAQs: Fast Answers for Common Whirlpool Ice and Cooling Questions These are the questions I hear most when working through Whirlpool refrigerator problems, distilled to the essentials so you can move forward quickly. What is the most common problem with Whirlpool refrigerators related to ice production? Insufficient freezer temperature is the top culprit. If the compartment sits above 10 F, the ice maker slows or stops. Next are water supply issues, like a restricted filter or a weak inlet valve. Mechanical failure of the ice maker assembly ranks third, which is where the OEM W10659156A replacement comes in. Why is my Whirlpool fridge not cooling but freezer works? This often points to airflow. A failed or iced-over evaporator fan, a blocked return vent, or a defrost problem that builds frost around the coil will starve the fresh food section. Check the evaporator fan motor location behind the freezer panel, confirm it spins, and inspect the coil for heavy frost. How do I replace the LED light in a Whirlpool refrigerator? Unplug the unit, pry the lens gently, and release the light module clips. Swap the module with the correct OEM part. If multiple LEDs are out, the main LED control, such as module W10289592 on some models, may be the root cause rather than a single board. Where can I find Whirlpool refrigerator manuals and parts diagrams? Look for the service sheet taped behind the toe-kick or inside a hinge cover. For digital copies, search your exact model number for manuals and care guides. Exploded diagrams and a Whirlpool refrigerator parts list manual make fast work of screw counts and wiring colors. How do I troubleshoot Whirlpool refrigerator water dispenser issues? Check filter age and flow first. Inspect the water filter housing for cracks or air leaks. Verify the door switch, dispenser switch, and that the inlet valve energizes. If the fridge not dispensing water or ice but the pump hums, look for a frozen reservoir or iced dispenser chute. Which Whirlpool refrigerator part numbers are replaced most often alongside an ice maker? Water inlet valves, filter housings, door gaskets that allow warm air into the ice chute, and auger motors in heavy-use homes. Drawer slide rails and dispenser drip trays are frequent cosmetic-plus-function fixes during the same visit. Whirlpool Refrigerator Parts – Reliable OEM Solutions for Common Problems A new W10659156A can bring a Whirlpool back to daily duty in a single visit, but only if the basics are right. Confirm real temperatures, verify water flow, clear the defrost drain, and align the fill correctly. Replace related weak links like a seeping inlet valve or a tired filter head so the new ice maker is not set up to fail. With OEM Whirlpool fridge parts matched by model and serial, the repair will feel routine, your ice bin will stay full, and you will stop thinking about the refrigerator altogether, which is Repair Clinic the highest compliment a kitchen appliance can get.
If you need diagrams, service literature, or to shop parts with model-level filtering, try these resources: OEM Whirlpool refrigerator replacement parts Genuine Whirlpool ice maker parts Whirlpool water filter housing replacement