Download
1 / 69
690 likes | 708 Views
Learn how to manage fee categories and add new fees in SMT software. Step-by-step guide with illustrations for user convenience.

E N D
This demonstration will be taking you through the new look ‘Fees’ tab in SMT
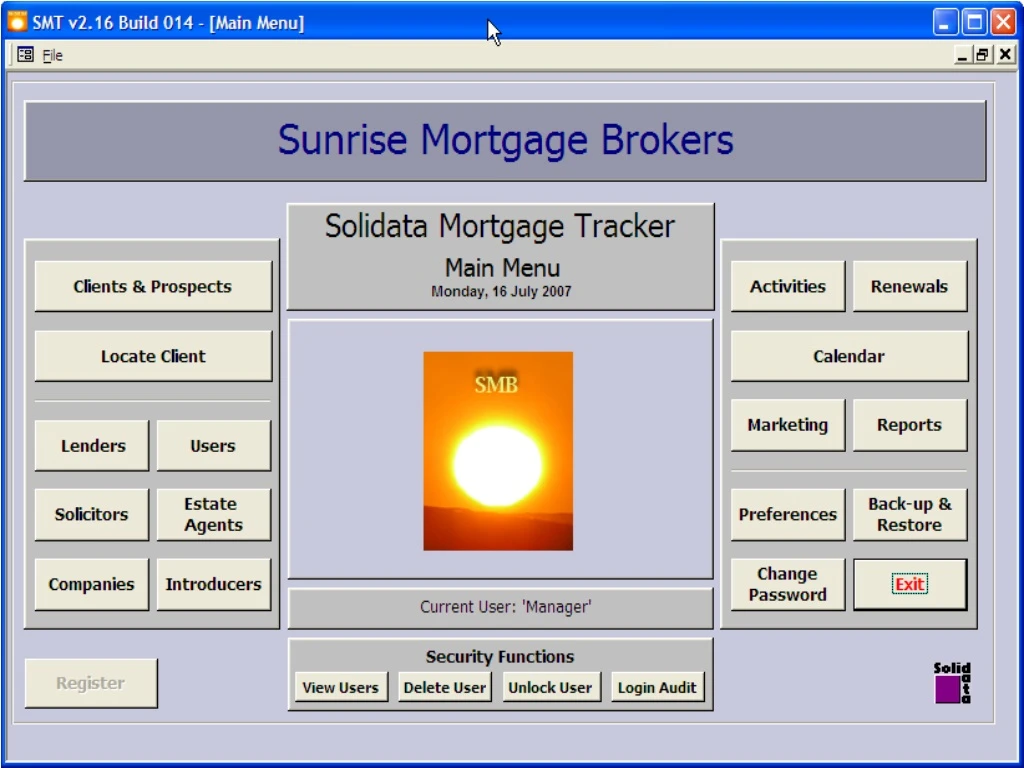
To get to the ‘Fees’ tab we need to go to Clients and Prospects
First select a client that you want to view the ‘Fees’ page for.
Then use the ‘Add/Edit Mortgage’ button to navigate to the Mortgage Details tab
From the ‘Mortgage Details’ tab, go to the ‘Fees’ tab. This is located here.
Now we will be looking in the Fee Categories by clicking the ‘Fee Category’ button
This page shows the various Fee Categories that are currently being used, what the heading will be in a report and what database list the fee category relates to.
To add a new category that is not included as default when SMT is installed, you need to click the button – ‘Add Category’
Clicking the ‘Add Category’ button will bring up this screen. As an example ‘Travel Insurance’ has been added. This category with use the database for ‘Companies’
To add a new product to a fee category, you need to click add
Clicking add will bring up this box. The name of the product needs to be entered into here. As an example European cover has been entered. Click ok to save the new product
To finish editing the fee category details, click ok to save
To delete a fee category you first need to ensure that no fees are linked to a particular category. A category cannot be deleted when fees have been allocated to that category. If you click this button a box will appear asking which category you want to delete.
Now you need to choose which category you want to delete from the list
Now you need to click the delete button to delete the fee category
If the category you are trying to delete is being used, you will get this message telling you it is being used and it cannot be deleted
When you have removed the category successfully it will be removed from the list and will not be available to select when you add a fee to a client
For the purposes of this tutorial I have added Travel Insurance back into the list so you can see how to create a new fee using this
To add a new fee to this client mortgage process, you need to click the ‘Add Fee’ button
Some fields use dropdown boxes because they have set options. If you want to choose a category that is not part of the list, you need to use the ‘Fee Category’ form
When a category is selected, additional information regarding this sale can be recorded and viewed in one of the reports available.
When a fee has been received and entered in this field, a ‘Date Paid’ must be entered as you will know this information from receiving the payment.
If the date field is not populated and you click ok, you will get a popup message like this one informing you that the field needs to be filled
The rule is the same if ‘Date Paid’ is populated, but the fee received is not yet entered.
If the amount received is not populated and you click ok, you will get a popup message like this one informing you that the field needs to be filled
The ‘Travel Insurance’ fee has now appeared in the list of fees. You may notice that this is the only category coloured. This is because I entered a field in the policy holder box.
This brings up the same box as the ‘Add Fee’ button does and all of the fields can be edited. Click ok to save changes or cancel to discard them. The ‘policy holder’ box is the field that applies colour to the category. There are different colours for main, secondary and joint policy holders.
The key to the colours is shown here. I have edited each category to show the colours and how it would look when you have entered all fields.
To select a category, you need to click anywhere along the row of the category
Then to delete a record, you need to have it selected, then click the ‘Delete Fee’ button shown below
You will then be asked if you want to delete the fee, if you select yes the fee will be immediately removed
For purposes of this tutorial I have kept travel insurance in the list
To view the ‘Fee Report’ for a single client, you need to click the ‘Fee Report’ button
This can be done with any category selected as it will populate a list of every fee , not just the selected one.
This generates a report showing all the information inputted into the previous screen. It also shows the advisor and the client(s) details
To close the report, click the grey cross. This will take you back to the fees tab
To view or add notes about any of the fees, you first need to click the ‘Show Notes’ button.