Client-Side Web Application Development with JavaScript
Client-Side Web Application Development with JavaScript. ISYS 350. Types of Web pages. Static page: The contents of a web page is predefined by HTML tags and other mark up languages. Example: david chao’s home page. Dynamic page


Client-Side Web Application Development with JavaScript
E N D
Presentation Transcript
Client-Side Web Application Development with JavaScript ISYS 350
Types of Web pages • Static page: • The contents of a web page is predefined by HTML tags and other mark up languages. • Example: david chao’s home page. • Dynamic page • A web page includes contents produced by a programming language when the page is opened.
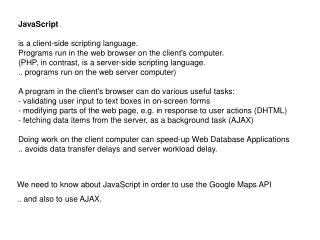
Technologies for Creating Dynamic Pages • Client-side technology • HTML • Browser Document Object Model (DOM) • JavaScript, JQuery • Cascade Style Sheet, CSS • Server-side technology • Microsoft .Net • Java • PHP • Others: Node.js, a server-side JavaScript
HTML Introduction • History: • http://en.wikipedia.org/wiki/HTML • Standard • The World Wide Web Consortium (W3C) • HTML 5: <!DOCTYPE html> • Multimedia controls • Video, audio, canvas • Controls with build-in validation
Online Resources for Learning HTML • w3schools.com • http://www.w3schools.com/default.asp
HTML Tags (Elements) • Heading section • <head>, <title>, <meta>, <script>, etc. • Body section • <body>, <div>, <p>, <h1> to <h6>, <a>, <br> • Formatting: <b>, <I>, <u>, <center> • Comment: <!-- comment --> • List <ul> • Image • Table: <table>, <tr>: a new row in table, <td>: a new cell in a table row. • Form: <form>, <input>, <select>
HTML Attributes (Properties) • HTML elements can have attributes that provide additional information about an element. • Attributes are always specified in the start tag • Attributes come in name/value pairs like: name="value“ • Name and value are case-sensitive and lowercase is recommended. • Examples: • <form id=“tf” name="testForm"> • <div id="content"> • <h1 class="center"> • <imgsrc="w3schools.jpg" alt="W3Schools.com" width="104" height="142">
FORM Tag • Client-side form attributes: • name: Form’s name, • id • For server-side form: • action: Specify the URL of a program on a server or an email address to which a form’s data will be submitted. • method: • Get: the form’s data is appended to the URL specified by the Action attribute as a QueryString. • Post: A preferred method for database processing. Form’s data is sent in the HTTP body.
A form may contains: • Textbox • Check box • Listbox • Radiobutton • Button • Etc.
Step by Step • 1. Add a form tag: • Name property • Action: server-side program; leave it blank for client-side • 2. Add lables by typing • 3. Add text input • 4. Add dropdown list: • Number of options • 5. Add radiobutton • Buttons of a group share the same Group Name • 6. Add button • Lable • Type: • Standard – client-side form to call a client-side click event procedure • Submit – for server-side form to submit to a server • 7. Add <br> to start a new line
Dropdown List Example <select name="Rate"> <option value=.04>4%</option> <option value=045>4.5%</option> <option value=.05 >5%</option> <option value=.055>5.5%</option> <option value=.06>6%</option> </select>
RadioButton Example:RadioButtons having the same name belong to one group <input type="radio" name="Year" value=10 />10 year<<br> <input type="radio" name="Year" value=15 />15 year<br> <input type="radio" name="Year" value=30 />30 year<br>
<form name="fvForm" > Enter PV: <input id='PV' type="text" name="PV" value="" /><br> Select Rate: <select name="Rate"> <option value=0.04>4%</option> <option value=0.045>4.5%</option> <option value=0.05>5%</option> <option value=0.055>5.5%</option> <option value=0.06>6%</option> <option value=0.065>6.5%</option> <option value=0.07>7%</option> </select><br> Select Year: <br> <input type="radio" name="Year" value=10 />10 year<br> <input type="radio" name="Year" value=15 />15 year<br> <input type="radio" name="Year" value=30 />30 year<br> <br> Future Value: <input type="text" name="FV" /> <br> <input type="button" value=“computeFV" name="btnCompute" onClick=“computeFV()" /> </form> Note: We can assign an id to a HTML tag (element).
Place Tags in a Table <table border="0"> <tbody> <tr> <td>Present value</td> <td><input type="text" name="pv" id="PV" value="" /></td> </tr> <tr> <td>Select rate</td> <td><select name="rate" id="Rate"> <option value=".04">4%</option> <option value=".05">5%</option> <option value=".06">6%</option> <option value=".07">7%</option> <option value=".08">8%</option> </select></td> </tr> <tr> <td>Select year</td> <td><input type="radio" name="year" id= "Year10" value="10" />10-year<br> <input type="radio" name="year" id="Year15" value="15" />15-year<br> <input type="radio" name="year" id="Year30" value="30" />30-year </td> </tr> <tr> <td>Future value</td> <td><input type="text" name="fv" id="FV" value="" /></td> </tr> <tr> <td></td> <td><input type="button" value="Comput FV" name="btnCompute" onclick="computeFV()" /></td> </tr> </tbody> </table>
HTML Tags and Eventshttp://www.w3schools.com/tags/ref_eventattributes.asp • Button, Radio button, check box: click event • Others: • Link <a> </a>: click, mouseOver, mouseOut • Area <area>: mouseOver, mouseOut • Body <body>: blur, error, focus, load, unload • Form: submit, reset • Textbox, Text area: blur, focus, change, select • List: blur, focus, change
Event Handler • Event handler name: on + event name • Ex. onclick • Calling a handler: • onclick="CompSumJS()“ • Execute one statement: • onclick="window.alert('you click me')" • Note: single quote/double quote
Example of Event Handler <script > function showSum(){ num1=parseFloat(window.prompt("Enter Num1: ")); num2=parseFloat(window.prompt("Enter Num2: ")); sum=num1+num2; window.alert("The sum is: " + sum.toString()); } </script> </head> <body> <form name="testText"> <input type="button" value="showTest" name="btnTest" onclick="showSum()"/> </form> </body>
Window Object • The Window object represents a Web browser window. • Methods: • window.open (“url”, “name”, Options) • Options: menubar=no, status=no, toolbar=no, etc. • window.close • window.alert(“string”) • Similar to C# messageBox.Show(“string”) • window.prompt(“string”) • present an input box for use to enter data • Try statements at: http://www.w3schools.com/jsref/obj_window.asp
Document Object • The document object represents the actual web page within the window. • Properties: • background, bgColor, fgColor, title, url, lastModified, domain, referrer, cookie, linkColor, etc. • Ex. document.bgColor=“silver”;
Navigator Object • The navigator object provides information about the browser. • Properties: • Navigator.appName:browser name • Navigator.appCodeName: browser code name • Navigator.appVersion • Navigator.platform: the operating system in use.
Location Object • Allows you to change to a new web page from within a script code. • To reload a page: • location.reload() • To open a page: Assign() • Ex. location.assign(URL)
History Object • Maintain a history list of all the documents that have been opened during current session. • Methods: • history.back() • history.forward() • history.go(): ex. History.go(-2)
Use document object to access data entered on a form • Using the future value form as an example: • Form name: fvForm • Textbox name: PV • Dropdown list: Rate • Radiobutton group name: Year
Accessing data entered on a form • Textbox: • document.fvForm.PV.value • Dropdown list: • document.fvForm.Rate.options[document.fvForm.Rate.selectedIndex].value • Radiobuttons: if (document.fvForm.Year[0].checked) {myYear=10;} else if (document.fvForm.Year[1].checked) {myYear=15;} else {myYear=30;}
CheckBox document.LoanForm.checkBox1.checked
Alternative way using the id attribute document.getElementById("PV").value
JavaScript Reference • http://www.w3schools.com/js/default.asp
Client Side Script • <script> • …… • ..statements • </script>
JavaScript Variable Declaration • var intrate, term, amount; • Data Type: • Variant - a variable’s data type is determined when it is initialized to its first value. • Variable scope: • Local: Variables declared in a function or procedure. • Global: Variables declared in the heading section, but not in a function or procedure. • Variable name is case-sensitive. • Note: We can use a variable without declare it.
Statements • Statements: • End with “;” • Block of code: { } • Comments: • Single-line comment: //comment • Block comment: • /* comment comment */
Arrays • var arrayName = new Array(array size); • var Pet = new Array(2); • Pet[0]=“dog”; • Pet[1]=“cat”; • Pet[2]=“bird”; Note: Optionally, it is not require to declare array size. var names=new Array(); names[0]="peter"; names[1]="paul"; names[2]="mary";
Use [] to define array var names=[]; names[0]=“peter”; names[1]=“paul”; names[2]=“mary”; Or simply: Names=[“peter”,”paul”,”mary”]
Operators • Arithmetic operators: +, -, *, / Math.pow(x,y), etc. • Math is an object with many methods such as round(x), random(), sqrt(x), ceil(x), floor(x), etc. • Note: “pow” has a lowercase p. • Comparison operators: = = , !=, <, >, <=, >= • Logical operators: &&, ||, !
Formula to Expression Math.pow(A,B) Math.pow(X/Y,A/B)
IF Statements JS: if (condition) { statements; } else { statements; } if (document.fvForm.Year[0].checked) {myYear=10;} else if (document.fvForm.Year[1].checked) {myYear=15;} else {myYear=30;}
Switch Case Statements switch(varable name) { case value1: statements; break; case value2: statements; break; … default: statements; break; }
Loop Structures • while (condition) { statements; } • for (var I = 0; I<5;I=I+1) { statements; } Note: Use Break statement to exit loop earlier. Ex. break ; //lowercase “b”
JavaScript’s Conversion Functions • parseFloat:for conversion to a floating-point number: • Ex. parseFloat('77.3') -> 77.3 • parseInt: for string-to-integer conversion • Ex. parseInt('123.45') -> 123 • toString(), toFixed(n) example: • Price=5; • Qty=10; • Amount=Price*Qty; • window.alert (Amount.toString()); • window.alert (Amount.toFixed(2)); //Show 2 decimals • eval • strVar = “5”; • numVar = eval(strVar)
Try Catch try { //Run some code here } catch(err) { //Handle errors here }
window.prompt: present an input box for use to enter datawindow.alert: like MessageBox function showSum(){ num1=parseFloat(window.prompt("Enter Num1: ")); num2=parseFloat(window.prompt("Enter Num2: ")); sum=num1+num2; window.alert("The sum is: " + eval(num1+num2)); window.alert("The sum is: " + sum); }
JavaScript Functions • Defining functions • function functionName(arg1,..,argN){ • Statements; • return valueToReturn; } Note: 1. The arguments are optional. 2. The return statement is optional. A JavaScriopt function is not required to return a value. 3. Typically the JavaScript functions are embedded in the <head> section.
Example: JavaScript to Compute the sum of two values <script> function computeSum(){ n1=document.sumForm.num1.value; n2=document.sumForm.num2.value; document.sumForm.sum.value=eval(n1)+eval(n2); //document.sumForm.sum.value=parseFloat(n1)+parseFloat(n2); } </script> </head> <body> <form name="sumForm"> Enter Num1: <input type="text" name="num1" id="num1" required /><br><br> Enter Num2: <input type="text" name="num2" id="num2" value="" /><br><br> Sum: <input type="text" name="sum" id="sum" value="" /><br><br> <input type="button" value="Compute Sum" name="btnCompute" onclick="computeSum()" /> </form> </body>
<form name="fvForm" action=""> Enter PV: <input id='PV' type="text" name="PV" value="" /><br> Select Rate: <select name="Rate"> <option value=0.04>4%</option> <option value=0.045>4.5%</option> <option value=0.05>5%</option> <option value=0.055>5.5%</option> <option value=0.06>6%</option> <option value=0.065>6.5%</option> <option value=0.07>7%</option> </select><br> Select Year: <br> <input type="radio" name="Year" value=10 />10 year<br> <input type="radio" name="Year" value=15 />15 year<br> <input type="radio" name="Year" value=30 />30 year<br> <br> Future Value: <input type="text" name="FV" /> <br> <input type="button" value="ComputeFV" name="btnCompute" onClick="ComputeFV()" /> </form> Note: We can assign an id to a HTML tag (element).