Download
1 / 13
130 likes | 136 Views
Below you can see how to mud drywall with all steps and know the mud types for you. Follow these useful tips to make your wall look flawless and beautiful.

E N D
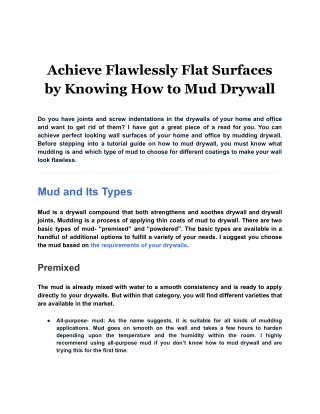
Achieve Flawlessly Flat Surfaces by Knowing How to Mud Drywall Do you have joints and screw indentations in the drywalls of your home and office and want to get rid of them? I have got a great piece of a read for you. You can achieve perfect looking wall surfaces of your home and office by mudding drywall. Before stepping into a tutorial guide on how to mud drywall, you must know what mudding is and which type of mud to choose for different coatings to make your wall look flawless. Mud and Its Types Mud is a drywall compound that both strengthens and soothes drywall and drywall joints. Mudding is a process of applying thin coats of mud to drywall. There are two basic types of mud- “premixed” and “powdered”. The basic types are available in a handful of additional options to fulfill a variety of your needs. I suggest you choose the mud based on the requirements of your drywalls. Premixed The mud is already mixed with water to a smooth consistency and is ready to apply directly to your drywalls. But within that category, you will find different varieties that are available in the market. ● All-purpose- mud: As the name suggests, it is suitable for all kinds of mudding applications. Mud goes on smooth on the wall and takes a few hours to harden depending upon the temperature and the humidity within the room. I highly recommend using all-purpose mud if you don’t know how to mud drywall and are trying this for the first time.
● Top-mudding: It has less adhesive powers and is used for only a final top mud coating. It dries to bright white and is very easy to sand. It is the optimal choice for all those drywall that is painted with light colors. Light-weight all-purpose mud: It dries to a lighter shade and hence suitable to the wall that will take pale paint. You may use it to mud for second and third coatings on the walls ● Powdered This contains chemicals that react to water and hasten hardening time. This mud shrinks less than all-purpose premixed mud but hardens faster. Powered mud suits well for pre-filling large gaps or soothing over crusher drywall corners before starting actual mudding of the drywall. It comes up with the following variants: ● Timed drywall mud: Setting mud or powdered mud is labeled by the time it takes to set. For example you can have from 5-minute mud to 20-minute mud from the market based upon the time it takes to harden. Remember while using timed drywall mud, mix only as much as you need the amount mud. Also, you must wash your tools frequently as you work. Easy- to stand drywall mud: The chemicals in some type of mud harden to rock like ridges on your wall. You have to sand for hours to get them off. It is better if you use easy- to the sand type of mud. ● Types of Drywall Tape These are tape that acts as a bond to keep the finished wall from developing cracks along with the drywall. Following are types of tape available depending upon their use.
Paper tape Source: awwong.com It is very thin and is used to create imperceptibly smooth joints. They come up with a crease down the center that helps you to bend it along the same to form sharp wall corners.
Mesh tape Source: leadongcdn.com Made up of fiberglass threads in an open-weave pattern, mesh tapes are thicker than paper tape. They come up with adhesive on the backside and you can easily fix them over a dry joint. You should apply the first coat of mud after fixing the mesh tape over dry joints.
Preformed tape Source: ntsigns.com They are made up of paper, plastic, or thin metal. You can also find preformed tape made up of a combination of materials in the market. It is mostly used on the outside wall corner for smoother looks. Some of them require nailing while others are adhesive.
Tools to Get Before Starting on How to Mud Drywall Source: nccdn.net ● ● ● ● ● ● ● ● ● ● ● ● Canvas drop cloth Safety goggles and respirator mask Drywall mud Drill Paddle bit for drill Large plastic bucket Mud pan 6-inch drywall taping knife 10-inch drywall taping knife Inside-corner taping tool Drywall pole sander Power drywall sander Nylon bristle brush
● 5-gallon water bucket All Set to Know How to Mud Drywall If you are good enough to differentiate different mud types and understand the different drywall tapes you need for your wall, you are all set to get started with how to mud drywall guide. I come up with 10 easy steps that will make you understand how to tape and mud drywall like professional expertise. Protect the Floor Mudding is a little messy. Before starting the mudding drywall, you must keep your floor safe from all the mud splatter and this becomes our first step on how to mud drywall guide. You must cover the floor with a canvas cloth, don goggles, and old clothing. You must not use plastic cloth. Plastic cloth can become slick with mud on it. You also need to protect yourself from mud as splatter can sting if they get into your eyes.
Choose the Mud Source: bobvila.com If you are using premixed mud then you are all good to go with how to mud drywall guide by just opening the lid of the container. However, if you decide to use powdered mud, mix the powder with the right amount of water. My how to tape and mud drywall suggest you to mix the water in proportion to the mud that has been recommended by the manufacturer of the mud powder. Next, you need to beat the solution until it is smooth. You can use a heavy-duty drill fitted with a paddle bit to beat the same.
Apply First Coat of Mud to Screw Indentations and Factory Joints Source: thespruce.com When the bevels are joint together, they form a small indentation. You should use a 6 inches taping knife to smooth them and then apply the mud evenly into the joint using our how to mud drywall guide. You should then wipe away the excess mud. Cover Mudded Joints with a Piece of Tape You have to cut the piece of paper tape as per the size of the joint and run it over it. Make sure that you run the tape while the mud is still wet for the process called bedding. Use a 6 inches knife to smooth mud and work out on bubbles as you go through. Wiping away excess mud is the prime step of our how to mud drywall guide.
Tape Drywall Corners Source: thespruce.com For those who are wondering how to tape drywall corners, I have come up with an easy trick in this how to tape drywall tutorial. Apply mud to both sides of inside corners first. Make sure to work into the center. Cut the pre-creased paper tape, fold it and fix it into the corner over the wet mud. You must now smooth the paper tape with light strokes. You can use a 6 inches knife or inside-corner taping tool for this. Wipe away the excess mud while smoothing the tape. After doing the inside corners, you can now use preformed tape corners for outside ones. You must then smooth mud by doing long vertical strikes on both sides to form a sharp uniform corner.
Avoiding Mud Butt Joints Butt joints occur when you fit together un-tapered ends of drywall. However, you can avoid them by using sheets of drywall that span the entire room. But it is more challenging if you have to deal with ends that have no beveled indentations. Mud them in the same way as you did beveled indentations using our how to mud drywall guide. Second Coat Source: homenish.com Apply a thin layer of the second coat of mud to screw indentations, beveled joints, and inside and outside corners in the same order as the first coat but with only mud.
You don’t have to use paper tape for the second coat as you did in step 3 of how to mud drywall guide. Butt Joints Second Coat For the second coat to butt joints, suggest you to take a 10 inches knife in this how to mud drywall guide. Apply 2 swaths of mud to butt joints that are approximately 8 inches wide. You must apply mud to both sides of the first joint coat but not on top of the original joint. You must then smooth the edges of the swath by feathering out the extra mud. Third Coat Source: ibsrv.net Apply a thin third layer of mud after the second coat dries. I suggest that you should use a 10 inches knife for all screw indentations, corners, and beveled joints in this
how to mud drywall guide. On butt joints, you should apply a thin layer of mud over previous swathes and the original mud joint. Sand the Mud the Dried Mud Grab your respirator and sand all joints and nail indentations until you get a perfectly smooth look on your wall. Conclusion It is important to prime after installation of new drywalls otherwise the new surface will be porous and absorb the color of paint. Though mudding may sound a bit messy to you when done correctly, the result is flat and smooth drywalls. All you need is the right guide on how to mud drywall to get it right and you can save up to 100$ by doing it yourself. With perfect mudding, no one can find indentations beneath and have a fabulous polished look. For more information on home improvement, visit HouseDecorationTip. Contact Us : Website : https://housedecorationtip.com Email Id : housedecorationtip@gmail.com To Connect With Us Visit