Download
1 / 12
120 likes | 244 Views
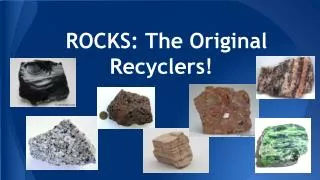
ROCKS: The Original Recyclers!. Rocks Have Options . Rockin’ Terms:. Weathering: The wearing away or breaking down of rocks by… 1. 2. 3. 4. 5. Rockin’ Terms:. Erosion: The movement of sediments produced after weathering, usually by... 1. 2. 3. Rockin’ Terms:.

E N D
Rockin’ Terms: • Weathering: The wearing away or breaking down of rocks by… 1. 2. 3. 4. 5.
Rockin’ Terms: • Erosion: The movement of sediments produced after weathering, usually by... 1. 2. 3.
Rockin’ Terms: • Deposition: When sediments are dropped off in a new location after erosion.
Let’s Recycle Some “ROCKS”! Step 1: Use the tools available at your station (pencil sharpener, cheese grater, penny) to shred your crayon-rock into a pile of shavings. *Think back to the rock cycle terms...What process of the rock cycle are we doing? • Erosion • Weathering • Depositing
Step 2: One at a time, each person should bring their shavings to the bigger piece of tinfoil. *Think back to the rock cycle terms...What process of the rock cycle are we doing? • Erosion • Weathering • Depositing
Step 3: Take turns laying your shavings down, one color one top of the other. *Think back to the rock cycle terms...What process of the rock cycle are we doing? • Erosion • Weathering • Depositing
Under Pressure... Step 4: Carefully fold the piece of tinfoil in a square so the layers you created are all covered. Step 5: Take turns applying pressure. You can put the tinfoil between blocks and stand on them if you want. Try not to jump. That could rip the foil.
We have created a new kind of Rock! Step 6: Carefully unfold the tinfoil and observe the new rock. Work as a team to identify the newrock. Step 7: Write in the name of the new rock on your rock cycle sheet.
Let’s Add a Little Heat and More Pressure... Step 8: Work as a team to predict what will happen when your rock is heated and more pressure is applied. Step 9: Refold your tinfoil packet and bring it to a heating station. Heat for 30-60 seconds. NEXT apply more pressure by putting it under the block and standing on it. • Step 10: Carefully unwrap your rock and identify thenew rock. Write in the name of the new rock on your rock cycle sheet
Melting it and Cooling it... Step 11: Get a “magma chamber” from the front. Place your rock in the chamber and bring it to a heating station. Once the rock is completely melted, carefullypour the magma into the water container. • Step 12: Write in the name of the new rock on your rock cycle sheet.