Download
1 / 7
70 likes | 150 Views
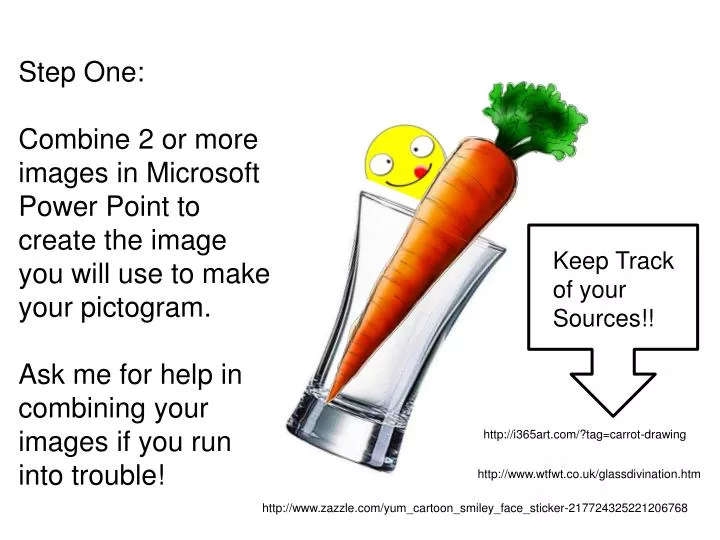
Step One: Combine 2 or more images in Microsoft Power Point to create the image you will use to make your pictogram. Ask me for help in combining your images if you run into trouble!. Keep Track of your Sources!!. http://i365art.com/?tag=carrot-drawing.

E N D
Step One: Combine 2 or more images in Microsoft Power Point to create the image you will use to make your pictogram. Ask me for help in combining your images if you run into trouble! Keep Track of your Sources!! http://i365art.com/?tag=carrot-drawing http://www.wtfwt.co.uk/glassdivination.htm http://www.zazzle.com/yum_cartoon_smiley_face_sticker-217724325221206768
Step Two: Group your picture then copy and paste it into a new Macromedia Freehand document. Drag the foreground layer down, lock it, then create a new layer to work with.
Step Three: With the pen tool draw an outline around the drawing. Fill it in with black, don’t worry about any of the detail at this point: • Be Careful!! • Start with the black arrow clicked. • Then click on the pen. • As you go around your drawing, you can alternate between “p” and “a” as I have shown you, but DO NOT double click (this finishes the line) until you get all the way around to where you started again. • Select the black fill under colour on the bottom left side of your screen.
Step Four: In the layers palette, click the little grey dot on Layer Two, this will make the fill invisible, but still show the outline. Make a new layer, trace some of the lighter areas and fill them in with white (or other colour of your choice): NOTE: When you have the grey dot clicked you will not be able to see that the lines you are making are changing colour or that the fill you are selecting is working. Just unclick the grey dot to check your progress.
You can continue to add details until you are happy with the final results. Remember to add a new layer before making each addition.
To Save as JPG • In Freehand, zoom in so that you can see your entire pictogram on the screen, but so that it is as big as possible. • Hit the print screen button on your keyboard • Go back to your Power Point Document , on a new slide click “paste” • With this image clicked, go to the picture tool bar and select crop • Crop your image until it only shows the pictogram • Adjust the size until it is as big as possible • Select File > Save As • In the drop down menu next to the file type select JPG • When prompted, select this slide only. Give it a sensible name and save it to the correct folder. • You will now find a JPG of your pictogram in your folder!