Download
1 / 21
210 likes | 342 Views
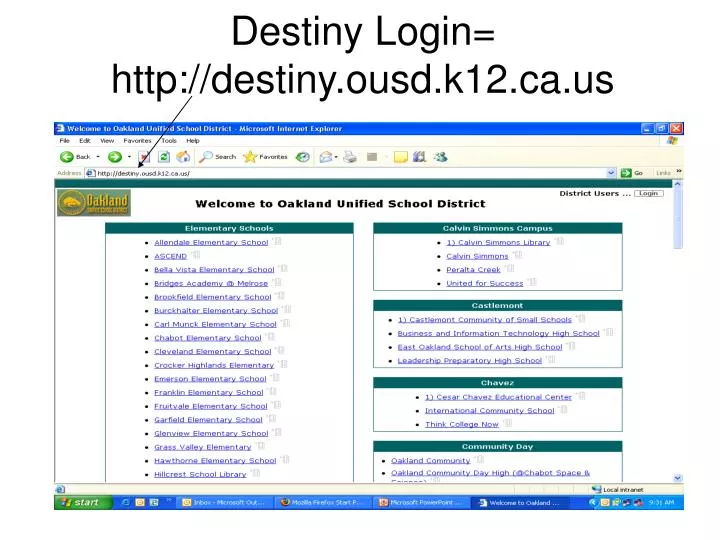
Destiny Login= http://destiny.ousd.k12.ca.us. Destiny home page login= http://webportal.ousd.k12.ca.us/ ; scroll to bottom of page—click on Library icon. Select your Library’s name. Login. Use your own login.

E N D
Destiny home page login=http://webportal.ousd.k12.ca.us/; scroll to bottom of page—click on Library icon
Go to back Office to setup your Library policies; look at patron and circulation tabs to make edits
Look at Reports function; note Bibliography and spine labels
Got to Patrons tab; note overdue materials and patron barcodes
Look at Job Manager; all of your reports will be stored here; you will need to Refresh List for any “pending” jobs before you can view.
Let’s look at the Library Catalog; click on the tabs to study the options available to you
Go to Circulation and try checking a book out to yourself or one of your patrons. Get their name up by typing it in and then scan the books.
Check in is easy! Go to the Check- In function and scan all the books in your pile—you do not need to access the name of the patron.
Now let’s add a new title to your collection; be sure the cursor is blinking in the box to the left of the go! Button.
Click on the title in the results and see if it is what you want; then add the title by clicking “Add Copies”
Correct the record—a very important step! Three things to remember here: (1) add District barcode, (2) correct Dewey number, and (3) add price. Then SAVE!
You should see confirmation; note the change in Dewey number; click Add Title to repeat process with next book.
For deleting titles use Update Copies function key and indicate that you want to track the weeding (for future reports)
To Fully Process your new book remember: • Cover it if possible; use mylar or laminate • Stamp it with your address stamp-2 places • Barcode it and be sure it is entered into Destiny • Print out spine label and apply ½ inch from bottom of spine. • Cover barcodes and spines with protectors • Display new books where students will see them
Don’t forget! • Never order new books from a vendor without full processing; see handouts provided for District specifications. • Call the District Library Services at 879-8271 if you use a new vendor who is not in the IFAS system or if you need assistance.