Download
1 / 87
870 likes | 1.06k Views
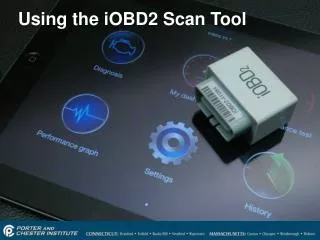
Using the iOBD2 Scan Tool. iOBD2. The iOBD2 interface is an inexpensive and easy to use diagnostic interface that allows the technician to: Read and record DTCs [Diagnostic Trouble Codes] Read freeze frame data Reset the ‘check engine’ light after a repair

E N D
iOBD2 • The iOBD2 interface is an inexpensive and easy to use diagnostic interface that allows the technician to: • Read and record DTCs [Diagnostic Trouble Codes] • Read freeze frame data • Reset the ‘check engine’ light after a repair • Read and record live data and display it as a graph • Read OBDII monitor statuses
iOBD2 • The iOBD2 can also display custom dashboard • Performance data can be obtained by combining vehicle data and GPS data to determine horsepower and torque during a road test
Getting started • Open the App Store to download the software application App Store • Type iOBD2 into the search box then hit the ‘Search’ button on the keyboard
Download the X-Tool application • In the menu bar select ‘iPad only’ • Select the iOBD2 app by X-Tool Tech and tap on ‘Free’
Setup Bluetooth • Insert the iOBD2 unit into the OBDII DLC connector under the dash • The DLC is a sixteen pin ‘D’ shaped electrical connector
Diagnostic Link Connector location • The DLC is located inside the cabin, within arm’s reach of the driver 300mm Left side location is MAX 300mm from the vehicle centerline Most likely locations Alternate locations
Diagnostic Link Connector location • Normally the DLC is located under the steering column • The iOBD2 interface module is powered by the +12 volt and ground terminal on the DLC
Connecting the iOBD2 interface • Insert the iOBD2 interface into the DLC
Go to ‘Settings’ to link by Bluetooth • Go to the settings App on your iPad to setup the Bluetooth link between your ipad and the iOBD2 interface module • Make sure that no one else in your area is currently using their iOBD2 while you are setting up the Bluetooth connection • If there are other students using a Bluetooth linked iOBD2 device move to another area of the shop or make the Bluetooth link outside the shop
Settings • Go to Bluetooth and turn Bluetooth on • Select the iOBD2 interface module
Open the iOBD2 App • You will be asked to setup a vehicle file the first time you open the App • Input the data for the vehicle you currently drive or will use the iOBD2 interface on most often • NOTE. The iOBD2 interface works only on vehicles built in MY 1996 and later • Select the iOBD2 icon to open the App
Connection Failure! Select ‘Settings’ from the main screen
Select ‘Connections‘ on the settings menu • Select connection to change the wireless interface type
Before connecting to the interface the app needs to know the type of connection • Select ‘Bluetooth MFI’ then return to the main screen
Connecting to the iOBD2 interface • When you return to the main screen you should see ‘Please wait’ at the top of the screen and a flashing ‘Bluetooth’ icon in the upper left corner while the handshake between the ipad and the interface module is being made • If ‘connection failure…’ is shown at the top of the screen check the Bluetooth settings in the iPad settings screen. If the Bluetooth setup looks good check for power and ground at terminals 4, 5 and 16 at the DLC Please wait …
Main Screen • When ‘Connection Successful’ is shown on the top of the screen the interface is ready for use Connection Successful
Main menu • The diagnosis menu is a generic OBDII scan tool that is used to read codes, read serial data, check monitor readiness status and view freeze frame data
Main menu • The ‘My dashboard’ allows you to set up custom dash instruments that can be seen easily as you drive the vehicle • Note: Whenever a scan tool is connected to the DTC the communication between the scan tool and vehicle may interfere with the normal operation of the vehicle
Main menu • The ‘Performance Test’ links data from the iOBD2 interface with data from the iPads GPS unit. • This test is useful in evaluating the performance of the vehicle before and after making modifications to the engine or driveline • Test done in this app need to be repeatable – 20 to 60 mph acceleration tests without changing gears is a better test than a 0-60 test as there should be no wheel spin during the test.
Main menu • The performance graph calculates horsepower and torque during an acceleration test and displays the results as a graph • The vehicle weight needs to be input into the ‘settings/vehicle’ screen before torque and power can be calculated
Main menu • The ‘Settings’ screen is used to change: • Wireless communication protocol • Units of measure • Folders for vehicle history records • Custom alarms
Main menu • The ‘History’ screen is used to recall data from prior tests • Whenever you see in the upper right corner, you can save all the data on the screen to the current active folder by tapping on the save button • The active folder is the folder you select or setup in ‘Settings’ when you first connect to the vehicle
Create a folder for vehicle data • Open the settings screen and select vehicle
Select ‘Vehicle’ to change the vehicle data folder or create a new folder • All saved vehicle data will be stored in this folder • Each time you save data a new sub folder labeled with the current date is saved in the history folder
Use the thumb-wheels to input Make, year and engine size • Use the keyboard to enter the Model
The vehicle folder with the check mark is the active folder where all data will be saved • Select the info icon on the right to edit the folder properties
Vehicle information • The information screen allows you to edit some of the data • You can alter the model to help identify the vehicle – ‘Bob Smith’s 2011 Civic’ • This is also where you can delete the vehicle
Scan Tool Operation • Select ‘Diagnosis’ from the main menu to begin using the iOBD2 in scan tool mode
Diagnosis main screen • The ‘Diagnosis’ main screen has 8 sub-menus
Trouble codes • Select ‘Trouble Codes’ to view: • Currently active trouble codes • Pending trouble codes • The ‘Trouble Codes’ is also used to reset the ‘Check Engine’ light • Note: resetting the ‘check engine’ light will erase all freeze frame data and reset all monitor statuses to ‘not tested’
Trouble codes • If there are multiple codes you may need to scroll to the bottom to read them all • Tapping on the info icon will give you a brief explanation of the code
Trouble codes • The built in code database is limited • Copy the code[s] and go to AllData for more information on what the code means and how to test the system to determine the exact cause of the code
Trouble codes • If a fault occurs the will cause the vehicle to exceed 150% of the allowable emissions for that model year a Pending Code is set in the vehicles computer memory • If the same fault occurs in two successive trips the ‘Check Engine’ {MIL} light will illuminate and a hard code will be recorded* • The vehicles OBDII system monitors the operation of the emission control system * with some exceptions
OBDII Drive cycle [Trip] • The OBDII systems runs diagnostic for all emissions related system during a complete drive cycle [trip]. • A drive cycle begins with an engine start when the coolant temperature is below 160 degrees F. • The coolant temperature must rise 40 degrees F during the trip • The vehicle must idle for a least 45 seconds and must be driven at speeds between 20 and 40 mph for 4 minutes or more
OBDII Drive cycle [Trip] – cont. • About 10 seconds of ¼ throttle or more acceleration is required and the vehicle must decelerate to 0 mph at some point • A short acceleration of up to 55 mph at ½ throttle is needed as well • The test should cover 8 to 10 miles of driving and take about 12 to 15 minutes to perform all the test. • If the trip does not fulfill all of the requirements any test data recorded during the test is erased
Pending codes • If a fault is detected during a completed trip a pending code is set – the check engine light will not illuminate • If the same failure is not detected on the next completed trip the pending code is automatically erased
Hard codes & freeze frame • If the same fault happens on two consecutive trips the ‘check engine’ light illuminates and a hard code [DTC] is recorded in the vehicles memory • The moment the code is set a number PIDs [parameter ID] are recorded in memory as an aid to the technician in determining the root cause of the failure • PIDs stored in freeze frame include: Engine RPM Vehicle Speed Coolant Temperature MAP and MAF values Throttle position Calculated load Loop status O2 sensor voltage[s] Short term fuel trim Long term fuel trim Intake air temperature Ignition timing
Late model vehicles have permanent [non-erasable] codes that remain locked in memory after a DTC reset
Trouble Codes P0123 Specific circuit or system Body Chassis Powertrain Network 0 = Total System 1 = Fuel Air Control 2 = Fuel Air Control 3 = Ignition System 4 = Auxiliary Emissions Systems 5 = Idle Speed Control 6 = PCM & I/O 7 = Transmission 8 = Transmission 0 = SAE [Generic] 1 = Manufacturers All OBDII Codes are 5 characters long
Clearing codes • Tapping on the ‘Clear Trouble Codes’ button will erase all trouble codes and turn off the ‘Check Engine’ light • Besides clearing the codes all of the freeze frame data will be erased
Before clearing codes tap on the ‘Save’ button in the upper right corner • This will save the code to the history file [on your iPad ]
Live Data • Live data is the meat and potatoes of the OBDII diagnostic system. • Live data displays the output of selected sensors and may also display PCM output commands • The amount and type of data displayed varies with the vehicle, model year and the software application • Software updates can sometimes be purchased that provide a greater amount of vehicle sensor and output data
Tap on each PID[Parameter ID] you want to view • Alternatively you can tap on ‘All’ to select all available PIDs • If the vehicle network is slow the data updates may take several seconds[slow frame rate] • You may want to select just a few PIDs so that the data update is faster
After selecting all the PIDs you want to view tap ‘Done’ to begin receiving live vehicle data • Tapping the ‘Inverse’ button clears all the selected PIDs
Data for each selected PID now appears on the right side of the screen • Tap anywhere on the PID line to display the data as a graph
The pause button in the upper right corner allows you to freeze the display • The scale on the left side will auto-range to fit the maximum and minimum values
Saving a screen Sleep / Wake button • If you want to save a data display: • Press and hold the Sleep/Wake button • Press the Home button • The screen will flash white for a second and you should hear the camera shutter sound • The image is stored in the ‘Photos’ folder on the main screen Home button