Download
1 / 2
20 likes | 164 Views
Efficiently recover lost data from iTunes backup on Mac

E N D
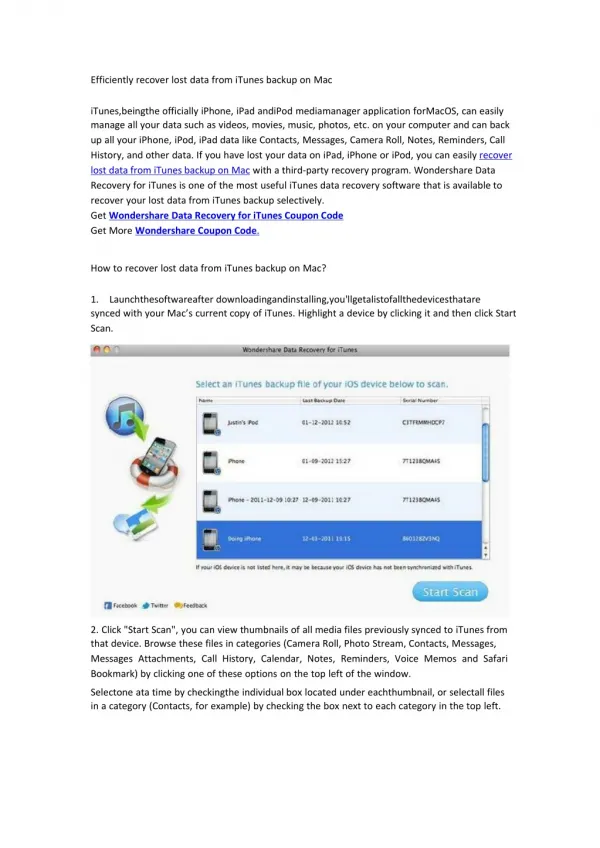
EfficientlyrecoverlostdatafromiTunesbackuponMac iTunes,beingtheofficiallyiPhone,iPadandiPodmediamanagerapplicationforMacOS,caneasily manageallyourdatasuchasvideos,movies,music,photos,etc.onyourcomputerandcanback upallyouriPhone,iPod,iPaddatalikeContacts,Messages,CameraRoll,Notes,Reminders,Call History,andotherdata.IfyouhavelostyourdataoniPad,iPhoneoriPod,youcaneasilyrecover lost data from iTunes backup on Macwithathird-partyrecoveryprogram.WondershareData RecoveryforiTunesisoneofthemostusefuliTunesdatarecoverysoftwarethatisavailableto recoveryourlostdatafromiTunesbackupselectively. GetWondershare Data Recovery for iTunes Coupon Code GetMoreWondershare Coupon Code. HowtorecoverlostdatafromiTunesbackuponMac? 1.Launchthesoftwareafterdownloadingandinstalling,you'llgetalistofallthedevicesthatare syncedwithyourMac’scurrentcopyofiTunes.HighlightadevicebyclickingitandthenclickStart Scan. 2.Click"StartScan",youcanviewthumbnailsofallmediafilespreviouslysyncedtoiTunesfrom thatdevice.Browsethesefilesincategories(CameraRoll,PhotoStream,Contacts,Messages, MessagesAttachments,CallHistory,Calendar,Notes,Reminders,VoiceMemosandSafari Bookmark)byclickingoneoftheseoptionsonthetopleftofthewindow. Selectoneatatimebycheckingtheindividualboxlocatedundereachthumbnail,orselectallfiles inacategory(Contacts,forexample)bycheckingtheboxnexttoeachcategoryinthetopleft.
3.Afteryou’vecompletedselectingallthefilesyouwanttorecover,justclickRecoverinthemenu3.Afteryou’vecompletedselectingallthefilesyouwanttorecover,justclickRecoverinthemenu bar.AttheSaveprompt,you’llbeaskedtonameandselectthedestinationfolderforyour recoveredfiles(Desktop,forexample).Yourfilewillexportimmediatelytothelocationyou specified.Nowyou’realldone.Simple,right?Toscan,viewandrecoverfilesfromanotherdevice, justclicktheBackbutton.Enjoyyourreclaimedphotos,videos,andmore!