dfos: tutorial
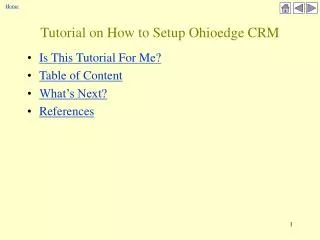
dfos: tutorial. www.eso.org/~qc/dfos/. Lesson 1: dfos - vision and architecture Directory structure Installation Tips and tricks. Lesson 2: Association. Lesson 3: Operations. Vision. Complexity ... ... comes by itself: Simplification ... ... needs efforts

dfos: tutorial
E N D
Presentation Transcript
dfos: tutorial www.eso.org/~qc/dfos/ • Lesson 1: • dfos - vision and architecture • Directory structure • Installation • Tips and tricks • Lesson 2: • Association • Lesson 3: • Operations
Vision • Complexity ... • ... comes by itself: • Simplification ... • ... needs efforts • The answer: dfos = Data Flow Operations System • www.eso.org/~qc/dfos/
dfos tools dfos regime user regime config files Vision • To obtain … • common understanding of tools and workflows • contributions from everyone possible • easier multi-tasking • cross-instruments training possible • Principle: • all workflow steps in common dfos tools • all instr-specific info in config files
Architecture Tools for two workflows: • daily workflow • packing workflow Level 1 tools: called by user Level 2 tools: called by level 1 tools Interaction: • command line • graphical user interfaces: DFO monitor; SM monitor (self-managing HTML pages)
Architecture Inter-tool “communication”: status flags • DFO_status; SM_status etc. (read by monitors) • possible to be read by wrapper tools $DFO_MON_DIR/DFO_STATUS:
Architecture central element of dfos: the Association Block AB (--> Lesson 2)
Architecture daily workflow sketch:
Directory structure • dfos needs well-defined directory structure • environment variables • many have DATE substructure, with DATE as 2005-01-14: • e.g. $DFO_RAW_DIR • others are flat • e.g. $DFO_MON_DIR • one is more complex: • $DFO_SRV_DIR/<run_id>/<DATE>/raw etc. • $DFO_SRV_DIR/<run_id>/<obs_id>/sci_raw etc.
Installation Get a complete installation of dfos (daily workflow) in four steps: 1. Getting started 2. Initial tool set 3. Creating ABs 4. Finish installation this is where you can get without ABs
Step 1: Getting started Obtain a dfos installation: • prepare the initialization file .dfosrc • prepare the dfos directory structure • download dfos tools • prepare the configuration files 1. Prepare your account and install the initialization file .dfosrc download .dfosrc into $HOME edit as appropriate create directory structure as defined make sure .dfosrc is sourced properly 4x : ok, continue
Step 1: Getting started 2. Install dfosExplorer (by hand): download and untar execute 2x : ok, continue 3. tune your browser to become more interactive (tune your browser) 4. Read the documentation (‘help’ and ‘dfos’)
dfosExplorer use action button to download edit config file
Step 2: Initial tool set 5. Install dfosInstall (using dfosExplorer) 6. Install: • dfosLog • dvdMonitor and dfosCron • dfosInstall: new installation/upgrade • new installation: installs everything, incl. template config file (old one saved!) • upgrade: config file is installed in $DFO_CONFIG_DIR/template (no overwrite!) • config files: always come as template; some need no editing at all, others need heavy editing. Always read documentation, all configurable parameters are documented! Remember: config files are your contribution and your responsibility.
Step 2: Initial tool set 7. Install: dataclient, fitsreport, createReport, checkDownloads • these tools define the pre-processing part of dfos • they don’t need ABs • dataclient: the tool for header/fits file downloads implicit downloads (specify type, date, mode): • dataclient -t h -d 2005-01-31: database headers • dataclient -t r -m all -d 2005-01-31: all raw fits files explicit downloads (specify ARCFILE names): • dataclient -t r -m l -l my_list.txt -o /data03/data/my_outpath/ • fitsreport: the workhorse for fits key reading • used by various different tools • flexible (formatted/unformatted), performant • createReport: general reporting tool (dfo reports, user reports)
Step 3: Creating ABs We are here: • Next: AB creation, processing workflow • Today: no details about association, just assume you can do it ... • ABs: text file with all information about a set of raw frames necessary to: • process and/or • pack • --> Even without a pipeline, you want to work with ABs.
Step 3: Creating ABs 8. Install: createAB (comes with: helpAB, listMcalib) • it uses fitsreport to create lists: raw_list, vcalib_list, mcalib_list (all under $DFO_MON_DIR) 9., 10. create the config files (Lesson 2) • prepare: • know your raw data types (DPR keys) and product types (PRO.CATG) • know the match keys (‘setups’) • know your pipeline (recipe names) • know your DRS • sketch your calibration map (piece of paper is fine)
Step 4: Finish installation 11. Install: createJob, processAB; getStatusAB • supported DRS: esorex, RBS, REI 12. Install: measureQuality, certifyProducts • prepare your QC procedures (MIDAS prog is attached as example) • QC procedures are as instr-specific as pipelines, no attempt made to include them into dfos • measureQ is a wrapper to call these procedures • certifyP is also a wrapper around a user-provided procedure to call the QC1 plots (example provided) • if you have no procedures yet: skip that part
Step 4: Finish installation 13. Install: moveProducts, renameProducts, updateAB • moveProducts calls renameProducts, updateAB, listMcalib • listMcalib updates the mcalib list, using fitsreport • cdbIngest is not yet called by moveProducts, TBD 14. Install: updateDP, finishNight • updateDP reads ABs for packing • supports: DATE and OB scheme • has a graphical monitor • also needed if pipeline support is lacking • finishNight: cleans up (almost) everything
Step 4: Finish installation updateDP:
Tips and tricks Tune your browser • follow the description to make your browser an interactive GUI: • launch shell scripts by clicking on a button • open an editor to edit your config files with the browser • used by the dfos monitor tools: dvdMonitor, dfosExplorer, dfoMonitor, updateDP, smMonitor, relMonitor • after tuning, mozilla will execute any script with extension .ash or .esh just by clicking
Tips and tricks Cronjobs • delegate some work to cronjobs: dvdMonitor, header download, createReport, dfosExplorer • use dfosCron to call these tools • test the cronjob and the way it sources .dfosrc! FAQ • read that web page before asking FAQs ...