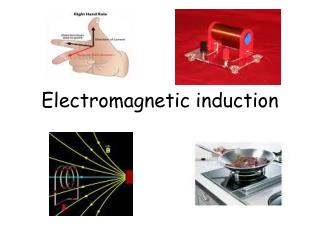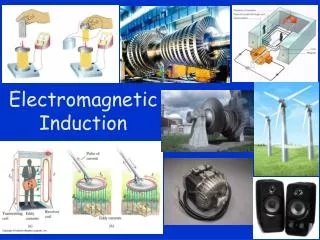
Electromagnetic Induction
Electromagnetic Induction. 012-11000 r1.04. Electromagnetic Induction. Introduction. Each page of this lab that contains the symbol

Electromagnetic Induction
E N D
Presentation Transcript
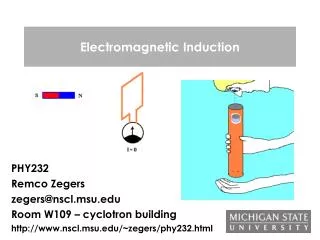
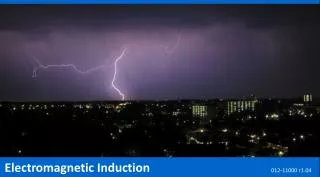
Electromagnetic Induction 012-11000 r1.04
Electromagnetic Induction Introduction Each page of this lab that contains the symbol should be inserted into your journal. After completing a lab page with the snapshot symbol, tap (in the upper right corner) to insert the page into your journal. Journals and Snapshots The Snapshot button is used to capture the screen. The Journal is where snapshots are stored and viewed. The Share button is used to export or print your journal to turn in your work. Note: You may want to take a snapshot of the first page of this lab as a cover page for your journal.
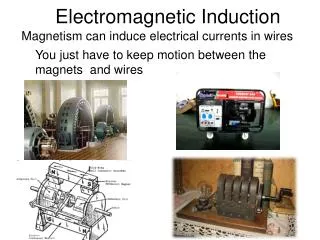
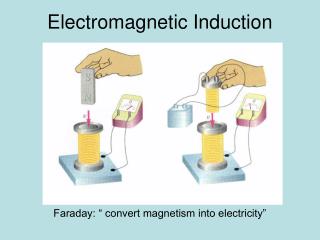
Electromagnetic Induction Lab Challenge You can send electricity through a conducting wire to make a magnetic field. Is the reverse possible? Can you use a magnet and a conducting wire to make electricity?
Electromagnetic Induction Background Michael Faraday (1791 - 1867) discovered a relationship between a changing magnetic flux Φ, and the potential within a conductor ε: Known as Faraday's Law, this relationship is defined by two key elements, the number of turns in a coil N, and the change in magnetic flux Φ. Magnetic flux is related to the strength of the magnetic field, the area enclosed by the wire loop and the angle between them. Because of the geometry of our experimental setup, we can say that the flux is proportional to the strength of the magnetic field.
Electromagnetic Induction Safety Be careful with magnets. Strong magnets can disrupt electronic devices and severely pinch any skin that comes between them.
Electromagnetic Induction Materials and Equipment Collect all of these materials before beginning the lab. • Voltage Probe • 3 Magnets of different strength • 200 turn coil • 400 turn coil • 800 turn coil • Lab Stand (not shown) • Three fingered clamp • No Bounce pad (optional) • Paper, tape and a pen
Electromagnetic Induction Sequencing Challenge The steps to the left are part of the procedure for this lab activity. They are not in the right order. Determine the correct sequence of the steps, then take a snapshot of this page. B.Drop the magnet through the coil, then stop data collection. Hint: This step is used twice. A.Connect the Voltage Probe to the SPARK Science Learning System. C.Compare the Voltage produced by the 200 turn coil to that produced by the 400 turn coil on the graph. D. Remove the 200 turn coil and replace it with the 400 turn coil.
Electromagnetic Induction Part 1 - As the Coil Turns In the first part of this lab, we determine if passing a magnet through a coil of wire gives rise to a voltage (or electromotive force), and secondly, whether the number of turns in the coil N has any effect on the amount of voltage as predicted in Faraday's equation. Note:For the best comparison, always be sure to use the same orientation of the magnet when dropping it through the coil.
Electromagnetic Induction Prediction Try to predict the shape of the Voltage versus Timecurve using the Prediction Tool*, then take a snapshot of this page. • *To Draw a Prediction: • Tap to open the tool palette. • Tap then use your finger to draw your prediction. • Tap when finished. • If you make a mistake, tap to clear your prediction.
Electromagnetic Induction Setup Mount the 200 turn coil to the lab stand using the three finger clamp, approximately 40 cm above the lab table. Connect the voltage probe to the coil. Connect the voltage probe to your SPARK Science Learning System. If you are using a pad place it below the coil.
Electromagnetic Induction Collect Data • Hold the magnet just above the coil opening. • Tap to start data collection. • Drop the magnet through the coil then quickly tap to stop data collection (~1 sec). • Switch coils. • Repeat steps 1 through 4 for each coil, dropping the magnet from the same height each time.
Electromagnetic Induction Analysis • Adjust the scale of the graph to fit data for all three runs, then indicate in the text box below which run corresponds to which # turn coil.
Electromagnetic Induction Analysis • Briefly describe one of the major differences between runs in the text box below.
Electromagnetic Induction Electromagnetic Induction Analysis • Describe the relationship between the number of turns in the coils and the peak voltages you observed. Take a snapshot of the page after entering your response.
Electromagnetic Induction Part 2 - More Magnet The second part of Faraday's equation refers to the amount of change in magnetic flux. From our observations of magnets, different types of material produce different strengths of magnetic field. Try at least two magnets of different strengths to see if the strength of the magnet makes a difference. Use only one of the coils and drop the magnets from the same height each time.
Electromagnetic Induction Part 2 - More Magnet Before proceeding to data collection, first delete* all of the data currently in this SPARKlab. Make certain you have already snapshot the data on pages 12 and 13 before deleting. *To Delete all Data Runs: 1. Tap to open the Experiment Tools screen. 2. Tap MANAGE RUNS. 3. Tap DELETE ALL RUNS. 4. When asked to confirm deletion, tap YES. 5. Tap OK to return to the SPARKlab.
Electromagnetic Induction Collect Data • Hold the magnet just above the coil opening. • Tap to start data collection. • Drop the magnet through the coil then quickly tap to stop data collection (~1 sec). • Switch magnets. • Repeat steps 1 through 4 for each magnet, dropping the magnet from the same height each time.
Electromagnetic Induction Analysis • Adjust the scale of the graph to fit data for the last three runs, then indicate in the text box below which run corresponds to which magnet.
Electromagnetic Induction Analysis • Briefly describe one of the major differences between the last three runs in the text box below.
Electromagnetic Induction Analysis • Describe the relationship between the strength of magnet used and the peak voltages you observed. Take a snapshot of the page after entering your response.
Electromagnetic Induction Part 3 - The Faster the Flux If the strength of the magnet affects the change in flux, how about the speed at which the magnet passes through the coil? Studies of acceleration show that the farther an object falls in a gravitational field, the faster it travels. If the magnet passes through the coil faster, it is reasonable that the magnetic flux in the coil is changing faster. Use one of your coils to find out.
Electromagnetic Induction Part 3 - The Faster the Flux Before proceeding to data collection, first delete* all of the data currently in this SPARKlab. Make certain you have already snapshot the data on pages 18 and 19 before deleting. *To Delete all Data Runs: 1. Tap to open the Experiment Tools screen. 2. Tap MANAGE RUNS. 3. Tap DELETE ALL RUNS. 4. When asked to confirm deletion, tap YES. 5. Tap OK to return to the SPARKlab.
Electromagnetic Induction Setup Roll up a piece of paper into a tube and tape it securely. The tube should be wide enough to allow your magnet to pass through freely, but narrow enough to fit inside the coil. You will mark four positions on the tube. With the tube in place, you will drop the magnet from the opening of the tube, then slide the tube through the coil to each mark, dropping the magnet from the tube opening each time.
Electromagnetic Induction Collect Data • Hold the magnet just above the tube opening. • Tap to start data collection. • Drop the magnet through the tube then quickly tap to stop data collection (~1 sec). • Adjust the tube height. • Repeat steps 1 through 4 for each height, dropping the magnet from the tube opening each time.
Electromagnetic Induction Analysis • Adjust the scale of the graph to fit data for the last four runs, then indicate in the text box below which run corresponds to which height.
Electromagnetic Induction Analysis • Briefly describe one of the major differences between the last four runs in the text box below.
Electromagnetic Induction Analysis 9. In the text box below describe the relationship between the height at which the magnet fell above the coil and the peak voltages you observed. Then take a snapshot of this page.
Electromagnetic Induction Analysis • How does your prediction compare to the actual voltage versus time graph? Answer below, then take a snapshot of this page.
Electromagnetic Induction Synthesis • Based on your observations in this lab, describe the characteristics of an electric coil generator that you would optimize to get the most electromotive force out. Answer below, then take a snapshot of the page.
Electromagnetic Induction Synthesis • You may have noticed that the second peak of the voltage curve is always in the opposite direction of the first peak, but you may not have noticed that it is also a slightly higher peak. Can you describe why that might be?
Electromagnetic Induction Multiple Choice Question Make your selection below then take a snapshot of this page. • Dropping a magnet through a coil is a form of energy transformation. What kind of transformation is it? • Thermal energy is transformed into electrical energy. • Mechanical energy is transformed into thermal energy. • Kinetic energy is being transformed into electrical energy. • Electrical energy is being transformed into thermal energy.
Electromagnetic Induction Multiple Choice Question Make your selection below then take a snapshot of this page. • If a generator with a 200 turn coil produced 120 V of EMF, how much would it produce if it was upgraded to an 800 turn coil? • 40 V • 480 V • 220 V • There is not enough information to draw a conclusion.
Electromagnetic Induction Multiple Choice Question Make your selection below then take a snapshot of this page. • The equation for Faraday's Law includes a negative sign on one side. What does it represent? • Magnetism is an inherently negative force. • Opposites attract. • The EMF generated seeks to reinforce the change in magnetic field. • The EMF generated seeks to oppose the change in magnetic field.
Electromagnetic Induction Congratulations! You have completed the lab. Please remember to follow your teacher's instructions for cleaning-up and submitting your lab.
Electromagnetic Induction References ALL IMAGES WERE TAKEN FROM PASCO DOCUMENTATION, PUBLIC DOMAIN CLIP ART, OR WIKIMEDIA FOUNDATION COMMONS: • http://commons.wikimedia.org/wiki/File:Lightning_on_Wageningen.JPG • http://commons.wikimedia.org/wiki/File:Michael_Faraday_-_Project_Gutenberg_eText_13103.jpg • http://commons.wikimedia.org/wiki/File:SGR_1806-20_108536main_NeutronStar-Print1.jpg • http://commons.wikimedia.org/wiki/File:D-W015_Warnung_vor_Absturzgefahr_ty.svg • http://commons.wikimedia.org/wiki/File:Dipole_field.jpg • http://commons.wikimedia.org/wiki/File:DIN_4844-2_Warnung_vor_magnetischem_Feld_D-W013.svg • http://commons.wikimedia.org/wiki/File:ForceLorentz.svg • http://commons.wikimedia.org/wiki/File:NSRW_Direct_Connected_Dynamo_and_Engine.png • http://www.freeclipartnow.com/office/paper-shredder.jpg.html