Download
1 / 37
370 likes | 442 Views
Learn about the general properties of the PEARL system and how to conduct first and higher tier assessments. Explore the user interface, data access, model running, and result viewing. Dive into FOCUS scenarios, substance editing, application scheduling, run generation, refinement, and result visualization. Discover higher tier assessments involving site-specific data, weather and soil profile adjustments, and detailed model outputs.

E N D
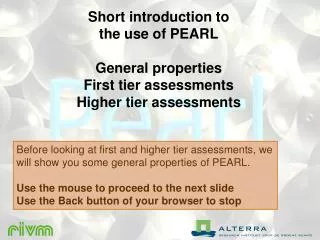
Short introduction tothe use of PEARL General properties First tier assessments Higher tier assessments Before looking at first and higher tier assessments, we will show you some general properties of PEARL. Use the mouse to proceed to the next slideUse the Back button of your browser to stop
The PEARL system consists of various components as shown in the figure. As a user, you will communicate with the PEARL User Interface only.
When you start the user interface, you will always enter the main screen. From here, you can access the data, run the model and view the results.
Pearl uses a relational database for data storage. Runs are composed of building blocks at various levels.
The highest level in the database hierarchy is the project level, which allows you to organize the data.
The on-line help function is an important feature of the system. The manual contains guidelines on model-use, derivation of model parameters and background information.
PEARL has a build in viewer. All PEARL graphs can be saved as Enhanced Windows Metafiles, which can be imported in (for example) Word 97
Tier I assessments FOCUS Let’s now have a look at the FOCUS scenario’s. In the following section, we will show you the most important steps.
Step 1Add and edit a substance Before you can start using the FOCUS scenario’s, you have to add or edit a substance.
Add a substance Additional input sheets Put in data Close when finished
Step 2Add and edit an applicationschedule As a second step, you will have to edit or add an application schedule.
Specify applications and details within scheme Choose or add a scheme
Step 3Generate runs with theFocus wizard Now the database contains all the required information. You can now generate Focus runs by combining crops, locations, a substance and an application scheme.
PEARL will now create a new project, containing all possible combinations (= runs). These runs are automatically selected for execution.
Step 4Refinement You may want to edit the individual runs before actually running the model.
You are free to assign different application schedules to individual runs.
Step 5Run the model You can execute several model runs with one push on a button.
The User Interface will createthe input files and run the model. You can follow the course of the simulations
Step 6View model results PEARL has predefined graphs and reports, specially dedicated to the first tier of the registration procedure.
Part of summary output FOCUS target output
Higher tier assessments In higher tier assessments, you will have to add site-specific data. You can make adaptations to existing data, or start from scratch.
Add or change soil building blocks, put in characteristic values
Select lower boundary condition and, if necessary, put in data
In the case of higher tier assessments, you may want to have a look at more specific model outputs
You have seen some features and applications of the PEARL model • Download the model, register and try it. • Don’t forget to use theon-line manual! Use the Back button of your web browser to stop the show