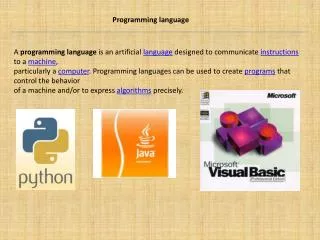
269200 Web Programming Language
269200 Web Programming Language. Dr. Ken Cosh Week 2 (CSS I). Introducing CSS. CSS stands for Cascading Style Sheets. It is a way to divide the content from the style and the layout on web pages.


269200 Web Programming Language
E N D
Presentation Transcript
269200 Web Programming Language Dr. Ken Cosh Week 2 (CSS I)
Introducing CSS • CSS stands for Cascading Style Sheets. It is a way to divide the content from the style and the layout on web pages. • With plain HTML you define the colors and sizes of text and tables throughout your pages. If you want to change a certain element you will therefore have to work your way through the document and change it. • With CSS you define the colors and sizes in "styles". Then as you write your documents you refer to the styles. Therefore: if you change a certain style it will change the look of your entire site.
How it works: • A style is a definition of fonts, colors, etc. • Each style has a unique name: a selector. • The selectors and their styles are defined in one place. • In your HTML contents you simply refer to the selectors whenever you want to activate a certain style.
Example #1 • Classic HTML <table> <tr><td bgcolor="#FFCC00" align="left"><font face="arial" size="2" color="red"><b>this is line 1</b></font></td></tr> <tr><td bgcolor="#FFCC00" align="left"><font face="arial" size="2" color="red"><b>this is line 2</b></font></td></tr> <tr><td bgcolor="#FFCC00" align="left"><font face="arial" size="2" color="red"><b>this is line 3</b></font></td></tr> </table>
Example #2 • With CSS (assuming that a selector called subtext is defined) <table> <tr><td class="subtext">this is line 1</td></tr> <tr><td class="subtext">this is line 2</td></tr> <tr><td class="subtext">this is line 3</td></tr> </table>
Example #3 • Instead of defining fonts and colors each time you start a new table cell, you can define a style and then, simply refer to that style in your table cells. • While CSS lets you separate the layout from the content, it also lets you define the layout much more powerfully than you could with classic HTML.
CSS Advantages • Define the look of your pages in one place • rather than repeating yourself over and over again throughout your site. (Ever get tired of defining colors and fonts each time you start a new cell in a table? Those days are over with CSS!) • Easily change the lookof your pages • even after they're created. Since the styles are defined in one place you can change the look of the entire site at once. (Ever get tired of replacing tags throughout your site when you want to change the look of a certain element? Those days are over with CSS!) • Define font sizes and similar attributes • with the same accuracy as you have with a word processor - not being limited to just the seven different font sizes defined in HTML.
Advantages #2 • Position the contentof your pages • with pixel precision. • Redefine entire HTML tags. • Say for example, if you wanted the bold tag to be red using a special font - this can be done easily with CSS. • Define customized styles for links • such as getting rid of the underline. • Define layers • that can be positioned on top of each other (often used for menus that pop up).
Also • Your pages will load faster, since they aren't filled with tags that define the look. The style definitions are kept in a single CSS document that is only loaded once when a visitor enters your site.
Selectors • Selectors are the names that you give to your different styles. • In the style definition you define how each selector should work (font, color etc.). • Then, in the body of your pages, you refer to these selectors to activate the styles.
Example <HTML> <HEAD> <style type="text/css">B.headline {color:red; font-size:22px; font-family:arial; text-decoration:underline} </style> </HEAD> <BODY> <b>This is normal bold</b><br> <b class="headline">This is headline style bold</b> </BODY> </HTML>
Example Explained • In that case B.headline is the selector.The example would result in this output:This is normal boldThis is headline style bold
Selectors • There are three types of selectors: • HTML selectorsUsed to define styles associated to HTML tags. (A way to redefine the look of tags) • Class selectorsUsed to define styles that can be used without redefining plain HTML tags. • ID selectorsUsed to define styles relating to objects with a unique ID (most often layers)
HTML (tag) Selectors • The general syntax for an HTML selector is:HTMLSelector {Property:Value;} • For example: <HTML><HEAD><style type="text/css">B {font-family:arial; font-size:14px; color:red}</style></HEAD><BODY><b>This is a customized headline style bold</b></BODY></HTML> • HTML selectors are used when you want to redefine the general look for an entire HTML tag.
Class Selectors • The general syntax for a Class selector is:.ClassSelector {Property:Value;} • For example: <HTML><HEAD><style type="text/css">.headline {font-family:arial; font-size:14px; color:red}</style></HEAD><BODY><b class="headline">This is a bold tag carrying the headline class</b><br><i class="headline">This is an italics tag carrying the headline class</i></BODY></HTML>
Class Selectors • Class selectors are used when you want to define a style that does not redefine an HTML tag entirely. • When referring to a Class selector you simply add the class to an HTML tag like in the above example (class="headline").
<SPAN> & <DIV> • Two tags are particularly useful in combination with class selectors: <SPAN> and <DIV>. • Both are "dummy" tags that don't do anything in themselves. Therefore, they are excellent for carrying CSS styles. • <SPAN> is an "inline-tag" in HTML, meaning that no line breaks are inserted before or after the use of it. • <DIV> is a "block tag", meaning that line breaks are automatically inserted to distance the block from the surrounding content (like <P> or <TABLE> tags). • <DIV> has a particular importance for layers. Since layers are separate blocks of information. <DIV> is an obvious choice when defining layers on your pages.
ID Selectors • The general syntax for an ID selector is:#IDSelector {Property:Value;} • For example: <HTML><HEAD><style type="text/css">#layer1 {position:absolute; left:100;top:100; z-Index:0}#layer2 {position:absolute; left:140;top:140; z-Index:1}</style></HEAD><BODY><div ID="layer1"><table border="1" bgcolor="#FFCC00"><tr><td>THIS IS LAYER 1<br>POSITIONED AT 100,100</td></tr></table></div><div ID="layer2"><table border="1" bgcolor="#00CCFF"><tr><td>THIS IS LAYER 2<br>POSITIONED AT 140,140</td></tr></table></div></BODY></HTML>
ID Selectors • ID selectors are used when you want to define a style relating to an object with a unique ID. • This selector is most widely used with layers (as in the above example), since layers are always defined with a unique ID.
Grouped Selectors • Most often selectors will share some of the same styles, for example, being based on the same font.In these cases, rather than defining the font for each and every selector, one by one, you can group them, and thus assign the font to all the selectors at once. • Look at this example, made without grouping:.headlines{font-family:arial; color:black; background:yellow; font-size:14pt;}.sublines {font-family:arial; color:black; background:yellow; font-size:12pt;}.infotext {font-family:arial; color:black; background:yellow; font-size:10pt;}
Grouped Selectors • As you can see, the only style that varies is the font-size.In the next example we have grouped the selectors, and defined the common styles at once..headlines, .sublines, .infotext {font-family:arial; color:black; background:yellow;}.headlines {font-size:14pt;}.sublines {font-size:12pt;}.infotext {font-size: 10pt;} • Less to type, easier to change and guaranteed to be the same for all styles.
Context Sensitive Selectors • It is possible to make selectors that will only work in certain contexts. • For example, you can define a style for the <B> tag that is only triggered if the text is not only bold but also written in italics. • For example, the style should be in effect here: <i><b>example</b></i> • but not here :<b>example</b>.
Context Sensitive Selectors • Simply adding a normal style to the <B> tag is done like this:B {font-size:16px; } • Adding a context dependent style, like the one described above is done like this: I B {font-size:16px;} • We simply separated the contextual <I> tag from the <B> tag with a space.
Context Sensitive Selectors • It is possible to use context dependent and grouped selectors at the same time. • For example, like this:I B, .headlines, B .sublines {font-size:16px;} • In the example the font-size of 16 pixels is in effect on: • All <B> tags enclosed by <I> tags • All headlines classes. • sublines classes enclosed by <B> tags.
Where to CSS? • CSS can be added to your pages at 3 different levels. • It is possible to create CSS styles that only work for the single tag it is defined for. Single tag CSS is used when the style is used in a single place on the entire site. • Usually a certain style appears more than once on your pages, and thus you should use the second technique: adding styles that are defined once for the entire page. • If, however, that certain style is used on more than a single page, you should use the third - and most powerful - technique described: adding styles that are defined once for the entire site.
Single Tags • CSS can be defined for single tags by simply adding style="styledefinition:styleattribute;" to the tags. • Look at this example: • It is <b style="font-size:16px;">NOT</b> me. • You should limit your use of single tag CSS. • If you define your styles for each and every tag they're used on, you will lose much of the power associated with CSS. • For example, you will have to define the style over and over again whenever it's used, rather than just defining it once and then referring to that one definition whenever it's used. • Furthermore, if you wanted to change a certain style, you'd have to change it all over in your document, rather than in one place
Single Pages • CSS can be defined for entire pages by simply adding a style definition to the head section.<html><head><title>MY CSS PAGE</title><style type="text/css">.headlines, .sublines, infotext {font-face:arial; color:black; background:yellow; font-weight:bold;}.headlines {font-size:14pt;}.sublines {font-size:12pt;}.infotext {font-size: 10pt;}</style></head><body><span class="headlines">Welcome</span><br><div class="sublines">This is an example page using CSS.<br>The example is really simple,<br>and doesn't even look good,<br>but it shows the technique.</div><table border="2"><tr><td class="sublines">As you can see:<br>The styles even work on tables.</td></tr></table><hr><div class="infotext">Example from kencosh.co.uk.</div><hr></body></html>
Single Pages • In the above example, although we used the sublines style twice, we only had to define it once: in the <head>section. • By defining styles for entire pages, you will gain the freedom to easily change the styles even after the entire page has been made. • This is an obvious advantage for you as a designer. But the advantage is on the visitors side as well. • Since the styles are only defined in one place, the page size will be smaller, and thus faster to load. • There is a way to emphasize these advantages even more: using external CSS styles that work for entire sites.
Site Styles • CSS can be defined for entire sites by simply writing the CSS definitions in a plain text file that is referred to from each of the pages in the site. • Rather than writing the entire CSS definition on each page, as in the previous examples, you can write it to a text file that is only loaded on the first page that a visitor sees at your site. When the visitor jumps to other pages, the CSS text file will be cached and thus doesn't have to be transferred via the internet for subsequent pages. • This means that your pages will load faster while at the same time you will have extreme flexibility to change the style for your entire site even after it has been made.
Site Styles • Here, there is no style definition on the page. Instead we add a reference to an external style sheet within the header:<link rel=stylesheet href="whatever.css" type="text/css"> • This means that the browser will look for a file called whatever.css and insert it at the place where the reference was found in the html document.
Site Styles • File: whatever.css.headlines, .sublines, infotext {font-face:arial; color:black; background:yellow; font-weight:bold;}.headlines {font-size:14pt;}.sublines {font-size:12pt;}.infotext {font-size: 10pt;} • Now if you just add the line <link rel=stylesheet href="whatever.css" type="text/css"> to the <head> of all your pages, then the one style definition will be in effect for your entire site.
CSS Text • Font • Font-family, font-style, font-variant, font-weight, font-size • An example of a typical font definition would be: • B {font-family:arial, helvetica; font-size:12px; font-weight:bold;}
CSS Text Properties • As well as the font properties there are several other text properties. • line-height, text-decoration, text-transform, text-align, text-indent, white-space
CSS Text - Color • As you can see, the previous CSS properties can replace all text formatting that can be done with plain HTML with one exception: the color. • The color is not part of the font collection in CSS - rather it has its own definition. • If you want to add a color to the text in the above example you'd do it this way:B {font:arial, helvetica 12px bold; color:red}
CSS Color • CSS has several options for defining colors of both text and background areas on your pages. • These options can entirely replace the color attributes in plain HTML. In addition, you get new options that you just didn't have in plain HTML. • For example, in plain HTML, when you wanted to create an area with a specific color you were forced to include a table. With CSS, you can define an area to have a specific color without that area being part of a table. • Or even more useful, in plain HTML when working with tables, you had to specify font attributes and colors etc. for each and every table cell. With CSS you can simply refer to a certain class in your <TD> tags.
CSS - Color • Color Properties • color, background-color, background-image, background-repeat, background-attachment, background-position, background • Basically you have three color options with CSS: • Setting the foreground color for contents • Setting the background color for an area • Setting a background image to fill out an area
CSS - Color • In plain HTML, colors can either be entered by name (red, blue etc.) or by a hexadecimal color code (for example: #FF9900). • With CSS you have these options: • Common name • You can define colors with the use of common names, by simply enter the name of the desired color. • For example: .myclass {color:red; background-color:blue;} • Hexadecimal value • You can define colors with the use of hexadecimal values, similar to how it's done in plain HTML. • For example: .myclass {color:#000000; background-color:#FFCC00;} • RGB value • You can define colors with the use of RGB values, by simply entering the values for amounts of Red, Green and Blue. • For example: .myclass {color:rgb(255,255,204); background-color:rgb(51,51,102);} • You can also define RGB colors using percentage values for the amounts of Red, Green and Blue: • For example: .myclass {color:rgb(100%,100%,81%); background-color:rgb(81%,18%,100%);}
Setting Background Colors • Background colors are defined similar to the colors mentioned before. For example you can set the background color of the entire page using the BODY selector:BODY {background-color:#FF6666;}
Background Image • Setting a background image • CSS lets you set a background image for both the page and single elements on the page. • In addition, CSS offers several positioning methods for background images. • You can define the background image for the page like this:BODY {background-image:url(myimage.gif);} • You can control the repetition of the image with the background-repeat property. • You can control the position of the image with the background-position property.
And On… • There are many different properties and many different settings. • Create a stylesheet in Dreamweaver and it will help you with a list of the options!
Assignment • Take your simple website about yourself from last week, and “pimp it up” using CSS. • Experiment with different style selectors • Experiment with in single style css, single page css and site wide css • Experiment with grouping selectors • Use Span and Div to ‘carry’ styles • Impress Me! Marks are available for technical beauty and page beauty!