Download
1 / 47
520 likes | 1.04k Views
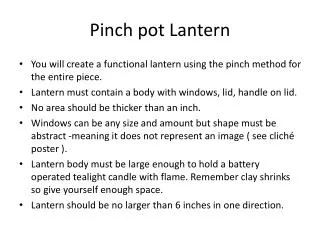
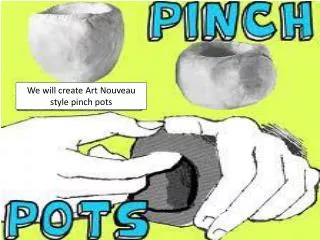
Narrative Pinch Pots: Speaking through Symbols. Ideas & Sketches. Something to Think About: The size and shape of for the body of your narrative pot. What type of handle, lip, foot and/or lid you prefer to add.

E N D
Ideas & Sketches Something to Think About: • The size and shape of for the body of your narrative pot. • What type of handle, lip, foot and/or lid you prefer to add. • What story you would like to communicate through the shape of the form, as well as the symbols and carvings used on the surface. • What colors (under glaze and glazes) do you want to use for the surface of your pot. Now, sketch all of these ideas!
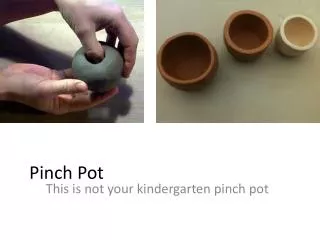
The Handbuilding Process With pinching gestures, you can mold clay into objects such as animals or even make a bowl. While this form of pottery seems really basic, you can get a feel for the clay you are working with and you will get to know the limits of your clay. (Does it bend easily? Does it dry fast? Etc.)
To make a bowl... Begin with a ball of clay. Push your thumb into the center. Then pinch up the walls.
Turn the piece as you pinch. This will help you to keep an even thickness in the walls of the piece.
Gently pat the bottom on a flat surface to create a flat spot on the bottom of the piece. As you finish the form, pieces can be added for the foot, lip, lid, handle, etc.
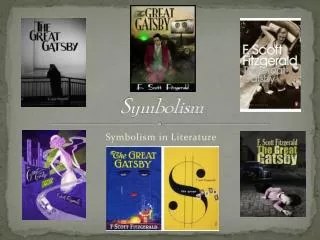
Let’s Talk Symbols While the most commonly used symbols are relatively simple, they can be used in elaborate combinations to tell more complex stories. For example, a Water Dream painting might show a U shaped symbol for a man, sitting next to a circle or concentric circles representing a waterhole, and spiral lines showing running water. The painter is telling the story of the power of the waterman to invoke rain. Furthermore, symbols will add to the depth of meaning. Today it is common for artists to refer to the 'outside' story which they provide for the general public, while the painting retains an 'inside' story accessible only to those with the appropriate level of knowledge.
Creating Your Own Symbolic Language To finish in preparation for the narrative pinch pot project, you must visually create a language of symbols in your sketchbook. This language is unique and communicates your feelings – you should be the only actual translator of the symbols. Your symbols can be as simple as a line or as complex as a combination of lines and shapes.
Ted Saupe Ted Saupe, a well-know clay sculpture artist, who has exhibited his ceramic pieces widely throughout the Southeast in numerous solo and group shows, is displaying more than twenty new pieces of his clay sculptures locally. Saupe, in discussing his recent works, explains, These pieces are niches, reliquaries and shrines to the people and things I know and love. They are about working, about ancient architecture, about history and about clay and fire. These new works help me answer questions about life's meanings, but they always leave me with new questions.
Artist Bio In some ways it’s a strange marriage of influences, in other ways it makes sense. I am most directly interested in the utilitarian pottery of the southeastern United States from the 19th and early 20th centuries, and the country pottery of Oribe, Japan. Both styles of pottery were made for the storage and serving of food. Both were fairly simply made with minor decoration and glazing. And both were made in a spirit of directness and respect for the material and the process. I have always loved these pots from different cultures and am really trying to capture some of the freshness and strengths of these two influences. My work is always autobiographical whether I am working figuratively or architecturally, or even when making vessels. It is always about history and/or age, and always tells a story, a personal narrative. I rely on memory, free association, and daily life events as my subject matter. Most recently my children have been a big part of the picture. Prior to that a trip to Crete to study Minoan archeology was my source of inspiration.
Notice how the artist uses the form, clay bands, lid, relief pieces, slip and underglaze to create an interesting, expressive piece of work. Some words to describe this work include: NARRIATIVE/STORYTELLING, TEXTURAL, INTRIQUING, ASIAN-INFLUENCED, FUNCTIONAL, just to mention a few. Now you come up with some adjectives to describe this piece in your sketchbook!
Narrative Pinch Pot Assessment Students will: 1. Complete sketches of the form including either a handle, lid, foot, and/or extended lip. 2. Decide on a message to communicate on the surface of the pot – telling a story about your life or their personal history. 3. Create a personal symbolic language for the surface design of the piece. 4. Construct a structurally sound pinch pot while referencing the final sketch (as discussed in upcoming demonstration). 5. Paint an undercoat layer of slip for a smooth painting surface. 6. Add underglaze or paint to complete the surface area of the pot. 7. Write an artist statement about the piece and a reflection the process of the narrative pinch pot.
Narrative Pinch Pot Goals Students will: • Decide on a message to communicate on the surface of the pot – this can be about personal feelings or tell a story about your life, family or an important event expressing something personal about you. • Create a personal symbolic language for the surface design of the piece: at least five personal symbols to convey the message of your story and incorporated into the surface decoration of your clay piece. • Complete a minimum of three initial sketches conveying the overall shape or profile of your form relating to your story.
Narrative Pinch Pot Goals • A comprehensive drawing displaying at least three alternate viewpoints of the form including either a handle, lid, foot, and/or extended lip (you may include all of the above if it works for your form). • Construct a structurally sound pinch pot while referencing the final sketch (as discussed in class). • Complete your surface design with a layer of under glaze for a on the surface or paint the bisque ware with tempra paint using excellent craftsmanship. • Write an artist statement about the piece and a reflection the process of the narrative pinch pot.
The first step in your process . . . • Write down your personal history or story • Create a visual language of at least 5 symbols telling your story – stay away from pre-existing symbols like peace signs, hearts, etc. you must create your own visual language. • Create a minimum of 3 thumbnail sketches with an additional three alternate views of the form of your pot. Remember your piece is three-dimension so this is why you must show multiple views into your thumbnail sketches. • Select the best design and draw a large scale drawing of the piece showing all the details for your design (also known as a comprehensive). • Incorporate your visual language into your comprehensive sketch. • Choose a color scheme to work with your design and add color along with your symbols to your large scale drawing.