450 4”-10”
130 likes | 268 Views
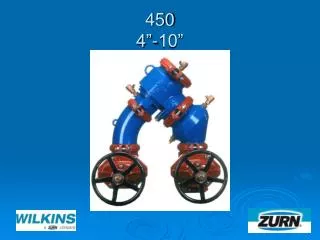
450 4”-10”. Modification Overview. Production of the 4” - 10” sizes began in 1998. The lead free version (XL) was introduced in 2011. Single Access Cover Removal. Cover is secured by a grooved coupling. Cover has no spring load. Check Valve Removal. Check valve module.

450 4”-10”
E N D
Presentation Transcript
Modification Overview • Production of the 4” - 10” sizes began in 1998. • The lead free version (XL) was introduced in 2011.
Single Access Cover Removal • Cover is secured by a grooved coupling. • Cover has no spring load.
Check Valve Removal • Check valve module. • 4”-6” checks are secured by retainers and o-ring sealed. • 8”-10” checked are bolted into body and o-ring sealed. • #1 check must be removed before #2 can be removed
Check Valve Removal 4”- 6” • Plastic Retainer – There is one retainer securing the #1 check module. • Pinch together the exposed ends, push down, and then pull downstream.
Check Valve Removal 4”- 6” • Wire Retainer – There are two separate spring loaded plate retainers that secure the #2 check module. • Pinch the sides of the spring together and rotate the plates out of the body groove, one at a time.
Check Valve Removal 4”-6” • Once the retainer is removed the check module can be pulled straight out of the body.
Check Valve Removal 8”-10” • #1 check – Remove the 4 nuts and washers. • #2 check – Remove the 7 nuts, washers and the check retaining ring.
Check Disc Replacement • Remove the bolts, washers, and o-rings on the back of the module. ** Do not remove any hardware from the spring side of module. • Separate the disc retainer from the module.
Check Seat Removal • The check seat is part of the check module and can not be removed. • If the seat is damaged, the complete check module will need to be replaced.
Check Valve Reassembly Notes • 4”-6”- Make sure the rollers on the check module are positioned at 3:00 and 9:00. • 8-10” – In the 12:00 and 6:00 position. • Install the check module into the body and close the test cock to hold check in place.
Check Valve Reassembly Notes • Plastic Retainer - • Install the plastic retainer by inserting one end into the body groove and then sliding your hand around the face of the retainer pushing it into the groove as you go. • The retainer will snap into place when it is fully seated.
Check Valve Reassembly Notes • Wire Retainers - • Retainers are positioned at 12:00 and 6:00. • Install each retainer into the body groove one plate at a time. • Squeeze the spring ends together to clear the stops on the face of the seat.