Download
1 / 6
60 likes | 208 Views
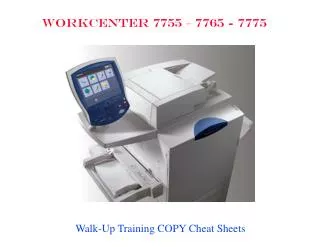
WORKCENTER 7755 – 7765 - 7775. Walk-Up Training COPY Cheat Sheets. WorkCentre 7755/7765/7775 Start all at [SERVICES HOME]. Copy/Print onto Special Paper Select [Copy]

E N D
WORKCENTER 7755 – 7765 - 7775 Walk-Up Training COPY Cheat Sheets
WorkCentre 7755/7765/7775Start all at [SERVICES HOME] • Copy/Print onto Special Paper • Select [Copy] • Open the necessary Paper Tray, input the special paper, close the paper guides up next to the paper stack. Do not go over the MAX fill line. Close the paper tray. • When the message appears on the User Interface, select the correct paper Size, Type and Color if it is not displayed correctly on the screen. Once identified the WorkCentre will know where your special paper is. • Select that paper for your Copy job as needed. Then make other Copy selections and press [Start]. • IF printing, make sure to identify the paper in the paper tray correctly, and be sure to select the same paper tray size, type or color for your print job from your PC. • NOTE: Your paper selection should match a paper tray already set up. • Copy Double Sided • Select [Copy] • Under “2-Sided Copying” • Select as appropriate: • Single Sided originals copied to Double sided; select 1->2 Sided • Double Sided originals copied double sided; select • 2->2 Sided • Staple Options • Select [Copy] • Select “Paper Supply” • Under “Copy Output” • Select the desired Staple • Option or • Select “More” • Select All options as shown on one screen to include “Collating, Hole Punch, Staple Options and/or Original Orientation”, as needed. Select Color or Black & White • Select [Copy] • Select “Output Color” • Select “Auto Detect” – to have the WorkCentre copy Color originals in Color and Black & White originals in Black & White or • Select “Black & White” • Select “More” • Select “Auto Detect, Black & White, Color, or Single Color” • Select [Start] Automatically Reduce an item • Select [Copy] • Select “Reduce/Enlarge” • Select “More” • Select “Auto %”; Select [Save] • Select appropriate Paper Tray • Select [Start] COPY TAB
WorkCentre 7755/7765/7775 • Image Enhancement • Select [Copy] • Select “Image Quality” • Select “Image Enhancement” • Select “Background Suppression” to control the background or a second side bleed through. • or • Select “Contrast Manual/Auto” • Copy Photographs • Select [Copy] • Select “Image Quality” • Select “Original Type” • Select “Photo” • Select “How Original was Produced” • Color Balance – This feature allows you to adjust the balance between Colors and the Overall amount of color on the Output copies. • Select [Copy] • Select “Image Quality” • “Normal” is the default • Select “Basic Color” • This adjusts the levels of all • four process colors of: • Yellow • Magenta • Cyan • Black • or • Select “Advanced Color” • This will adjust the: • Highlights • Mid-tones • Shadows • density levels in each of the four process Colors. • Color Optimization - This feature optimizes the Image Quality features for Sharpness, Saturation, Color Balance, Lighten/Darken, and Contrast. • Select [Copy] • Select “Image Quality” • Select “Color Presets” • Select from the following for differences in background and/or foreground as needed: • “Lively”, “Bright”, “Warm”, “Cool” • Lighten/Darken • Select [Copy] • Select “Image Quality” • Select “Image Options” • Select “Lighten/Darken”, • “Sharpness” and/or • “Saturation” IMAGE QUALITY TAB
WorkCentre 7755/7765/7775 • Mixed Size Originals • Select [Copy] • Select “Layout Adjustment” • Select “Original Size” • Select “Mixed Size Originals” • Set Paper Tray to “Auto” • Review the screen of Valid pairs/page sizes that can be processed at the same time. • Then place originals in the Duplex Automatic Document Feeder with the smallest paper size on the top of the stack. • Copying Books/Bound Originals • Select [Copy] • Select “Layout Adjustment” • Select “Book Copying” • Select “Both Pages, Left Page • Only or Right Page Only” • Select “Binding Edge Erase” amount as needed to white out the binding edge. • Original Orientation • Select [Copy] • Select “Layout Adjustment” • Select “Original Orientation” • Select “Upright Images” • Select “Sideways Images” • Select “Portrait” • or • Select “Landscape” • Auto Center/Image Shift • Select [Copy] • Select “Layout Adjustment” • Select “Image Shift” • Select “Auto Center” • or • Select “Shift” amounts • Measure Original Size • Select [Copy] • Select “Layout Adjustment” • Select “Original Size” • Select “Preset Scan Areas” • or • Select “Custom Scan Areas” • Input the Width [X] & Height [Y] measurements in (inches) by selecting the desired number. • Margin Shift • Select [Copy] • Select “Layout Adjustment” • Select “Image Shift” • Select “Margin Shift” • Enter amount of shift needed for Side 1 and/or Side 2 • Edge Erase • Select [Copy] • Select “Layout Adjustment” • Select “Edge Erase” • Select “All Edges” • or • Select “Individual Edges” • Select desired edges, Erase • necessary amount up to • 2.0 inches on each edge for • Side 1 and/or Side 2. LAYOUT ADJUSTMENT TAB • Mirror Image/Positive Image • Select [Copy] • Select “Layout Adjustment” • Select “Invert Image” • Select “Mirror Image” • or • Select “ Positive Image“
WorkCentre 7755/7765/7775 • Covers • Select [Copy] • Select “Output Format” • Select “Special Pages” • Select “Covers” • Select “Front and Back Same”, • “Front and Back Different” or “Front Cover Only” or “Back Cover • Only” • Select “Printing Options” • Select “Blank, Print on Side 1, Print on Side 2, or Print on Both Sides” • Booklet Creation/Fold & Staple • (Optional) • Select [Copy] • Select “Output Format” • Select “Booklet Creation” • Select “On” • Select “Fold & Staple” (optional) • Select “Paper Supply”-Landscape • Under “Original Input” • column, select • “1-Sided Originals” or • “2-Sided Originals” • -Use 60 originals MAX; Ensure Paper Supply is Landscape • Transparency Separators • Select [Copy] • Select “Output Format” • Select “Transparency Separators” • Select “ON” • Select “Separator Supply” • Select “Transparency Supply” • Annotations – This feature allows additional headers and/or footers to be added to Copies. • Select [Copy] • Select “Output Format” • Select “Annotations” • Select “Page Numbers”, “Comment”, “Date”, or “Bates Stamp” to the copies. • Select “Apply to Page” • Select “Location” on the Pages • Special Pages • Select [Copy] • Select “Output Format” • Select “Special Pages” • Select “Covers”, • “Chapter Starts”, “Inserts”, or “Exceptions” • Select [Copy] Tab • Select “Paper Supply” • Multiple Pages on one Sheet or Multi-Up • Select [Copy] • Select “Output Format” • Select “Page Layout” • Select “Pages per Side” • Select “2-up, 4-up, 6-up or 9-up, • or Specify ”Rows & Columns” • NOTE: Be sure to have the same number of originals as number selected to display on one sheet. OUTPUT FORMAT TAB • Repeat Image • Select [Copy] • Select “Output Format” • Select “Page Layout” • Select “Repeat Image” • Select “2, 4, 6, or 9 • or • Specify “Rows & Columns” • or • Specify “Auto Repeat”
WorkCentre 7755/7765/7775 • Build Job – This feature will allow scanning of all pages with different settings to be setup as one Copy job. • Select [Copy] • Select “Job Assembly” • Select “Build Job” • Select “ON” • Select “Display window available between • Segments” – window will display number of • pages scanned in per segment • Window displays [Segment Pages] • Select “Quantity for Final Job” – total amount of copies to be completed • Select “Sample Last Segment” • or • Select “Delete Last Segment” • or • Select “Delete All Segments” as needed • When you are finished scanning in the segments, press End Build Job to END programming and the job will print out • Sample Job– This feature will print one complete sample reflecting your selections and the completed job. • Select [Copy] • Select “Job Assembly” • Select “Sample Job” • Select “ON” • Select [Save] • REVIEW the output job. • Select to process or delete the job • Store Programming – This feature will save settings from one job, to use the same settings for future jobs; just the settings not the entire document. • Program the Features for the copy job, check the output, and before the machine resets all selections to defaults • Select [Copy] • Select “Job Assembly” • Select “Save Current Settings” to save • the settings • Enter the Name of the Settings • Retrieve Saved Settings • Select [Copy] • Select “Job Assembly” • Select “Retrieve Saved Settings” • Select “Load Settings” JOB ASSEMBLY TAB