Intubation 101
Intubation 101. From start to finish. Objective. Recognizing landmarks and anatomy Overview of equipment Overview of techniques Ventilation vs. oxygenation RSI. Anatomy. PAGE 74. View of larynx. Mallampati class.

Intubation 101
E N D
Presentation Transcript
Intubation 101 From start to finish
Objective • Recognizing landmarks and anatomy • Overview of equipment • Overview of techniques • Ventilation vs. oxygenation • RSI
Anatomy • PAGE 74
Mallampati class • This test is supposed to be done on a conscious and cooperative pt, sitting upright, leaning forward….not unresponsive in a ditch. • You still need an airway!!!
Non-traumatic position of head pre-intubation • Adult: Proper head to chest relationship for ventilation defined by a horizontal line connecting the ear to sternal notch • Children: Have large heads vs. adults tend to have large chests. Proper head to chest position is defined by a horizontal line connecting ear to anterior shoulder
4 steps to patent airway • Proper patient position -ear horizontal to sternum • Insertion of oral or nasal airway • Lifting of the mandible • Suctioning the airway
Oxygenation and Ventilation • Maximizing oxygenation requires maximizing the inspired concentration of O2 as well as effective elimination of carbon dioxide from the alveolas. DON’T HYPERVENTILATE!!!! • Hyper-oxygenate with BVM or NRB mask with high-flow O2. • BVM using small volume 6-7 cc/kg, over 1-2 seconds, low pressure
Cricoid Pressure • Application of downward pressure at the cricoid ring causes compression of the underlying esophagus prevents passive regurgitation of stomach contents. • Recommeded during BVM ventilations with pediatrics - Over aggressive pressure causes tracheal compression making it hard to bag or intubate!!!
Criciod Pressure • Once criciod pressure has been applied, this should be continued until intubations is complete and verified.
Equipment • Curved blades or Macintosh blades • Straight blades or Miller • Stylet shaping • Handle and how to hold it
Curved blades • Begin SLOW insertion directly down the middle of the tongue not the right side to find the epiglottis. • Blade tip is advanced into the vallecula pressing on the hyoepiglottic ligament, raising the epiglottis out of the way. • If the epiglottis is missed upon blade insertion, the tip of he blade will enter the esophagus.
Straight blade • Directly lifts the epiglottis. • Proper epiglottis identification, tongue control, and tube passage are important in curved blades, are even more critical with straight blades. • Flanges are much smaller with less control of tongue • Recommended in infants
Enter on the right side of the mouth, the epiglottis edge is lifted by the tip of the blade and the tip is advanced into the laryngeal inlet. • The first structure seen is the interarytenoid notch, followed by the posterior cartilage, then the vocal cords and glottic opening.
Dangers with straight blades • Never blindly advance into the esophagus and then withdraw due to risk for puncture or perforation to the hypo pharynx, upper esophagus, and larynx.
Stylet shaping • Straight-to-cuff tube/stylet aids in maneuverability and laryngeal view. With the main body perfectly straight, with about a 35 degree angle beginning just behind the cuff. The stylet stopped 2-3 cm before the tip of the tube.
Holding the handle • Correct grip of a laryngoscope is low down on handle, with your thumb pointing upwards. • With proper hand grip, keep your elbow close to torso, it is easy to transmit force along forearm and to blade tip, making effective use of instrument without straining.
Know whether you are right or left eye dominant. • Left eye dominance rotate there heads slightly to the right bring the target closer and widens there view. • Right eye dominance do not need to compensate keeping there heads straight.
Multiple intubations attempts • The decision about whether to temporarily suspend intubation attempts and bag the pt (or not intubate a child at all) is dependent upon pulse oximetry and pulse rate. • Without sufficient preoxygenation the onset of critical hypoxia will be quick. • PALS does state that it is acceptable to not intubate a pediatric patient as long as the patient is sufficiently oxygenated and ventilated during transfer to a higher level of care. Do not delay transport and other vital care for difficult intubations if BVM is effective
PaO2 • By maximizing oxygen concentration in the alveoli, blood and tissues, the more time the patient will tolerate apnea before becoming dangerously hypoxic. • Preoxygenation can take several minute. TAKE YOUR TIME!!!!
Combitube following failed intubations • Leaving the Combitube in place following failed intubations is an appropriate stopping point, assuming oxygenation and ventilation have been achieved. • Placing the combitube with a laryngoscope ensures proper placement. Blind insertion may cause trauma and bleeding.
Sedation may be required if pt biting on the tube. • An OG can be placed down the esophageal tube for decompression of the stomach. • DO NOT remove the Combitube to intubate. If they haven’t thrown up yet, they will now!!! • You can intubate around the Combitube by deflating the pharyngeal balloon, using a straight miller blade.
Pediatric intubations • Differences from adult to pediatrics. • The larynx is positioned higher in neck • The mandible in infants is under-developed, meaning shorter and narrower. • Increased size of the tongue relative to the size of the oral cavity in peds. • Pediatrics have a increased length and stiffness of the epiglottis. • Lastly, the size of the head in peds. • The narrowest point is the subglottic region, not the vocal cords like adults.
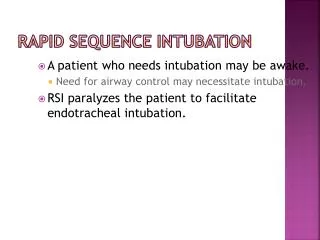
RSI • The fastest most effective means of controlling the emergency airway. • Patient safety in RSI is about managing the inherent risk involved with the cessation of spontaneous breathing. - which you are about to take away!!!!
Indications for RSI • GCS less than 8 with the following: • Pt is unable to maintain a patent airway. • Pt is unable to protect his/her airway. • Pt is not being appropriately ventilated or oxygenated. • Pt requires intubations for specific therapy or procedure. (flying in an aircraft)
Contraindications for RSI • Known allergy for necessary medications. • Suspected epiglottitis, or edema. • Severe oral, mandibular, or neck trauma. • Age less than 3 months old. • Significant hypotension.
Pre-RSI requirements • EKG 4-lead • IV with normal saline, X 2 if possible. • Pulse oximetry • Bag valve mask attached to high-flow O2 • Suction • Combi-tube and/or cricothyrotomy kit.
RSI Medications • Lidocaine • Dose: 1.5 mg/Kg IVP Reduces cardiovascular and intracranial pressure responses during intubations. Should be given at least 2 minutes prior to starting intubations.
Atropine • Dose: 0.02 mg/Kg IVP (minimum dose of 0.1 mg) Blunts the occurrence of bradycardia from vagel stimulation during intubations and from the administration of Succinylcholine. Also dries up secretions. Very important in Pediatrics. Bradycardia during RSI intubations usually caused by hypoxia!!!
Zemuron ( for defasiculating dose when succinylcholine is the paralytic agent.) • Dose: 0.1 mg/Kg IVP This non-depolarizing neuromuscular blocker prevents fasiculation's due to Succinycholine. This is small, involuntary muscle contractions seen under the skin. • Fasiculations can result in the release of potassium by the muscles. Consider using for patients with hyperkalemia.
Versed • Dose: 0.1 mg/Kg under 50 lbs 2.0 mg IVP for adults Duration is 5-10 minutes. This reversible, short-acting benzodiazepine works as sedation and analgesia. Administer to pt’s who might be adversely affected by increased HR and BP. (MI’s, CHF, HTN’s and head injuries)
Succinylcholine • Dose: 1.5 mg/Kg IVP This non-reversible depolarizing neuromuscular blocker provides paralysis in 30-90 seconds. Duration is 3-6 minutes. ALL protective reflexes are gone!!! Cricoid pressure is needed until intubation is completed to prevent aspiration.
Zemuron • Dose: 1.0 mg/Kg • This non-depolarizing neuromuscular blocker has a duration of 25-35 minutes when given in full dose.
Verification of placement • Watch it go through the “cords” and let everyone know. • Auscultation • Chest rise and fall • EtCO2 • Pulse Oximetry