Download
1 / 45
450 likes | 565 Views
RTV 322 Camera use: Shooting to Edit. Film and Video. Project Start. Training and certification Shift set up this week Start next week – be on time, ready to be productive each time. Project Start. You must watch and learn from the camera tutorials available on the course outline.

E N D
RTV 322 Camera use: Shooting to Edit Film and Video
Project Start Training and certification Shift set up this week Start next week – be on time, ready to be productive each time
Project Start You must watch and learn from the camera tutorials available on the course outline. Be prepared to apply that understanding starting next week.
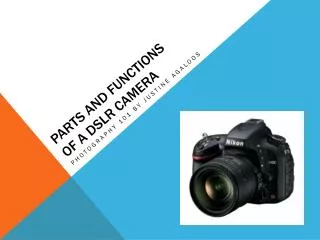
Our cameras • Canon XH A1 (mini DV) • Manual mode • ‘point and shoot’ • JVC HM 150 (SDXC card) • Class 6 or above • Brand matters • Georgia tutorial • Our settings: • SD(DV), QuickTime, 16:9 • (GL1)
The gear • Camera • Camera mounted light • Mic and cable • Mic clip • Tripod • ‘shoe’ / plate & balance indicator • Batteries • Dolly
Reminder • Your own MiniDV tape • Your own 16GB or higher SDHC or SDXC memory card • Ability to shoot on either • Ability to edit on FCP 7 or FCP X • Note: You must have shot on SD card to edit on FCP X or Adobe Premiere
Reminder • Canon camera replacement cost, $3000 • JVC camera replacement cost, $2000 • Camera battery or light replacement cost, $125 • Sony mic replacement cost, $200 • Mic clip replacement, $25
Other reminders • ‘PA’ room / check out room • Reserve gear before needed for checkout – allow time for check-out and check-in • ONLY an on-duty PA • Reserve your edit station before every needed use
Camera control • Loading tape and SD card • Mounting battery • Plug in and check mics • Power, stand-by, lock settings • AGC, Gain adjustments • ND filter • MF / AF • ‘shutter speeed’
Lenses • Camera body vs. lens • Zoom or fixed (prime) -- critical focus • Optical vs. Digital zoom • Diaphragm / aperture -- f-stops / t-stops / number means what? • Manual vs. autofocus • Sharp focus, Selective focus, follow focus, rack focus, soft focus, swimming focus • Depth of field is affected by focal length, aperture, and the distance of objects from the camera.
Camera mounts • Tripod and pedestal • Friction head / Fluid Head • Crane vs. jib • Dolly / track • SteadiCam vs. Handheld • Image stabilization • Robotics, follow me, Segue, ‘copter, cable mount, etc. • Bean bag, other options
Shot Composition • Rule of Thirds • Point of View • Angle • High angle, low angle, high level, low level, bird’s eye view, canted / Dutch angle • Cut off lines, look space, lead room, head room, eye line • Terms: WS, OTS, 2/S, etc.
Shot Composition • Master Scene Shooting Method • Establishing / Master Shot • Coverage • Demonstration, Star Trek Enterprise • Also talked about as ‘shooting & editing sequences’ • Wide shot / medium shot / CU / reverse angle, OTS, etc.
Transitions • What is a shot? • Fade / cut / Diss / Wipe / DVE • ‘Changing shots’ in a one-shot • Multi cam shoots vs. film style • Real time to Filmic time • Invisible / seamless edits • Sequences • Master Shot / cover shot • Jump cuts / pop cuts
Camera movements • Pan, tilt, truck, dolly, arc, zoom, boom/pedestal • DVE • Crane, tracking, feather, 360 shot, follow, swish pan / whip pan, snap zoom (use as transition)
The Static Frame • Storytelling involves interplay of blocking, lighting, costumes, and setting -- as captured by the camera • Balanced shots? • Edge of the frame / off-screen space
Technical vs. aesthetics • What kind of camera? What kind of lighting? What kind of lens? • Consumer vs. Prosumer vs. professional cameras • How the story is told? ‘Language’ of visual storytelling -- Hollywood style, home movies style, new media style, NPPA / news style
Remember • Artist with paint and canvas – the art of visual storytelling • Songwriter creating a new song – creative development of content for a target audience
Video Shooting Tips • http://multimedia.journalism.berkeley.edu/tutorials/shooting_tips/
Planning Your Shoot • Talk over your shoot with other members of the production team and make sure you're clear on what shots you need to tell the story. • If you're on your own, write up a list of shots you need. Write the story beforehand in your head, and list the elements you want to get video of to do that story.
Planning Your Shoot • Think about what's going to look good visually, and how your shots are going to come together sequentially. • Try viewing your piece as a skeleton, and you're shooting the flesh for all those bones.
Roll Blank Tape Before You Shoot • Before you start shooting, roll your tape for 30 seconds at the beginning of your tape with the lens cap on (or with color bars - see your camera manual for setting your camera to display color bars). • SD card is a different issue
Check Your Audio • Be sure to plug a set of headphones into the camera and check your audio to make sure you're getting an audio feed. • It's easy to forget to plug an audio cord into the camera or to properly set the audio level - and wind up with great video but no audio to accompany it.
Shoot Selectively • Think before you shoot. Be aware of what you're shooting and when the tape is rolling. Don't record unless you're taking a shot. • Don't roll tape when you're changing from one shot to another or focusing. Wait until you have the shot you want before rolling record. • 4-to1-shooting ratio.
Shut Up When You Shoot • When you press the record button, shut up already! • When the camera is rolling it picks up all the ambient sound. • Don't talk while the camera is rolling, either to yourself or with other members of your team, and no humming. • ‘Good nat sound’
Hold Your Shots • Hold your shots for at least 15 seconds, before you pan, zoom or go onto another shot. • You can always take a 15-second clip and make it a 2-second clip during editing, but you can't take a 2-second clip and make it into a 15-second clip.
Excessive Panning and Zooming • Don't constantly pan from side to side or zoom in and out with the camera - hold your shots and look for the one moment that's really captivating. • Instead start with a static shot, and hold it for 15 seconds. • ‘Let the action move in front of the camera’
Shoot in Sequences • To capture a person arriving at work in the morning on her bicycle -- that's one sequence. • It could be made up of the following shots: the person pulling up to the building, getting off the bicycle, chaining the bicycle to the bicycle stand, taking off gloves, taking off her helmet … (cont.)
Shoot in Sequences • …tucking gloves into the helmet, and walking into the building. Every little detail is important. You can't shoot enough details. • A good ratio to shoot for (literally) is 50 percent close-ups and extreme close-ups, 25 percent medium shots, and 25 percent or less wide shots.
Repeat that • 50 percent close-ups and extreme close-ups, 25 percent medium shots, and 25 percent or less wide shots. • NEVER put two wide shots together back to back. • Cut from ‘master shot’ to cut-in (insert) shot – ‘coverage’
Headroom and Noseroom • One approach is the rule of thirds: • one third of the frame should be above the person's eyes • one third of the frame should be the person's face and shoulder area • one third of the frame should be the person's lower torso.
Change Angles and Perspectives • Don't shoot everything from eye level - it's boring.
Get People in Your Scenes • ‘Don’t just shoot the water at Niagara Falls’
Interviews • Have the person you're interviewing to look at you, not at the camera. (objective POV) • Avoid a straight-on shot - shoot the person from a slight angle to the left or right.
Microphones • Use hand-held (stick ) mic only when in a live interview situation (so, never for what we do) • With a lav mic, you'll need to "dress the mic" - properly attach it to the person you're interviewing • Ask the person to run the cord to the lav mic up the inside of their shirt (so the wire won't show in your video).
Avoid High Contrast in Lighting Situations • For example, don't place an interview subject against a bright window or white wall or with sunlight behind the person. • It's usually best to shoot with the sun to your back. • Also – dark skin, white shirt
Photography • …is what we are doing. • …is the art of capturing and controlling light.
Check White Balance • Has to do with differences in color caused by the relative level of reds and blues in light and how a video camera compensates for these differences in color. • MUST white balance every time lighting conditions change. • Must set for dominant light source.
Manual Exposure • The auto exposure on digital video cameras is generally very good at setting the correct lighting. • Professionals always set the correct light and manually set the camera for that light.
Get All the Shots You Need • Visual storytelling • ‘See it, say it’ / ‘shoot to the pictures’ • ‘Pictures’ as jargon means video • Interviews / people on camera / main subject of shot (A-roll) • Footage that supports main content (b-roll)
In the end… • Visualize what your ‘story’ will be – beginning, middle, end • Script what you plan to shoot • Shot list, outline, full script • Gather the raw footage with a strategy for what the final ‘story’ will look like • Plan for what the final production needs will be • ###