Download
1 / 60
1.19k likes | 2.02k Views
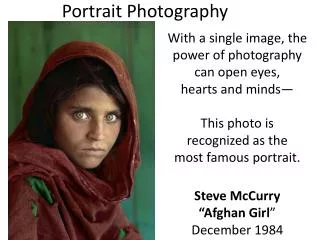
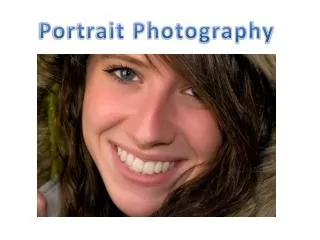
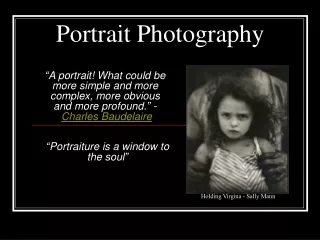
Portrait Photography. Topics we will discuss. Lighting Angles Posing Tips. First, and foremost…. As a beginner in portrait photography, you will definitely need to learn more on a trial-and-error basis.

E N D
Topics we will discuss • Lighting • Angles • Posing • Tips
First, and foremost…. • As a beginner in portrait photography, you will definitely need to learn more on a trial-and-error basis. • We will cover many aspects that can help you improve your abilities, but, in the end, different things work for different people. • TRIAL-AND-ERROR!
Lighting • Is absolute key to amazing portraits • You will be working with several types of light the next few days • Natural & Artificial light • Hard & Soft light • In portrait photography, you want to do your best at making the shadows disappear. (In some cases, shadows are good. Remember, TRIAL-AND-ERROR!)
Recap of Lighting • Hard • Creates dark shadows • 1 light source from 1 direction • Soft • Creates light shadows, if any at all • More than 1 light source from multiple directions • Natural • Natural, Outdoor light (The Sun) • Artificial • Anything that is not natural, outdoor light (light bulbs) • High Key Lighting (New) • Bright lighting (creates a “happy” mood) • Low Key Lighting (New) • Dark lighting (creates a “dramatic” mood) • Directions of Light • Front, Back, & Side
Angles • We have already discussed the different types of angles… • High- “weak”“fragile”“small” • Low- “strong”“power”“large” • Slanted- “unease”“disorientation” • Eye-Level- “normal”“real-life” • Use different angles to create certain “moods” in your photos
Scenario • If you are photographing a newborn baby and you want to photograph them in a “vulnerable” state, what type of angle would you use? • Low • High • Slanted • Eye-Level
Scenario • If you are photographing a soldier in Iraq and you want to photograph him in a “dominant” state, what type of angle would you use? • Low • High • Slanted • Eye-Level
Scenario • If you are photographing a Senior in high school and you want to photograph he/she in their “natural” everyday life, what type of angle would you use? • Low • High • Slanted • Eye-Level
Scenario • If you are photographing a D.J. at a party event and you want to photograph him in an “unusual” state, what type of angle would you use? • Low • High • Slanted • Eye-Level
Angles • ACTIVITY • Take quality portraits of your neighbor using the 4 different angles
Posing • Body language is very important and can tell you how comfortable or uncomfortable your subject is • Things we will be focusing on… • Hands & Arms • Feet & Legs • Head/Chin • Shoulders • Hips • Joints • Eyes
Posing….Hands • You should bend fingers at all joints • Ladies should have more of an open hand • Gentlemen should have more of a closed hand • Try not to intertwine fingers
Posing….Hands • Encourage your model to keep hands & fingers relaxed • If they can’t relax, consider composing shots that don’t include their hands • Or…you can consider giving them something to hold onto • Props MUST be relevant to the shot • Examples: Basketball, guitar, binder, etc • Or…have them rest their hands upon some other element in the shot • Examples: Chair, leg, waist, etc
Posing…Arms • Elbows bent express a comfortable casualness • Arms straight give a feeling of formality and often stiffness (to be used with much caution) • These are a few pointers, but there are various ways to do things…TRIAL AND ERROR!!
Posing…Feet • Feet hip width apart will give a look of strength • Feet at different angles or heights (on a step, chair, etc) will give “balance” to depth. • These are a few pointers, but there are various ways to do things…TRIAL AND ERROR!!
Posing…Legs • Legs spread hip width apart while standing will give an air of strength • Generally while standing, one leg should hold the body weight; the other leg can be bent, or extended behind like a graceful dancer • Can cross one leg over the other • These are a few pointers, but there are various ways to do things…TRIAL AND ERROR!!
Activity Practice with hands, arms, legs, and feet.
Volunteer I need some volunteers… 2 volunteers
Posing…Shoulders • Shoulders should be on different “planes” (one slightly higher or lower than the other) • Shoulders square on will express a strong attitude • Sometimes square shoulders can create a solid picture, but use it wisely • These are a few pointers, but there are various ways to do things…TRIAL AND ERROR!!
Volunteer I need some volunteers… 3 boys & 1 girl
Posing…Head/Chin • Head tipped back slightly will generally give an attitude of a “punk” • Head tipped back to the “high” shoulder will feel fun and flirty • Good for girls • Head down toward the “low” shoulder can express power or position (especially when shooting from a low angle) • Good for guys • These are a few pointers, but there are various ways to do things…TRIAL AND ERROR!!
Activity Practicing with Shoulders & Head position
Posing…Joints • One rule; if it bends, bend it. This goes for elbows, knees, wrists, etc.
Eyes • You can have your subject looking straight at the camera. • This pulls your viewer in automatically and creates an instant focal point
Eyes • You can have your subject looking at something outside the frame • This leads your viewer to wonder what grabbing the subject’s attention
Eyes • You can have your subject looking within the frame
Eyes • Give your subject space to look in too… • This is a great rule to follow, but does have a time when it would be useful to break • TRIAL & ERROR!
Posing • In portraits, it is very helpful to take pictures in this order… • Head shots • Shoulder & up • Waist & up • Knee & up or full body shots
Activity Picture order, Eyes, & Bending
So what does it take… To become a great Portrait Photographer?
Portrait Photography • Practice! Practice! Practice! • Match poses with “personalities” • This requires communication skills to get to know your subject • Go for what is Natural • If your subject is uncomfortable, it will show • Be Patient! TRIAL & ERROR!
Tips • Alter your Perspective • Try various angles!! • Play with Eye Contact • Look within the frame, out of the frame, etc • Experiment with Lighting • SHOOT CANDIDLY!!!! • No posing! In the moment!