Download
1 / 48
500 likes | 1.12k Views
Kodak Capture Pro software Differences with Capture Software. February 15, 2008. What’s New? Capture Software vs. Capture Pro. High Level Summary of What’s New in Capture Pro (details included in included presentation) New GUI

E N D
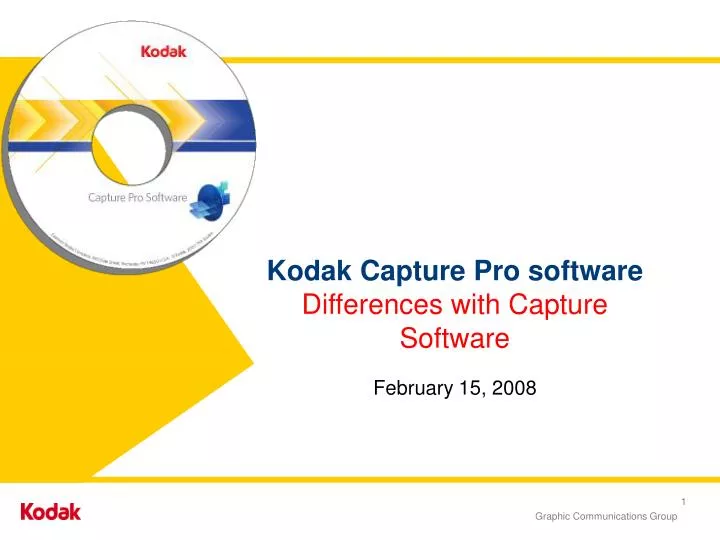
Kodak Capture Pro softwareDifferences with Capture Software February 15, 2008
What’s New? Capture Software vs. Capture Pro • High Level Summary of What’s New in Capture Pro • (details included in included presentation) • New GUI • New features - Thumbnail Viewer, Batch Explorer, Information View, Automatic Batch output • Enhanced features - Image Viewer, Indexing, Post-Scan Editing, Batch Manager, Page Setup • “Applications” become “Jobs” in Capture Pro • New “Indexing Only” Product with its own hardware key and license
Main Screen GUI (2) • New look and feel • Menu names have changed to be more meaningful as well as consistent with Windows conventions • All new icons/buttons and many more of them to accommodate: • New features (i.e., Save as PDF and Flag tools) • Shortcuts for frequently used functions • New Batch and Open Batch • Zoom In/Out • Edit Index data • Page Setup • Undo • More toolbars and better tool/icon/button organization • Ability to customize the main screen by moving windows and toolbars around
Main Screen GUI (3) • Batch Explorer and Thumbnail Viewer are now available in addition to the Image Viewer • Batch Explorer shows document breaks and provides for performing post-scanning functions at the document level (e.g., Split, Merge, Move) • Thumbnail Viewer provides an ability to “see” more of the current document and batch and allows quick navigation to other images/documents in the batch
Main Screen GUI (4) • Batch Explorer • Shows Windows Explorer-type view for the current batch only. • Right-click menu provides access to document-level functions • Menu options change depending on what is selected/highlighted
Main Screen GUI (5) • Thumbnail Viewer • Shows all images in the batch. • Title Bar of each image shows Document and Image Sequence Number • Clicking on image will automatically navigate the Image Viewer and Batch Explorer to that image/document • Click and hold the image for magnifying glass
Main Screen GUI (6) • Image Viewer • Like Capture Software, it shows all images in the current document • <Page Down> and <Page Up> keys as well as a new scroll bar will navigate the document • Buttons for navigating within a document no longer exist • Title Bar of each image shows Image and Page Sequence Number • Status Bar now shows totals for the entire Batch Capture Software Capture Pro
Main Screen GUI (7) • Image Viewer (continued) • 1-Up, 2-Up, 4-Up, 8-Up continue to be supported • New Customize option allows up to 36-up image display
Main Screen GUI (8) • Index View • Index information can be now be displayed on-the-fly during scanning • Index data can be Pinned or Auto-Hidden (move cursor, you don’t have to click, over Index Tab to display the index data)
Main Screen GUI (9) • Information View • Batch Status and Image Properties dialogs in Capture Software has been replaced by Information View
Main Screen GUI (9) • Information View • Batch Status and Image Properties dialogs in Capture Software has been replaced by Information View • Batch, Document, Page, and Image properties are displayed • Like Index View, Information View can be pinned or auto-hidden
Main Screen GUI (10) • Classic and Enhanced Layouts • Two default Main Screen layouts are always available for user selection, Enhanced and Classic • Like Capture Software, any main screen layout changes are saved at the User and Job/Application level
Main Screen GUI (10) • Classic and Enhanced Layouts • Two default Main Screen layouts are always available for user selection, Enhanced and Classic • Like Capture Software, any main screen layout changes are saved at the User and Job/Application level
Post-Scan Editing (1) • Capture Software • Post-scan editing is done by clicking on the tool and then the images on which to perform the function • The cursor changes to the tool selected • Editing is limited to one image at a time or “Apply to Screen” (up to 8 images)
Post-Scan Editing (2) • Image Selection in Capture Pro • In Capture Pro, images must first be selected using the Selector tool • Just like Windows Explorer, CTRL and SHIFT keys can be used to select multiple images • Selected images are surrounded by red border and have title bar darkened • Image Viewer and Batch Explorer will show selected images • Change the Selection Mode to automatically select all images for a page
Post-Scan Editing (3) • Image Selection in Capture Pro (continued…) • You cannot selectindividual images in different documents using the Batch Explorer • Tip: First use the Flag tool and then choose “Select Flagged” from the Edit Menu • However, you can select entire documents and even the entire batch on which to perform a function!! • The Batch Explorer tree view must be collapsed in order to select multiple documents Right-click anywhere on the Tree to access the context-sensitive menu
Post-Scan Editing (4) • Post-Scan Editing in Capture Pro • You then click on the icon/tool to perform the function on the selected images • Note: If you have lots of images selected (e.g., the entire batch), the function could take some time! • Save as PDF is a new post-scan function • Pressing the Rescan and Insert buttons will actually start the scanner Notes: • In Capture Software, the green Start button was used • Insert will only become active when the first image of a page is selected
Post-Scan Editing (5) • Moving Images and Pages • Can be done in either the Image Viewer or Batch Explorer • Only one image or one complete page, can be moved at a time • Just click and hold on an Image/Page and drag it to its new position. • The icon on the toolbar is now the Pan/Scroll (within an image) tool and will perform the same function as the Capture Software icon Note: The cursor changes indicating that a Move is taking place
Post-Scan Editing (6) • Moving Images and Pages (continued) • In the Image Viewer, images/pages can only be moved within the current screen. Note: This is different from Capture Software • Use Batch Explorer to move pages to a different area of the current document or even to a different document! • An entire Document can even be moved using the Batch Explorer • Images can only be moved within the same Page (i.e., swap Front and Rear). Note: In Capture Software, in Move Image mode, individual images could be moved anywhere in the current document
Post-Scan Editing (7) • Splitting Documents • Split Document tool in Capture Pro is the same as the Saw tool in Capture Software • Select the tool and then click on the image/page that will begin a new document. • Image must be the first in a page. • The new Document is inserted immediately after the current document. Note: In Capture Software, the new Document is always appended to the end of the Batch • Splitting can also be done by right-clicking on a Page in the Batch Explorer
Post-Scan Editing (8) • Splitting Documents (continued) • New Split Document will not inherit index data from its Parent Document • Except when Default Value is <LAST VALUE> • System Default Values (e.g., Date/Time, Document ID) will get recalculated • Image Address and Print String default values will get recalculated based on first image of new document • Bar Code and OCR default values will not be recalculated.
Post-Scan Editing (9) • New Functions • Import Images • One or more images can be inserted into or appended to the current document • Image(s) will be inserted before selected page; if nothing is selected image(s) will be appended to end of document • Each image is considered its own Page • On-the-Fly indexing and separation is not performed on imported images • TIFF, JPEG, and BMP are supported (each image in Multi-Page TIFF will be imported as a separate Page) Note:Import images…will not be availableif the batch is empty
Post-Scan Editing (10) • New Functions (continued) • Display Filters • Image viewing can be configured to not display or “filter” specific images (during scanning or post-scanning) • Separate settings available for Image Viewer and Thumbnail Viewer • Accessible via the Main or Right-Click menus • Status Bar will indicate if Filters are turned ON or OFF
Post-Scan Editing (11) • New Functions (continued) • Flag Tool • Images can now be “Flagged” for later handling and consideration • Unlike Image Selection, the Flag is persistent and stays with the image even after batch processing • The Flag is contained in the TIFF tags of the image for interrogation by a downstream application
Post-Scan Editing (12) • New Functions (continued) • Merge Documents • Through the Batch Explorer, documents that were falsely separated during scanning can now be merged together • Selected Document will always get merged “up” with Previous Document • To merge “down” you must first move the document and then perform the merge • Index data from Selected Document is cleared; the Previous Document’s (i.e., the combined document) index data is left unchanged
Post-Scan Editing (13) • Cropping and Blanking • New Draw Region tool provides much more flexibility and functionality compared with Capture Software • Each image can have its own region of different size and location • Region can be applied to selected images or all images in the current document • Once a region is drawn it can be moved or changed in size (“rubber-banded”) • With Capture Software, you must re-draw the entire region !!
Post-Scan Editing (14) • Cropping and Blanking (continued) • Once the region(s) have been drawn, you then invoke the Crop or Blank function from the Toolbar • Images with regions must be selected in order for cropping or blanking to take affect • Drawing regions and cropping/blanking can only be done one document at a time
Post-Scan Editing (15) • Remove Blank Images • Very similar to Capture Software with a couple key improvements • Separate image size setting for Color images • Selected images are bordered in Red and not shaded in Red • Easier to inspect image content and easier on the eyes! Capture SoftwareCapture Pro software
Jobs and the Batch Manager (1) • Jobs vs. Applications • The terminology of Application has changed to Job in Capture Pro software. • To configure a Job, you invoke/access Job Setup from the Main Screen. • In Capture Pro, you can get to the Main Screen, however, without opening up a batch… • In Capture Software you could also access Application Setup from the Open Application dialog
Jobs and the Batch Manager (2) • Batch Manager • The Open Application dialog has been replaced by the Batch Manager
Jobs and the Batch Manager (3) • Batch Manager (continued) • Improvements from Capture Software • Ability to select multiple batches and perform operations like Delete and Output • Each batch now has a Status • You can even know which batches are “In Use” in a Multi-User installation • Can sort the batch list based on any column in the display
Jobs and the Batch Manager (4) • Batch Manager (continued) • More Improvements • Customizable on-line help can be readily displayed for each Job • You can also select for which Jobs to display batches. • Only those Jobs that a user has access to will be available for selection
Page Setup • What’s Different • Every scanner is supported through TWAIN • All scanner settings are configured through the scanner’s TWAIN driver • All functions available for Color/Grayscale and Black & White • Calender mode • Merge • Split • NEW Auto-Delete Options • Delete both “streams” (i.e., color and black & white) when blank image is detected; current Capture Software requires separate detection for Color and Black & White • Delete Based on Content (in addition to Image Byte Size) • Enhanced Split functionality (on-the-fly during scanning) • Split from 2 to 6 images • Separate settings for Front and Back • Configurable Image Order
Indexing and Index Setup (1) • Capture Pro Index • NEW Indexing-only product, Capture Pro Index • Requires its own hardware key and license • Note: Any Full license of Pro with an attached scanner can also do indexing in a Multi-User environment • Any existing Capture Software hardware key can be converted to an Indexing-only license • Main Screen GUI automatically changes to reflect no attached scanner
Indexing and Index Setup (2) • Indexing Mode • Separate main screen layout when entering Indexing Mode • Completely customizable • Also saved at the Job and User level • NEW: Can navigate to other images in the document to perform indexing • Thumbnail Viewer can assist in navigating to the right image
Indexing and Index Setup (3) • Indexing Mode (continued) • New Indexing Toolbar and Index Menu • Previous Document(NEW) • Save and Exit(NEW) • Cancel and Exit(NEW) • More than 100 languages available for Drag and Drop OCR!! • ENTER key can be defined to perform the most-used function; thereby increasing productivity by minimizing mouse-clicks • Single keystroke hot keys further increase productivity
Indexing and Index Setup (4) • Indexing Mode (continued) • Customizable field descriptionscan assist in Key Data Entry • NEW: Drop-Down Lists are available for Table Look-Up and ease of data entry 1) Select the value from the list using the mouse or 2) Enter a starting character to automatically navigate to the right spot in the list
Indexing and Index Setup (5) • Index Setup • Completely re-designed to make it easier to edit and make changes to index fields • Many new features and improvements
Indexing and Index Setup (6) • Index Setup – What’s New and Improved • “Unlimited” number of index fields for both Batch and Document (actual limit is 999) • “Unlimited” # of characters per index field • Ability to Add, Delete, Move (change order) index fields without having to wipe everything out and start over! • Read-only index fields (operator can see the data but cannot modify the data during indexing) • Hidden index fields (operator can not see the data during indexing, but data will be included in batch output) • Output Mask for all data types (not just Date/Time as in Capture Software) • Drop-down list index field type • Batch level bar codes can now be used as default values for Document level index fields • Bypass audit during navigation (Allow post-scanning Image QC without getting Index Error pop-up messages)
Indexing and Index Setup (7) • Index Setup – What’s New and Improved (continued) • Ability to Convert Characters during the indexing of a document • Remove unwanted characters from zonal OCR (e.g., spaces, ^, MICR delimiters [> # ~]) • Fix zonal OCR errors (e.g., B to 8; O to 0 etc…) • Allow special characters to be generated from bar codes that do not support special characters (e.g., 3 toü) • In Capture Pro, conversion and display will take place immediately from key data entry or drag-and-drop OCR (this was not the case in Capture Software) • More flexible Input and Output Masks • Now called Input and Output Format in Capture Pro software • Range of values (e.g., enter a value between 100-299) • New syntax
Output Processing (1) • Step 1: Initiating Batch Output • Batch Output can be initiated Manually or Automatically(NEW) • Manual • User presses the Output button (New icon) • Automatic • New option in Job Setup to automatically output a batch whenever a batch is closed Closing a Batch • Opening another batch • Manually creating a new batch • Automatic batch creation (e.g., patch/bar code) • Exiting Capture Pro software
Output Processing (2) • Step 2: Validating Index Data • Before Output is done, all index data (batch and document) is validated against the Input Format (including Min and Max length) • No more forgetting to index and having to rescan and re-index a batch!! • If error is detected, message is displayed and user is automatically taken to the “guilty” index field • If Job is configured for Auto Batch Processing, then Batch is put into “Index Error” status
Output Processing (3) • Step 3: Batch is Queued for Output • After index validation, the batch is queued for output by a separate process that runs in the background • If batch output was initiated by the user, they will immediately be prompted to create a new batch without having to wait for the current batch to be output • Scanning into the new batch can continue while batch output processing takes place in the background
Output Processing (4) • Step 4: Batch Output Processing is Done in the Background • All batch output processing, regardless of whether it was initiated manually or automatically, is done in the background on the PC that initiated the output (NEW) • Automatic batch output should never be enabled in a multi-user environment; because… • It will never be able to be opened by the Indexing Workstation!! • When batch is closed on the scanning workstation, it will get immediately processed • After background batch output processing is successfully completed, batch will be deleted, by default. There is a NEW option, however, to keep the batch after processing • Allows batches with index data problems (e.g., typos, wrong data entered, missing fields) or missing images/pages to be corrected and re-Output • Allows System Admins to test and ensure their Jobs are configured properly before putting Jobs into production
Output Processing (5) • Capture Pro Batch Status • When Capture Pro is launched, a second process Capture Pro Batch Status is automatically started and placed in the system tray. 2 ways to display the status of output batches • Click on the system tray icon • Access from Main Screen • Batches with the following status will be displayed • Queued • Processing • Processing Error • Index Error
Output Processing (6) • Output Processing Errors • Because all processing takes place in the background, if Output errors occur, the user will be notified via a pop-up window just above the system tray • The Capture Pro Batch Status icon changes to • To display the status of all batches (not just the ones in error) or to display more details about a batch in error, click on Show Log from the Control menu • You can search for a specific batch in Notepad