Read-Only User
Project Completion and Certification Tracking System. Training Manual. Read-Only User. Read-Only User - Contents. Page. Page. 4. Report Generator - Starting

Read-Only User
E N D
Presentation Transcript
Project Completion and Certification Tracking System Training Manual Read-Only User WinPCS Training Manual - Read-Only User
Read-Only User - Contents Page Page 4. Report Generator - Starting Report Generator - Overview Report Generator - Defining Reports Report Generator - Running Reports Report Generator - Spreadsheet View Report Generator - Sorting Data Report Generator - Copying Data to Excel Report Generator - Saving / Loading Reports Report Generator - Mask Filter Screen (1 of 4) Report Generator - Mask Filter Screen (2 of 4) Report Generator - Mask Filter Screen (3 of 4) Report Generator - Mask Filter Screen (4 of 4) Report Generator - Connections 20 21 22 23 24 25 26 27 28 29 30 31 32 • Starting WinPCS • Main Screen • Main Menus • Action Bar 3 4 5 6 2. Typical Buttons & Icons Definition Typical Buttons Examples Typical Icons Examples (1of 2) Typical Icons Examples (2 of 2) 7 8 9 10 3. WinPCS View Screens Options Option 1 - Typical View Form Option 1 - Typical View Form – Searching Option 1 - Typical View Form – View Connections Option 1 - Typical View Form – Drag & Drop Option 2 - Typical Hierarchy View Option 2 - Typical Hierarchy View - Navigation Option 2 - Typical Hierarchy View - Drag & Drop Option 2 - Typical Hierarchy View – Menus 11 12 13 14 15 16 17 18 19 5. Reports - Standard Reports Reports - Status Indices & Reports Reports - Typical Examples Reports - Quantitative Reports 33 34 35 46 WinPCS Training Manual - Read-Only User
Starting WinPCS Module Yards Windows login feature WinPCS will prompt the User with a WinPCS User Logon Screen. Enter your Network Login ID and Password when requested. Brisbane and Site WinPCS uses your Network Login ID as your WinPCS Login Name and will start without a login User Prompt. Enter your WinPCS Logon Name and Password when requested. To Start WinPCS , Double Click on the Icon on your Desktop User Not Registered WinPCS Validates the User Logon. If the User Name / Password is not recognised by WinPCS, the User will not be allowed into WinPCS. A Splash Screen will appear until WinPCS is fully loaded and the Main Screen Appears. Contact your WinPCS Administrator for access to WinPCS WinPCS Training Manual - Read-Only User
Main Screen Main Menus Action Bar WinPCS Training Manual - Read-Only User
Main Menus Typical Examples of various drop down menus to all user areas in WinPCS. The user selects the desired menu and the appropriate screen is then Displayed. Each User has Security Levels set within WinPCS. Depending on the Levels set by the Administrator the User may / may not be able to access all area’s of the Menu’s and these items will be greyed out. WinPCS Training Manual - Read-Only User
Action Bar Typical Action Bar Print Preview Report Make a Construction Change Notification. View Property Create a Note Edit Property Who made This Connection View or Make a Word Doc. Make a Handover Certificate Run Excel Make an Area Completion Cert. Open & View Drawings Preservation Make a New Punchlist Start Preservation Make a Word Query Void or Break Connection The Action Bar is found on the lower section of the WinPCS main Screen and is used mainly for Drag & Drop* Commands. * Drag & Drop = when an Icon is Clicked on and Held until released over the relevant Area / Button Command. WinPCS Training Manual - Read-Only User
Typical Buttons and Icons Definition Buttons • Buttons provide common functions that are performed when selected for example: • Navigation. • Information. • Updating / Deleting. Icons • Icons are objects represented by a graphical picture in WinPCS. These Icons are used for the • Drag & Drop* functions within WinPCS for example: • Making connections. • Running reports. • Viewing data. • Creating Certification Documents. * Drag & Drop = when an Icon is Clicked on and Held until released over the relevant Area / Button Command. WinPCS Training Manual - Read-Only User
Sort records in descending order (Letters z.a, then digits 9...0) Sort records in ascending order (Digits 0...9, Letters A...Z, a...z) Find and Replace data in the Report Sort the Report according to the number of duplicates present Copy current data to Microsoft Excel Copy current data to Microsoft Word for Windows Copy current data to disk. (There is a choice of formats) Print immediately. Print preview provides the Printing function with more interaction. Zoom inwards in a print preview Zoom outwards in a print preview Show the previous page Show the next page Typical Buttons Examples The following buttons are General Navigation buttons The following buttons are found in a Report view and / or the Print Preview. Exit Help Information on outcome of recent database operations. This button changes colour according to the outcome of the last operation. Find first Record Find previous Record Find next Record Find last Record Get Record, equal or higher value than used for searching. Get exact value searched for. The following buttons are found in View forms: Open the List view Start the Report generator Create connections between objects View connected items connected to item being Viewed. Start the Entry screen, if allowed to. List all records having a key field value in common. Select the active key, then click this button. WinPCS Training Manual - Read-Only User
Typical Icons Examples ( 1 of 2) Equipment Packages Master Equipment Construction Package / Skid Electrical Equipment HVAC Test Packs HVAC Equipment Piping Hydro Test Packs Instrument / F&G / Telecom Loops Instrument Equipment Piping Isometrics Instrument Loop Mechanical Equipment Piping Leak Test Packs Fire & Gas Loop Fire & Gas Equipment Telecoms Loop Telecoms Equipment Site, Units, Systems, Sub-Systems, Sub-Sub-Systems Electrical Circuits Site Manual Valves Circuit Units Valve Tag Systems Instrument / F&G Index Sub-Systems (AC-1) Instrument Tag Lighting & Small Power Sub-Sub-Systems (AC-2) Fire & Gas Tag Lighting & Small Power Tag Construction Telecom Equipment Tags Piping Line List Milestone / Priority Telecom Equipment Tag Line Tag Notes Cable Schedule Project Documents Note - Open Electrical Cable Document Folder Note - Closed Instrument Cable Project Documents Fire & Gas Cable Vendor Documents Telecoms Cable Note: - These Icons are Typical Examples and may vary depending on the Project Requirements of WinPCS. Commissioning Manual Junction Boxes Handover Certificate Documents Junction Box WinPCS Training Manual - Read-Only User
Typical Icons Examples ( 2 of 2) Mechanical Completion Phase 1 ITP/ ITR Punchlist Software ITP / ITR Active Not Started Not Started Cleared Complete Complete Query Open Closed Change Control Mechanical Completion Phase 2 ITP/ ITR Pre-Commissioning Phase 1 FTP/ FTC Open Not Started Not Started Closed Complete Complete Field Test Report (FTR) ‘A’ Sheet Field Test Report (ITP / ITR) ‘B’ Sheet Field Test Report (FTP / FTC) Preservation Vendor ITP/ ITR Pre-Commissioning Phase 2 FTP/ FTC Preservation Schedule Not Started Not Started Preservation Activity Complete Complete Note: - These Icons are Typical Examples and may vary depending on the Project Requirements of WinPCS. WinPCS Training Manual - Read-Only User
WinPCS View Screens Options There are 2 ways to view information within WinPCS • Option 2 – Hierarchy View • Option 1 – View Form View Form / Hierarchy Views are accessed via the drop down menus on the main WinPCS screen. WinPCS Training Manual - Read-Only User
Option 1 - Typical Form View Exit Information on outcome of recentdatabase operations Start the Entry screen, if allowed to. Open in a Hierarchy Set status on tag, if allowed to. Open in a 2nd Hierarchy List all records having a key field value in common. Typical example of a View form, showing it’s basic operations. The forms may vary and look somewhat different from this example, but they will work in the same way. The View Screens do not allow data to be input or changed. Find first Record Find previous Record Open the List view Find next Record View connected items connected Find last Record Start the Report generator Get Record, equal or higher Get exact value searched for. WinPCS Training Manual - Read-Only User
Option 1 Typical Form View – Searching To the left in the window, there are some small Key shaped symbols in different colours. These indicate that the corresponding data field is a key field or part of a key field, and can be used to control the effective order or search of the records in the database, these fields are highlighted for controlling the order or search. By clicking on one of the dark grey keys, it will turn yellow, and the corresponding field will be used to determine the order or search criteria using the Navigation Buttons. Active Key Field Key Field Fields without frames: (Secondary Fields) Field Types Navigation Buttons Some Fields are shown without a border. These fields are Look-Up fields for reference only Fields with frames & Keys: (Primary Key Fields) Fields with frames & NO Keys: (Primary Fields) A field that can be used to control the effective order and /or be used to search the table. These fields are for reference only. WinPCS Training Manual - Read-Only User
View connected items connected to item being Viewed. Option 1 Typical Form View – View Connections To View the Connections to the Item select the View Connections Button on the Lower section of the View Form. This will Open the View Connections window within the lower section of the View Form. Example Shows an LCS Cable with associated Equipment Drive and Mechanical Completion check record. Typical View Form Filter Buttons for each Type of Connection Equipment No. Mechanical Completion (Stage 1 check sheet) Objects Connected to Item being Viewed WinPCS Training Manual - Read-Only User
Exploded View Option 1 Typical Form View – Drag & Drop To View the Details of the Relevant Connections. Click on the Relevant Icon that you want to view the Details and Hold the Left Button of your mouse and Drag the Icon to the Lower Action Bar and Release over the View Property Icon. This will open up the Form View for the Item that was dragged over the Screen. Example shows an Equipment Drive. Equipment Drive. End Result showing the Form View for the Equipment Drive. View Property WinPCS Training Manual - Read-Only User
Option 2 - Typical Hierarchy View One way to look at the data within WinPCS is as a collection of objects that have properties assigned to them and are connected with other objects. This makes up the hierarchy we see Commissioning System Commissioning Sub-System Document Folder Equipment Drive Junction Box Mech Equip Instrument Loop Instrument Cable Instrument Tag WinPCS Training Manual - Read-Only User
Option 2 Typical Hierarchy View - Navigation From the Main Menu select the Hierarchy Required. Select the Icon (object) Required within the Hierarchy to be viewed. Double Click (left mouse button) on that Icon (object). This will display the Lower Connections to the relevant Icon (object). Repeating the Double Click on the same Icon (object) will reverse the procedure and Hide all the Lower Connections to that Object. Commissioning System Commissioning Sub-System Commissioning Sub-System Plant Area Construction Area Construction Area Construction Area WinPCS Training Manual - Read-Only User
Option 2 Typical Hierarchy View - Drag & Drop To View the Details of the Relevant Connections. Click on the Relevant Icon that you want to view the Details and Hold the Left Button of your mouse and Drag the Icon to the Lower Action Bar and Release over the View Property Icon. This will open up the Form View for the Item that was dragged over the Screen. Example shows a Construction Area. Construction Area End Result showing the Form View for the Construction Area. View Property Exploded View WinPCS Training Manual - Read-Only User
Depending on the Level at which you are in the Hierarchy various menus will be available from a right mouse button click. Option 2 Typical Hierarchy View - Menus Commissioning System Commissioning Sub-System Equipment Report – Selection View Property Edit Property Who Connected this Item Create a Note Create a Completion Certificate Connect Check Sheets Create a Preservation Activity / Requirement Remove Connection to a Higher Level Make new Punch List These Examples are typical to the Objects within the Hierarchy and may vary depending on the Project Requirements of WinPCS Instrument Tag By selecting an Option within the Menu, this will carry out the relevant function. Each User has Security Level set within WinPCS. Depending on the Levels set by the Administrator the User may / may not be able to access all of the Items within the Menu’s. WinPCS Training Manual - Read-Only User
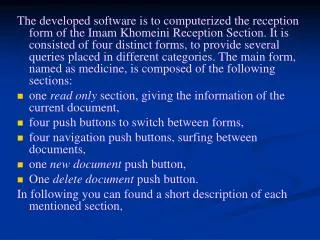
View the Report Generator Report Generator - Starting The Report generator is powerful way of creating “ad-hoc” and Standard Reports for later retrieval. The user is able to save Reports that can be accessed via the Main Menu under Reports > Standard Reports selection. The user is also able to Export the Final Report Data Into Excel and word. 1. 2. The Report Generator appears within the Same Window as the original View Form. The Report Generator is accessed via the View Form. View Form without the Report Generator. View Form with the expanded view of the Report Generator. WinPCS Training Manual - Read-Only User
Report Generator – Overview The Report Generator is user definable and easy to use. Listed below are the main button functions…… Report Help. Retrieve a Previously definedReport. Save this Report layout for Later re-use. Summarise data in a fieldwith equal values Run Report. Fields Selected For Report Define filter or mask forinclusion andexclusion ofdata to be listed. Remove selected Fieldfrom the List Include Fields fromConnected tables Exit and close The Report Generator Set Key Field for Listing. Set Field for restrictionsdefined in the mask dialog. WinPCS Training Manual - Read-Only User
Left Click on Field to be added to Report Report Generator - Defining Reports Selecting Fields to be included in the Report. By left clicking on the Fields on the View form will add the Fields to the report as required and will be included in the Final Report. Primary Key Field Fields to be included in the final Report If a Field is selected with a Lookup function defined ( Fields without frames), this Lookup field will be added automatically to the Report. A Primary Key Field must be selected. This Primary Key will be used for the extraction. If a Primary Field is not selected the report will not run. Note : - Fields with frames & Keys are Primary Key Fields WinPCS Training Manual - Read-Only User
Run Report. Report Generator - Running Reports Running the Report. Once all the Fields and the Primary Key Field have been selected the report is ready to run. Left click on the Run Report Button. This will run the report on the criteria within the Mask function. 1. 2. Note : - the mask function is not used for this demonstration. The Report Generator will now process the criteria showing the Counter of records being processed Final Report generated in a spreadsheet View, ready for Sorting / Exporting Saving to a text file or Print from WinPCS 3. WinPCS Training Manual - Read-Only User
Report Generator - Spreadsheet View Spreadsheet View After the Report Generator has finished processing the Report a Spreadsheet View will appear. The user can Sort, Export into Excel / Word and Print the Final Report. Exit Print Preview Copy current data to Microsoft Excel Print immediately Sort records in descending order Remove selected record Copy current data to Microsoft Word Create Connection between Objects Sort records in ascending order Find or Find/Replace an entry in the edit Field Save the Data to Disk (Various Formats) Edit Column Legends Example shows the Print Preview Option WinPCS Training Manual - Read-Only User
Report Generator - Sorting Data Sorting using the Spreadsheet View To sort the final Report before Printing the user can sort the report using the Sort Ascending / descending Buttons. Sort records in ascending order Sort records in descending order Example Shows a typical 2 Column Sort on the columns Circuit No and then DB No. in Ascending Order. Final Sorted Report. The Column legends are used for selecting fields to be used for sorting. Clicking once on a Legend will select the field for sorting. Click on the same Legend again the Field will be de-selected. A number will appear against the Legend as shown above. This will determine the order of the sort. WinPCS Training Manual - Read-Only User
Report Generator - Copying Data to Excel Copy Data to Microsoft Excel. The Report data can be transferred directly into Excel. Select the Copy current data to Microsoft Excel Button and the Data from the Report will be imported into Excel ready for Formatting, Saving, Sorting, Emailing, etc… Copy current data to Microsoft Excel Final View of the Data within Excel. WinPCS Training Manual - Read-Only User
Report Generator - Saving / Loading Reports Loading a previously saved Report. Retrieve a Previously defined Report. Retrieve a Previously defined Report. 1. Select the Retrieve a Previously defined Report Button to start the Retrieval process. Select the Report Required. The Report will be loaded ready for use Saving a Report. Save this Report layout for later re-use. 1. The Report is now saved ready for Retrieval when required. All saved reports can be accessed from the Standards Report Menu. Select a Standard Report to over write or select (NEW REPORT) to add a new one . Select the “Save this Report layout for later re-use” Button to start the Save process. WinPCS Training Manual - Read-Only User
Report Generator – Mask / Filter Screen (1 of 4) Mask / Filter Screen Overview The Mask Filter Screen is split into three sections. 1. Include Field 2. Filter Expression 3. Marco Function. 1. 2. Define filter or mask forinclusion andexclusion ofdata to be listed. Include Field Select the Mask Button to enter the Mask / Filter Screen Filter Expression Macro Function WinPCS Training Manual - Read-Only User
Report Generator – Mask / Filter Screen (2 of 4) Mask / Filter Screen - Include Field The Include Field is used for Filtering data on the Primary Key Field selected within the Report Generator Window. Include Field This Example will show only Equipment Starting with 245. * = Wildcard ? = Matches any Single Character This Example will show only Circuits with the 3rd Character equalling a Zero will be listed. This Example will show only Equipment containing “PPP” anywhere in the Equipment name. This Example will show only Equipment starting from 245-PPP-001 Thru to 245-PPP-050 inclusive. This Example will show only Equipment starting from 220-PPP-001 Thru to 220-PPP-999 inclusive. WinPCS Training Manual - Read-Only User
Filter Expression Report Generator – Mask / Filter Screen (3 of 4) Mask / Filter Screen - Filter Expression The Filter Expression can be applied across more than one field. Including fields that are not included within the Report selection. I.e. any field that appears within the View Form the report was generated from. Select the Fields…button and the Elements of expression window appears with a list of defined fieldnames and operators, from which the expressions may be assembled. == != && || ! < <= > >= - - - - - - - - - Equal to Not Equal to AND OR NOT Less than Less than or equal to Greater than Greater than or equal to The report will only list records for Discipline = “M” and Function = “PPP” The report will only list records for Function = “PPP” or Function = “PPS” WinPCS Training Manual - Read-Only User
Macro Function Report Generator – Mask / Filter Screen (4 of 4) Mask / Filter Screen - Macro Function The Marco Function is used for more advanced Mask / Filtering. Your System administrator can set-up macro files with more advanced functions that can be applied on reports when required. The Example shows the Function Equip_Codes within the File MACRO.LCX being applied to the Mask / Filtering Window. The report will only list records for Area is not equal to “220” or Status is equal to “A” or Function is equal to “PPP” WinPCS Training Manual - Read-Only User
Select fields from Connected bases. Report Generator – Connections With the Connection Button the user can select Fields from objects in other Tables that have relationships formed. By selecting the Connections Button the Report Connections window appears. The Report Connections window works in the same way as the Hierarchy View. By Double clicking on the Table will display the connections below that Table (Double clicking again will reverse the procedure and hide the lower connections). Once the Correct Table is found select the show fields Button. This will show all the available fields within the Table in the right side of the window, then highlight the Field required and press the Select Button and the Field will be added to the Report Generator Window. Repeat this process for each Field required. Example shows before Sub-System No. CERTAC1 is added Example shows the Field from Sub-System No. CERTAC1 WinPCS Training Manual - Read-Only User
Reports - Standard Reports Standard Reports are a quick way of running pre-defined Reports that have been saved using the Report Generator. The Standard Reports can be accessed via the Main Drop Down Menu. 1. Select the Report Required 2. Final Report generated in a spreadsheet View, ready for Sorting / Exporting Saving to a text file or Print from WinPCS The Report Generator will now process the criteria showing the Counter of records being processed 3. WinPCS Training Manual - Read-Only User
Reports - Status Indices & Reports Status Indices & Reports are standard reports that have been defined for the Project. These Reports are accessed via View Forms within the Completions Drop Down Main Menu or via the Hierarchy View (Right Click). These reports can not be modified by any User within WinPCS. Hierarchy View Select the Status Indices & Reports Button View Form Right Click on Object that you want a Report on and Select “Report Selection” Typical Status Indices & Report Selection for Plant Areas Note: - The Reports Selection may vary depending on the Project Requirements of WinPCS. WinPCS Training Manual - Read-Only User
Reports - Typical Examples Below are Typical Examples of Various Status Indices & Reports that are available within WinPCS Reports Selection Note: - The Final Reports Layouts will vary depending on the Project Requirements of WinPCS. WinPCS Training Manual - Read-Only User
Reports - Quantitative Status Reports Summary Status Report by Sub-System The Quantitative Status Reports are accessed via the Report Spreadsheet View. Summary Status Reports by TO System The Quantitative Status Report groups the Check Sheets by Discipline within a Sub-System / System to measure the progress. The example shows the Quantitative Status Report by Sub-System . Two Reports are generated showing the Totals by Rows and Columns. WinPCS Training Manual - Read-Only User