WiFi Networking
WiFi Networking. Workshop. WiFi. WiFi is the wireless way to handle networking. It is also known as 802.11 networking . The big advantage of WiFi is its simplicity. The computers connect to the network using radio signals, and computers can be up to 100 feet or so apart. .

WiFi Networking
E N D
Presentation Transcript
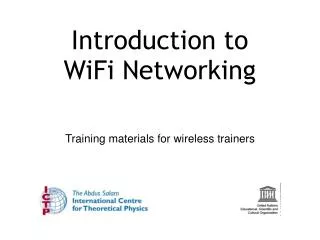
WiFi Networking Workshop
WiFi • WiFi is the wireless way to handle networking. • It is also known as 802.11 networking. • The big advantage of WiFi is its simplicity. • The computers connect to the network using radio signals, and computers can be up to 100 feet or so apart.
Wireless Networking Standards • WiFi refers to the protocols that allow wireless networking. • These protocols are codified in standards. • Standards are mutually agreed upon rules adopted by the industry on how the wireless networks operate. • There are several standards that enable wireless local area networks (WLANs).
Wireless Networking Standards • Some WLAN standards include: HiperLAN, Bluetooth, HomeRF. • There are a couple of standards that describe Wi-Fi. All of them are part of the 802.11 suite. • The core protocols are listed in the 802.11 standards, which was originally available in 1997.
802.11 Suite • Since then, several new extensions have been added to the core 802.11 protocols. • The most relevant of these additions are: 802.11a, 802.11b, and 802.11g.
WiFi’s Radio Technology • The radios used in WiFi are not so different from the radios used in walkie-talkies. • They have the ability to transmit and receive. • They have the ability to convert 1s and 0s into radio waves and then back into 1s and 0s.
WiFi’s Radio Technology (Cont’d) • WiFi radios that work with the 802.11b and 802.11g standards transmit at 2.4 GHz, while those that comply with the 802.11a standard transmit at 5 GHz. • WiFi radios use much more efficient coding techniques (process of converting 0’s and 1’s into efficient radio signals) that also contribute to the much higher data rates.
WiFi’s Radio Technology (Cont’d) • The radios used for WiFi have the ability to change frequencies. • For example, 802.11b cards can transmit directly on any of three bands, or they can split the available radio bandwidth into dozens of channels and frequency hop rapidly between them. • The advantage of frequency hopping is that it is much more immune to interference and can allow dozens of WiFi cards to talk simultaneously without interfering with each other.
802.11b, 802.11a, and 802.11g • 802.11b was first to reach the marketplace. It is the slowest and least expensive of the three. 802.11b transmits at 2.4 GHz and go up to 11 Mbps. • 802.11a was next. It operates at 5 GHz and can handle up to 54 Mbps. • 802.11g is a mix of both worlds. It operates at 2.4Ghz (giving it the cost advantage of 802.11b) but it has the 54 megabits per second speed of 802.11a. It is also backward compatible to 802.11b. • Most WiFi cards nowadays are capable of all three of these radio technologies.
Adding WiFi to Your Computer • One of the best things about WiFi is how simple it is. • Many new laptops already come with a WiFi card built in -- in many cases you don't have to do anything to start using WiFi. • It is also easy to add a WiFi card to an older laptop or a desktop PC.
Adding WiFi to an Older Computer • Buy a 802.11a, 802.11b or 802.11g network card. • For a laptop, this card will normally be a PCMCIA card that you slide into a PCMCIA slot on your laptop. Or you can buy a small external adapter and plug it into a USB port. • For a desktop machine, you can buy a PCI card that you install inside the machine, or a small external adapter that you connect to the computer with a USB cable. • Install the card
Adding WiFi to an Older Computer • Install the drivers for the card • Find an 802.11 hotspot. • Access the hotspot. Hotspot: a connection point for a WiFi network. It is a small box that is hardwired into the Internet. The box contains an 802.11 radio that can simultaneously talk to up to 100 or so 802.11 cards.
Locating Hotspots • There are many WiFi hotspots now available in public places like restaurants, hotels, libraries and airports, university. For example, Lovely Wi-Fi. • The number of hotspots in the world is growing daily. • You can also create your own hotspot in your home.
Connecting to a Hotspot • There are actually two steps to making a connection. • The first is to have your notebook "talk" to the hotspot, which means that the hardware and hotspot must recognize each other. • This should happen automatically as long as your wireless hardware is turned on and new.
Connecting to a Hotspot (Cont’d) • On the newest machines, an 802.11 card will automatically connect with an 802.11 hotspot and a network connection will be established. • As soon as you turn on your machine, it will connect and you will be able to browse the Web, send email, etc. using WiFi.
Connecting to a Hotspot (Cont’d) • Access the software for the 802.11 card -- normally there is an icon for the card down in the system tray at the bottom right of the screen. • Click the "Search button" in the software. The card will search for all of the available hotspots in the area and show you a list. • Double-click on one of the hotspots to connect to it.
Connecting to a Hotspot (Cont’d) • On most notebook models, you will see some sort of signal icon on the bottom right hand corner of your screen or a lit indicator on the notebook itself, which will give you feedback for "On" and signal strength (a red screen means your radio is Off; a green screen indicates it is On). OFF ON
Connecting to a Hotspot (Cont’d) • You can also see the quality of the signal by clicking on the radio icon (may vary by system):
Connecting to a Hotspot (Cont’d) • Your next step is to sign up with a wireless Internet service provider and configure your notebook according to their instructions. • Most of the time, this is a matter of simply launching your web browser. It will automatically go to the wireless service provider's sign-in page. • Keep in mind that different hotspot locations work with different service providers, but each hotspot location should provide easy and clear instructions on how to connect.
Connecting to a Hotspot (Cont’d) • After this, you will end up at the log-on page of the wireless provider (or, in some cases, the wireless location).
Connecting to a Hotspot (Cont’d) • If so, simply follow the instructions to sign up for the service, or enter your user name and password if you are already a customer. • Once you successfully log on, you should see the following icon in your tool bar, indicating the connection has been made:
WiFi Security • WiFi hotspots can be open or secure. • If a hotspot is open, then anyone with a WiFi card can access the hotspot. • If it is secure, then the user needs to know a WEP key to connect. • WEP stands for Wired Equivalent Privacy
WiFi Security (Cont’d) • WEP is an encryption system for the data that 802.11 sends through the air. • Encryption system prevents any non-authorized party from reading or changing data. • Specifically, it is the process of encoding bit stream in such a way that only the person (or computer) with the key (a digital sequence) can decode it.
WEP • WEP has two variations: 64-bit encryption (really 40-bit) and 128-bit encryption (really 104-bit). • 40-bit encryption was the original standard but was found to be easily broken. • 128-bit encryption is more secure and is what most people use if they enable WEP. • For a casual user, any hotspot that is using WEP is inaccessible unless you know this WEP key.
WEP (Cont’d) • If you are setting up a hotspot in your home, you may want to create and use a 128-bit WEP key to prevent the neighbors from casually eavesdropping on your network. • Whether at home or on the road, you need to know the WEP key, and then enter it into the WiFi card's software, to gain access to the network.
Setting up a Hotspot at Home • If you already have several computers hooked together on an Ethernet network and want to add a wireless hotspot to the mix, you can purchase a Wireless Access Point and plug it into the Ethernet network. Wireless Access Point
Alternate Setup using a Wireless Router • If you are setting up a network in your home for the first time you can buy a Wireless Access Point Router. • This is a single box that contains: • 1) a port to connect to your cable modem or DSL modem, • 2) a router, • 3) an Ethernet hub, • 4) a firewall and • 5) a wireless access point. • You can connect the computers in your home to this box either with traditional Ethernet cables or with wireless cards.
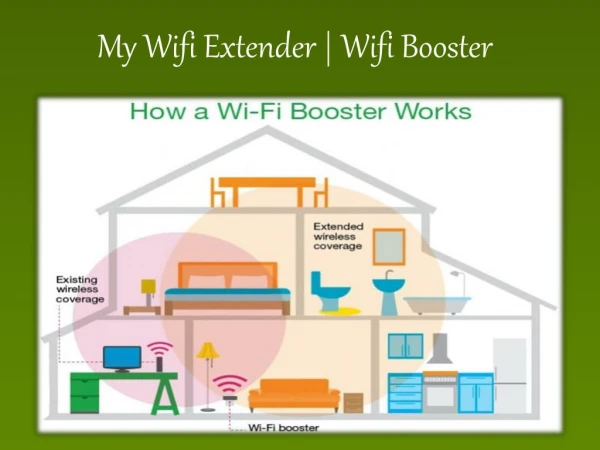
WiFi Range • Regardless of which setup you use, once you turn your Wireless Access Point on, you will have a WiFi hotspot in your house. • In a typical home, this hotspot will provide coverage for about 100 feet (30.5 meters) in all directions, although walls and floors do cut down on the range. • Even so, you should get good coverage throughout a typical home. For a large home, you can buy inexpensive signal boosters to increase the range of the Hotspot.
One Type of Amplifier Or a directional antenna can be used to give better range in a particular direction.
Another Way to Amplify WiFi Signals A WiFi repeater is installed to extend coverage. Wireless Access Point
Things to Configure in a Hotspot • The SSID -- Service Set IDentifier is a sequence of characters that uniquely names a WLAN. • It will normally default to the manufacturer's name (e.g. "Linksys" or "Netgear"). • You can set it to any word or phrase you like. • The channel – the radio link used by access point/router to communicate to wireless devices. • The WEP key -- The default is to disable WEP. • If you want to turn it on, you have to enter a WEP key and turn on 128-bit encryption. • WEP can be in text format.
Infrastructure versus Ad Hoc • All the connections that we have talked about today require a connection from a device equipped with a wireless network interface card (NIC) to a wireless access point. • Generally, all such connections are operating in what is known as the infrastructure mode. Here the wireless network resembles a cellular architecture. • Wireless devices can also communicate directly with each other, i.e., it is not required that they communicate with an access point first.
Infrastructure versus Ad Hoc • When devices with NIC cards communicate directly with each other, the wireless network operates in ad hoc mode. • Essentially peer-to-peer communication is enabled.
Ad Hoc Mode • Ad Hoc connections can be used to share information directly between devices. This mode is also useful for establishing a network where wireless infrastructure does not exist. • Some uses, • Synchronize data between devices. • Retrieve multimedia files from one device and “play” them on another device. • Print from a computer to a printer without wires. • There are many applications of ad hoc networking in the military and in specialized networks.