Download
1 / 52
520 likes | 650 Views
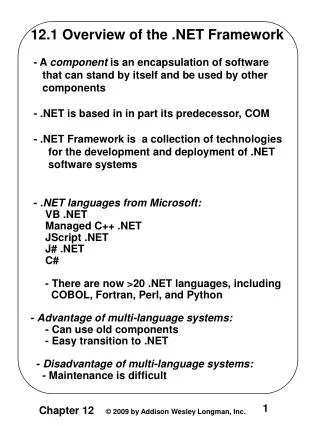
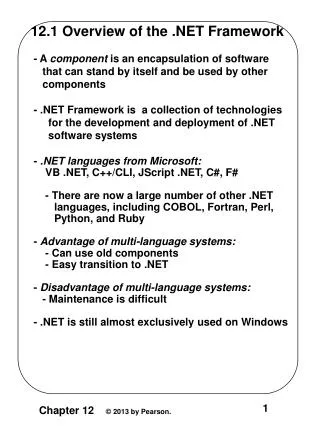
12.1 Overview of the .NET Framework - A component is an encapsulation of software that can stand by itself and be used by other components - .NET Framework is a collection of technologies for the development and deployment of .NET software systems

E N D
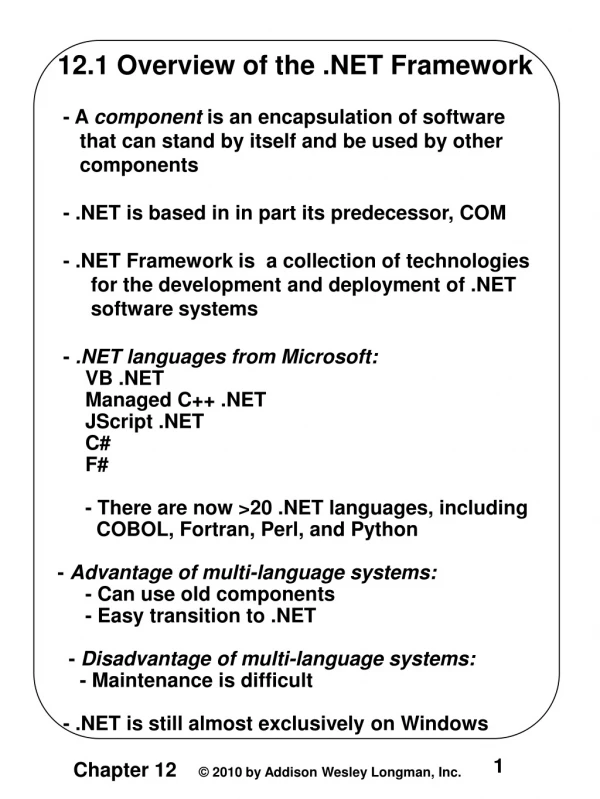
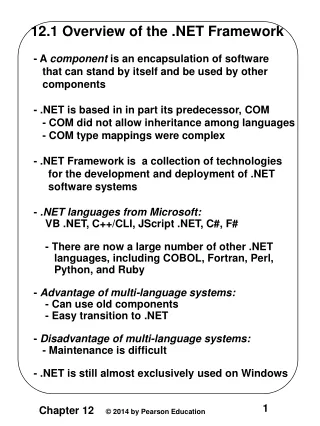
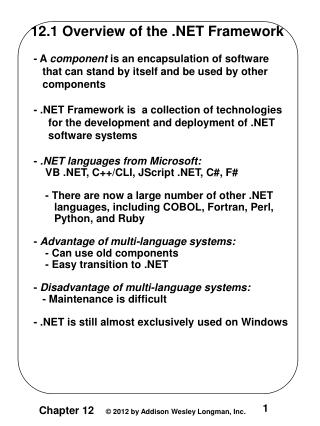
12.1 Overview of the .NET Framework - A component is an encapsulation of software that can stand by itself and be used by other components - .NET Framework is a collection of technologies for the development and deployment of .NET software systems - .NET languages from Microsoft: VB .NET, C++/CLI, JScript .NET, C#, F# - There are now a large number of other .NET languages, including COBOL, Fortran, Perl, Python, and Ruby - Advantage of multi-language systems: - Can use old components - Easy transition to .NET - Disadvantage of multi-language systems: - Maintenance is difficult - .NET is still almost exclusively used on Windows
12.1 Overview of the .NET Framework (continued) - The .NET Common Language Runtime (CLR) - JIT compilation (for each .NET language) - Garbage collection – can be forced - Exception handling , type checking, debugging - Common Language Infrastructure (CLI) - Common Type System (CTS) - Minimum type set for .NET - All .NET languages must support them - e.g., Int32, which corresponds to int in C# - All CTS types are derived from System.object - Two categories of data types: value and reference
12.1 Overview of the .NET Framework (continued) - Common Language System (CLS) - Minimum language constructs and rules - Framework Class Libraries (FCL) - > 4000 classes - Aim of CLI and CLR: interoperability - A component in any .NET language can: - Use any class in the FCL - Call the methods of any other .NET language class - Subclass any class from any .NET language
12.2 Introduction to C# • - C# heritage: • - From Java: • - Single inheritance • - Interfaces • - Garbage collection • - No global types or variables • - Level of coercion • - From C++: • - Pointers • - Operator overloading • - Preprocessor • - structs, enums, … • - From Delphi and VB: • - Properties • - From J# (actually, J++): • - Delegates
12.2 Introduction to C# (continued) - C# heritage (continued): - New Features: - Indexes - Attributes - Events - Primitive Types and Expressions - Similar to Java, except C# has unsigned integers and a 16-byte decimal type - Math class provides methods for Abs, Cos, Sqrt, and Pow - Data Structures - Similar to Java and C++: class library support for Array, ArrayList, String, Queue, Stack, and Hashtable - An enumeration type, similar to that of C++, except no coercions to or from other types - Regular expressions for string pattern matching
12.2 Introduction to C# (continued) - Control Statements - Like Java, except: The foreach statement has different syntax foreach (int myInt in myIntArray) { … } 3. The switch has a static semantics rule that requires each selectable segment to end in an unconditional transfer (either break or goto) case 0: Zeros++; goto case 1; case 1: ... break; case ... - Classes, Methods, and Structures - Like Java, except: 1. Parameters can be passed by value (default), passed by reference, or passed by result - Pass by reference - ref - Pass by result - out
12.2 Introduction to C# (continued) 2. A method that can be overriden must be marked virtual A method that overrides must be marked override A method that has the same protocol as an inherited method but is NOT to override it is marked new 3. A C# struct is a lightweight class - Supports constructors and can implement interfaces - Does not support inheritance or subclasses - Is allocated from the stack - Partial Classes - A class definition can appear in two or more files – put together by the compiler - Two uses: - To make large class definitions more manageable - When a tool (like Visual Studio) creates part of a class definition and the developer creates another part
12.2 Introduction to C# (continued) - Exception Handling - All exception classes are descendants of Exception - Two subclasses, SystemExceptionand ApplicationException - Common system exceptions are IndexOutOfRangeExceptionand ArithmeticException - Output, etc. System.Response.Write( ″<h1> Today’s Report </h1>″); - For outputting the values of variables: string msg = string.Format( ″The answer is: {0} <br />″, answer); System.Response.Write(msg); - The using statement using System; - Namespaces namespace myStuff { … }
12.3 Introduction to ASP.NET -The Basics of ASP.NET - Based on ASP, but revolutionarily different - ASP documents could have embedded scripts in either Jscript or VB – both purely interpreted - Disadvantages: 1. Inefficient 2. Mixing script and markup is confusing 3. Scripting languages are unreliable - ASP.NET differs from JSP in two ways: 1. Several different non-scripting .NET languages can be used (VB, J#, C#) 2. All ASP.NET code is compiled - Code can be embedded in ASP.NET documents, or can be separate in a code-behind file - Base class is System.Web.UI.Page, unless there is a code-behind class (then it is the base)
12.3 Introduction to ASP.NET (continued) - ASP.NET documents - Can include: 1. XHTML markup 2. Directives – appear in <%@ … %> blocks 3. Render blocks <% … %> - No method definitions - Put into a function in the document class 4. Declaration blocks - Script elements - method definitions 5. Server-side comments <%-- … --%> - The only directive covered here is Page - The only necessary attribute is Language SHOW timeLeft.aspx - Code-behind Files - The Page directive must specify the code-behind file in a Inherits attribute
12.3 Introduction to ASP.NET (continued) <%@ Page language = ″C#″ Inherits= ″timeLeft2″ Src = ″timeLeft2.aspx.cs″ %> SHOW timeLeft2.aspx and timeLeft2.aspx.cs - The using directives are in the code-behind file, but not in the ASP.NET document because the class made from the ASP.NET document is a subclass of the code-behind class 12.4 ASP.NET Controls - Two collections of server controls: HTML controls and Web controls - Because HTML controls are rarely used, we will not discuss them - Web Controls - Two categories: 1. Those that correspond to the HTML controls 2. Special controls for data validation and data binding
12.4 ASP.NET Controls (continued) - Four subclasses of ListControl: - DropDownList and ListBox – converted to HTML select elements - CheckBoxList and RadioButtonList – converted to HTML table elements - Some commonly used special Web controls – converted to combinations of HTML elements - Xml – allows the inclusion of XSL transformations - Panel – allows collections of elements to be handled together (placement, etc.) - AdRotator – Easy way to have different content appear on different requests - Validator controls – later - Web controls must include the runat attribute, set to ″server″ - The tag names of Web controls must be prefixed with asp <asp:textbox id = ″phone″ runat = ″server″ />
12.4 ASP.NET Controls (continued) - All Web controls are converted to objects in the document class - An ASP.NET document with a form has two purposes: 1. Describe the form to be displayed by the browser 2. Process the form when its data is submitted - Each of these has its own kind of request – initial and postback - Code in the document can determine which kind of request it is by testing the IsPostBack property of the Page class - The values of controls can be accessed through the Value property of the associated object - Example – Gets user name and presents a greeting SHOW hello.aspx (before postback)
12.4 ASP.NET Controls (continued) - Document classes implicitly maintain form data state between postbacks in the ViewState hidden element of the form - The life cycle of hello.aspx: Client requests a document Compile document and call constructor Initialize control state with ViewState Set control state with the form data Save control state in ViewState Execute instance and return results to client Delete class and its instance from server Client leaves site Client interacts with the form Client causes a postback
12.4 ASP.NET Controls (continued) • - ViewState is user-accessible, so it can be used to • store state information other than form data • ViewState[″myName″] = ″Freddie″; • SHOW hello.aspx (after the form has been filled • and the document has been compiled) • - Changes: • 1. The ViewState control • 2. The document has an internal name • 3. The render block has been replaced by its • output • - Display of hello.aspx after filling and clicking • Submit
12.4 ASP.NET Controls (continued) - Postbacks are initiated when: 1. User clicks the Submit button 2. Any button (except maybe a checkbox) is clicked 3. A checkbox is clicked or a select item is selected, if its AutoPostBack property is set to ″true″ - Visual Studio and Visual Web Developer (free)– IDEs for both Web and non-Web applications - Allows development and testing of Web apps without using an external Web server - Includes an integrated debugger for .NET languages
12.4 ASP.NET Controls (continued) Start Page:
12.4 ASP.NET Controls (continued) - The Start Page has two tabs, Toolbox and Solution Explorer - An Example (rebuild hello using VS) 1. Select File/New/Web Site, which opens: 2. Select ASP.NET Empty Web Site 3. Enter C:\whatever\helloVS for location (HTTP) 4. Click OK
12.4 ASP.NET Controls (continued) 5. Right click the second line in the Solution Explorer 6. Select Add New Item, select Web Form, and click Add - This produces the following skeletal document, Default.aspx: <%@ Page Language="C#" AutoEventWireup="true" CodeFile=Default.aspx.cs" Inherits="_Default" %> <!DOCTYPE html PUBLIC "-//W3C//DTD XHTML 1.0 Transitional//EN" "http://www.w3.org/TR/xhtml1/DTD/ xhtml1-transitional.dtd"> <html xmlns="http://www.w3.org/1999/xhtml" > <head runat="server"> <title></title> </head> <body> <form id="form1" runat="server"> <div> </div> </form> </body> </html>
12.4 ASP.NET Controls (continued) 6. Change the name of the .aspx document to helloVS.aspx (by right-clicking the original name, Default.aspx) 7. Click Split at the bottom of the workspace 8. Expose the Toolbox (select View/Toolbox) 9. Drag two text boxes and a button to the design window and set their IDs to name, age, and Submit 10. Set the Text attribute of the button to ″Submit″ 11. Insert the response markup and code from hello.aspx <!-- helloVS.aspx A simple example of an ASP.NET document with controls, built with VS. It uses textboxes to get the name and age of the client, which are then displayed. --> <%@ Page Language="C#" AutoEventWireup="true" CodeFile="helloVS.aspx.cs" Inherits="_Default" %> <!DOCTYPE html PUBLIC "-//W3C//DTD XHTML 1.0 Transitional//EN" "http://www.w3.org/TR/xhtml1/DTD/ xhtml1-transitional.dtd"> <html xmlns="http://www.w3.org/1999/xhtml"> <head runat="server"> <title> helloVS </title> </head>
12.4 ASP.NET Controls (continued) <body> <form id="form1" runat="server"> <p> Your name: <asp:TextBox ID="name" runat="server"> </asp:TextBox> <br /> Your age: <asp:TextBox ID="age" runat="server"> </asp:TextBox> <br /> <asp:Button ID=“submit" runat="server" Text="Submit" /> <br /> <% if (IsPostBack) { %> Hello <%= name.Text%> <br /> You are <%= age.Text%> years old <br /> <% } %> </p> </form> </body> </html> - To test it, click the Debug menu and select Start without Debugging
12.4 ASP.NET Controls (continued) - ASP.NET Events - There are two levels of events – page-level events and control events - Page-Level Events - Four page-level events are implicitly raised by the Page class during the process of processing a request Load, Unload, PreRender, and Init - There are two ways to write and register handlers for page-level events 1. Write handlers with preassigned names and a specific protocol – implicitly registered when the document class is created public void Page_Init(System.EventArgs e) { … } - Called auto event wireup
12.4 ASP.NET Controls (continued) - Page-Level Events (continued) 2. Overload virtual methods and manually register them – not covered here - Control Events - Many events are handled on the server, although they are raised on the client - Control events are either postback or non-postback - All events on Button and Menu are postback - CheckBox, TextBox, and RadioButton are non- postback controls - Event handlers for controls are registered on attributes of the control element attributes TextBox uses OnTextChanged Button uses OnClick CheckBox and RadioButton use OnCheckedChanged CheckBoxList and RadioButtonList use SelectedIndexChanged
12.4 ASP.NET Controls (continued) - Control Events (continued) - Handler protocol: - Return type is void - Two parameters: an object type and the event object, whose type is System.EventArgs protected void TextboxHandler(object src, System.EventArgs e) { ... } - Registration: <asp:TextBox ID = "Name" OnTextChanged = "TextBoxHandler" runat = "server" />
12.4 ASP.NET Controls (continued) - Controls can be created by either markup or by programming code - For example, <asp.Button ID = "helpButton" Text = "help" OnClick = "OnClickHandler" runat = "server" /> Or protected Button helpButton = new Button(); helpButton.Text = ″help″; helpButton.id = ″helpButton″; helpButton.OnClick = ″OnClickHandler″; helpButton.runat = ″server″; - There are two problems with using code: 1. It required more typing 2. Placement of the control in the document is cumbersome
12.4 ASP.NET Controls (continued) - Can use a placeholder <asp:PlaceHolder id = ″buttonPlace″ runat = ″server″ /> buttonPlace.Controls.Add(helpButton); - Although creating elements is easier with markup, modifying them is a good use of code - Response output from controls - Can’t use Response.Write, because the output goes to the beginning of the buffer, rather than close to the controls
12.4 ASP.NET Controls (continued) - Alternative control output: - Create a label element where you want the output to appear - Set the content of the label by assigning to its Text property - Use string.Format for output with text and values <asp:Label ID = ″output″ runat = ″server″ /> <% string msg = string.Format{ ″The result is {0} <br />″, result); output.Text = msg; %> - List Controls - Common characteristics: - Items in the lists are modeled with ListItem objects - The collection of items of a list control are modeled with the Item object
12.4 ASP.NET Controls (continued) - List Controls - Common characteristics (continued) - ListItem objects can be defined with the Add method - The SelectedIndex and SelectedItem properties of a control reference the index and value of the selected item with the lowest index - All list controls can raise SelectedIndexChanged - Example – create a text box, a drop-down list, and a button, using a code-behind file to fill the items in the list SHOW controls.aspx - Fetch the VS-furnished code-behind file by clicking its name in the Solution Explorer (you must click on the triangle in front of the .aspx file’s name)
12.4 ASP.NET Controls (continued) using System; using System.Collections; using System.Configuration; using System.Data; using System.Linq; using System.Web; using System.Web.Security; using System.Web.UI; using System.Web.UI.HtmlControls; using System.Web.UI.WebControls; using System.Web.UI.WebControls.WebParts; using System.Xml.Linq; namespace controls { public partial class _Default : System.Web.UI.Page { protected void Page_Load(object sender, EventArgs e) { } } } - Delete the usings except System, System.Web, System.Web.UI, and System.Web.UI.WebControls - Use the Page_Load handler (on non-postback calls) to fill the list, using the Add method, as in: mySelect.Items.Add(new ListItem(″red″)); - Add a handler for the itemSelected event to display the chosen color - Also, the handler to confirm the user’s choice SHOW controls.aspx.cs
12.4 ASP.NET Controls (continued) - Validation Controls - RequiredFieldValidator - CompareValidator - RangeValidator - RegularExpressionValidator - CustomValidator - ValidationSummary - Validation controls are placed just after the controls whose values they are to validate - Use the ControlToValidate attribute to specify the control to be validated - Use the ErrorMessage attribute to specify the error message SHOW validate.aspx
12.4 ASP.NET Controls (continued) - Custom Validation controls - CustomValidator control - Example: <asp:CustomValidator runat = "server" id = "CustomValidator1" ControlToValidate = "name" ValidateEmptyText = “false" Display = "Static" ErrorMessage = "The text entered is not valid" ClientValidationFunction = "clientValidator" OnServerValidate = "ServerValidator"> </asp:CustomValidator>
12.4 ASP.NET Controls (continued) - An Example - A form asks the user to input an even number - A custom validator control is used to determine whether the input number is even and produce a message SHOW customValid.aspx & customValid.aspx.cs - For an odd number: - For an even number:
12.4 ASP.NET Controls (continued) - Master Documents - Create a master document whose content is common to several other documents, called content documents - Implicitly merge each content document into the master document before presentation when the content document is requested - Example: Master document gives a company’s standard header – no active controls and no code - To create a master document with VS: 1. Create a new Web site 2. Right-click the project in the Solution Explorer 3. Select Add New Item from the menu 4. Click Master Page from the list of template buttons 5. Change the name to airad.master & click Add
12.4 ASP.NET Controls (continued) - The skeletal document produced by VS: <%@ Master Language="C#" AutoEventWireup="true" CodeFile="airad.master.cs" Inherits="airad" %> <!DOCTYPE html PUBLIC "-//W3C//DTD XHTML 1.0 Transitional//EN" "http://www.w3.org/TR/xhtml1/DTD/ xhtml1-transitional.dtd"> <html xmlns="http://www.w3.org/1999/xhtml"> <head runat="server"> <title>Untitled Page</title> <asp:ContentPlaceHolder id="head" runat="server"> </asp:ContentPlaceHolder> </head> <body> <form id="form1" runat="server"> <div> <asp:ContentPlaceHolder id="ContentPlaceHolder1" runat="server"> </asp:ContentPlaceHolder> </div> </form> </body> </html> 6. Add the content and styles for the application SHOW airad.master
12.4 ASP.NET Controls (continued) - Content documents must begin with a Page directive with the masterpagefile attribute - The whole content document must be an asp:content element, which includes the contentplaceholderID attribute set to "TopPageContent" - The URL of the merged file is the name of the content document - To create the content document: 1. Right-click the project in the Solution Explorer 2. Select Add New Item 3. Select Web Form and change its name to airadContent.aspx 4. Select Select Master Page and click Add 5. Select the master page airad.master and click OK
12.4 ASP.NET Controls (continued) - The skeletal document produced: <%@ Page Language="C#" MasterPageFile="~/airad.master" AutoEventWireup="true" CodeFile="airadContent.aspx.cs" Inherits="airadContent" Title="Untitled Page" %> <asp:Content ID="Content1" ContentPlaceHolderID="head" Runat="Server"> </asp:Content> <asp:Content ID="Content2" ContentPlaceHolderID="TopPageContent" Runat="Server"> </asp:Content> 6. Add a div element with a special ad in second Content element 7. Delete first Content element SHOW airadContent.aspx
12.5 ASP.NET AJAX - Ajax can be included an ASP.NET document without the developer writing any JavaScript, if VS is used - VS Toolbox for Ajax – Ajax Extensions - Ajax server controls add script to documents that is run on the client - Other server control processing is done on the server - We cover only two server controls, ScriptManager and UpdatePanel - Every document that uses ASP.NET AJAX must include a ScriptManager control <asp:ScriptManager id = "whatever" runat = "server" /> - UpdatePanel defines the area of a document that can be updated with Ajax – its content
12.5 ASP.NET AJAX (continued) <asp:UpdatePanel runat = "server" id = "whatever" /> <ContentTemplate> (whatever is to be Ajax-updateable) </ContentTemplate> </asp:UpdatePanel> - Example – the old zip-code problem 1. Select File/New Web Site and ASP.NET Web Site 2. Drag a ScriptManager element to just after the form tag 3. Add a TextBox for the zip code with id, columns, and runat attributes 4. Add the AutoPostBack attribute in the zip code TextBox set to "true" 5. Add an OnTextChanged attribute to the zip code text box set to the name of the C# handler (in the code-behind file)
12.5 ASP.NET AJAX (continued) 7. Drag an UpdatePanel element to just after the zip code text box 8. Type in a ContentTemplate control inside the UpdatePanel 9. Drag text boxes for the city and state inside the ContentTemplate element 10. Drag in two labels to be used as placeholders for time stamps, one for initial rendering (id is Label1) and one for each Ajax update (id is Label2). The Label1 element goes just before the “name” text box; the Label2 element goes just after the “state” text box - Label form: <asp:Label id = "whatever" runat = "server" > </asp:Label> SHOW CityState.aspx - Note: The registered handler is named Zip_OnTextChanged
12.5 ASP.NET AJAX (continued) - The code-behind file 1. Select File/Open/File and CityState.aspx.cs 2. Add the handler method for the zip code text box, with the HashTable object with cities and zip codes - The value of the zip code text box is accessible through zip.Text - The time stamp for the Ajax updates is created with: Label2.Text = "(Refreshed at " + DateTime.Now.ToString() + ")"; - The other time stamp is added to the Page_Load method, but executed only on a non-postback call SHOW CityState.aspx.cs
12.5 ASP.NET AJAX (continued) - The initial screen: - After entering name, address and zip code: • After moving the cursor out of the zip code text box:
12.5 ASP.NET AJAX (continued) - After entering a new zip code and moving the cursor out of the zip code text box:
12.6 Web Services - Introduced in Chapter 7 – XML - A Web service is a collection of one or more related methods that can be called by remote systems using standard protocols on the Web - VS provides two approaches to building and advertising Web services: - Traditional – since 2002 – we’ll cover this one - Windows Communication Foundation (WCF) - since 2006 (not restricted to the Web) - In .NET, a Web service is a special kind of class defined in a document that is all code except the first line, which is a directive, such as: <%@ WebService Language = "C#“ CodeBehind = " … " Class = "MyWebService1.Service1" %> - To build a Web Service in VS: 1. Select File/New Web Site/ASP.NET Web Service 2. Choose File System for location and enter C:\vStudio\PaymentService for the name and C# for the language and click OK
12.6 Web Services (continued) 3. Right-click on the .asmx file in the Solution Explorer and select Rename to change the name to PaymentService. Also for the .cs file Also change the name of the code-behind file and the inherited class of PaymentService.asmx to reflect the new names of the code-behind file. The .asmx and .cs files are now: <%@ WebService Language="C#" CodeBehind="~/App_Code/PaymentService.cs" Class="PaymentService" %> using System; using System.Linq; using System.Web; using System.Web.Services; using System.Web.Services.Protocols; using System.Xml.Linq; [WebService(Namespace = "http://tempuri.org/")] [WebServiceBinding(ConformsTo = WsiProfiles.BasicProfile1_1)] // To allow this Web Service to be called from script, // using ASP.NET AJAX, uncomment the following line: // [System.Web.Script.Services.ScriptService] public class Service : System.Web.Services.WebService { Public Service () { //Uncomment the next line if using designed components //InitializeComponent(); } [WebMethod] public string HelloWorld() { return "Hello World"; } }
12.6 Web Services (continued) • 4. Modify PaymentService.cs to add the calculation: • - Delete all using statements except for System • and System.Web.Services. • - Rename the class PaymentService and delete the • constructor • - Replace the HelloWorld method with: • public double CalculatePayment(double loanAmt, • double intRate, int months) • { • double monthRate, payment; • monthRate = intRate / 12.0d; • payment = (monthRate * loanAmt) / • (1.0d - Math.Pow(1.0d + monthRate, -months)); • return payment; • } • SHOW PaymentService.cs • - To test the service, select Debug/Start Without • Debugging, to get:
12.6 Web Services (continued) - Click the CalculatePayment link, to get: • If we enter three numbers 100000.0, 0.05, and 120 • and click Invoke, we get the result, in XML:
12.6 Web Services (continued) - Consuming a Web Service - We create a client Web application to use the PaymentService service 1. Select File/Add New Web Site/ASP.NET Web Site, while the PaymentService project is open, and name it PaymentUser 2. Modify Default.aspx - Rename it PaymentUser.aspx - Replacing _Default with PaymentUser in its Page directive - Add text boxes to collect the input parameters and a button to call the service - Add a Label element as a placeholder for the return value from the service SHOW PaymentUser.aspx - Now we must modify the code-behind file (PaymentUser.aspx.cs) 1. Delete all using statements except System and System.Web.UI and add using localhost
12.6 Web Services (continued) 2. Rename the partial class PaymentUser and rename the Page_Load method buttonClick 3. Add a statement to instantiate the proxy class PaymentService Proxy = new PaymentService(); 4. The return value must be inserted into a string and set to the Text attribute of the Label element in the PaymentUser.aspx document 5. In the actual call to the proxy, the form values must be converted to numerics, using Convert.ToDouble and Convert.ToInt32 // PaymentUser.aspx.cs // The code-behind file for the PaymentUser.aspx // document. Defines the event handler that creates the // proxy, and calls it to produce the results. using System; using System.Web.UI; using localhost; public partial class PaymentUser : System.Web.UI.Page { protected void buttonClick(object sender, EventArgs e) { PaymentService proxy = new PaymentService(); Result.Text = String.Format( "<br />Payment is: {0:C}“,proxy.CalculatePayment( Convert.ToDouble(Loan.Text), Convert.ToDouble(Interest.Text), Convert.ToInt32(Months.Text))); } }
12.6 Web Services (continued) - The final step of building the Web service consumer is to create a Web reference in the client 1. Right-click on the PaymentUser entry in the Solution Explorer and select Add Web Reference
12.6 Web Services (continued) 2. Select Web Services in this Solution, which produces: