Download
1 / 105
1.05k likes | 1.19k Views
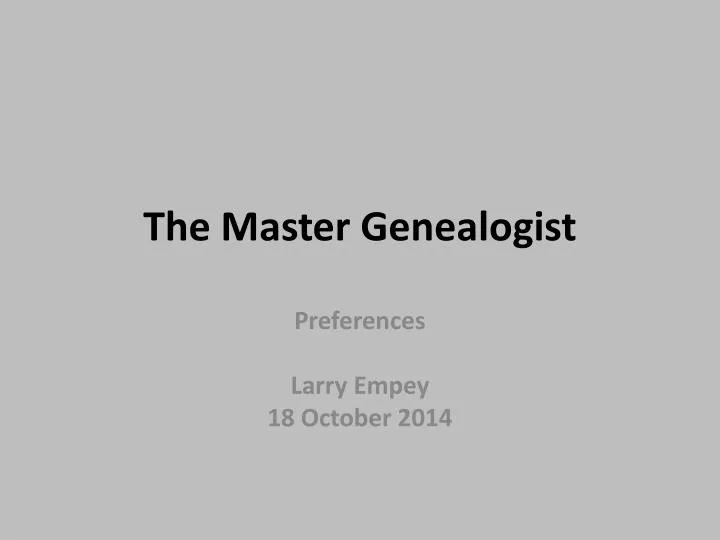
The Master Genealogist. Preferences Larry Empey 18 October 2014. To begin click the plus sign to the left of “Program Options”. Then click on “General”.

E N D
The Master Genealogist Preferences Larry Empey 18 October 2014
To begin click the plus sign to the left of “Program Options”
View History remembers Details tabWhen checked, the Viewmenu history remembers the tab in the Details window that was in use, as well as the previous focus persons. (from TMG help)Thus remembers if “person”, “Family” or ”Tree” tab is selected and which person was selected.
Open Picklist to current focus personWhen checked, the Picklist will open with the highlight on the current focus person. When not checked, it will open at the top.
Show status barWhen checked, a status bar appears at the bottom of the screen which gives information on the status (off/on) of Insert, NumLock, Scroll Lock, and Caps Lock keys. When these keys are on, the words are bolded.The next slide shows an example
Show cue cardsWhen checked, tips about how to do various functions will appear the first time you enter a particular screen. You can turn off the Cue Card for a particular screen by deselecting Show this cue card again next time in the Cue Card window. In addition, you can right-click on the Help button in any screen to trigger a Cue Card for that screen (in case you want to view it again). Closing the first Cue Card triggers an option to turn all Cue Cards off.An example of a cue card is on the next slide
Maximum number of simultaneous web searchesEnter the maximum number of web searches to do simultaneously. The default is 10. If you have problems with web searches, you may wish to reduce the number. If you have a fast computer and lots of memory, you may want to increase it. The maximum possible is 99.I will also mention that it also depends on your internet connection.
Wallpaper fileYou may select a graphic file to appear as background to the windows on the TMG screen.Assuming you have unused screen space.
Wallpaper modeYou can choose how the wallpaper file will be displayed. Your choices are: Clip, Stretch, Stretch Isometric, and Tile. Clip uses the image as is. Stretch stretches the image to fill the background window. Stretch Isometric fills the background window as nearly as possible, but keeps the image from becoming skewed. Tile repeats the image to fill the background window.
When opening a second projectYou can choose to: Close the current project, keep both projects open, or ask each time.
Date formatYou can select the date format for the display of dates on the screen to be any of the following nine date formats. You can enter a complete date using any of these nine date formats regardless of the screen display format selected here. Dates will be output in reports based on the Report Options for that report and not based on this selection. Since the program can spell out the name of the month in reports if requested in the Report Options, there is no need for a screen display format to spell out the month.The next slide will show examples.
Format of IDEach individual is given an ID Number by the program. You can choose to display the ID Number, the Reference Field, or both. The Reference field can contain alpha, numeric, or alpha-numeric characters.ID NumberNumber assigned by the program.Reference FieldNumber or other entry from Reference field.BothBoth IDNumber and Reference Field will be used to format the person's ID.
Default project pathYou may enter a path to be used as the default when new projects are imported. The default is to place them in a PROJECTS folder under the default program user data tree folder.
Old Style date rangeThe default for Old Style dates is 1583-1752, the date span over which the Gregorian calendar was adopted by various countries. You can change these dates by dialing the dates you want to use. You might want to change this if much of your research is in countries that changed to new style dates at a time other than the default.Further info on the next screen.
Old Style DatesDates between 1583 and 1752 may be considered as Old Style dates. The Gregorian calendar was introduced by Pope Gregory XIII in 1582 to correct an error in the Julian calendar. In that year, the day that would have been October 5 was called October 15 and other changes were made to prevent future errors. In addition, the beginning of the year was moved from March 25th to January 1st. The Gregorian calendar was adopted immediately by France, Italy, Spain, Portugal, and Luxembourg and within just a few years by most of the German Catholic countries. Other countries, however, waited various lengths of time to adopt the Gregorian calendar. For example, Great Britain and its colonies in America did not adopt it until 1752, by which time the difference in the two calendars was 11 days. Thus George Washington's birthday, which was 11 Feb 1731, became 22 Feb 1732 in the Gregorian calendar. The Gregorian system spread later to non-European countries. Turkey was one of the last countries to convert in 1925. The Russian Orthodox church and various Middle Eastern Christian churches have retained the Julian calendar. Recognizable date forms include:24 Feb 1691 OS24 Feb 1690/124 Feb 1690-124 Feb 1690 .. 1In the above examples, if you enter the date in any of these formats, TMG will enter 24 Feb 1690/91.You should always enter Gregorian dates, therefore to enter an Old Style date:Enter the new style date followed by OS.If you enter a Julian date, be aware that calculations based on this date may be wrong, or enter this date as an irregular date and use a sort date to place the tag on the Person View.If you need to clarify whether the date is Julian or Gregorian, do so in the memo field for that tag.
We will move on to “startup and exit”The second menu item under “Program options”
This item gives you the choice of having the “Welcome window “ appear or not.For those who have forgotten what the Welcome window is, it is shown on the next slide.
This is the “Welcome window”Make your choice of what you wish to happenIf you uncheck the box at the bottom then make your choice, this will become the default action
Checking this box will bring up the “tips and hints” box.Forgotten?Next slide
This will set the time that the “Splash screen “ will appear.I have no idea why anyone would want to study this “Splash screen”
This will set the number of days before TMG will check for upgrades0 means it won’t checkTMG list usually has the upgrade notice before it appears here.
Here you can set the time in days when TMG will check for messages0 means it does not check
When you exit the program TMG will give you two choicesThe chance to save the screen layout (if it has changed)The chance to backup your project.You DO backup, right?
We will move on to “Data Entry”The next menu item under “Program options”
When Advanced is checked, the Beginner mode will be turned off and the following data entry fields will be visible: Roles, Event-specific name (name variation), Sort Date, Place Styles, Name Styles, Witnesses, Sentence, and Sureties.
Spell CheckerInternalIf you check this option, selecting the Spell Checker will bring up TMG's internal Spell Checker.Microsoft WordIf you check this option, selecting the Spell Checker will bring up Microsoft Word and will use its spell checking feature. This feature is particularly helpful for people using languages other than English, since they will have a spelling dictionary in their own language.Grammar CheckerWhen you select Microsoft Word as your Spell Checker, you have the option to Also check grammar.
Use buttons for Add/Edit/Delete/Primary on the Details windowIf you check this option, four buttons are enabled to the right of the Tag Box to improve usability for beginners. These buttons are enabled by default for Beginner Mode.Buttons are shown on next screen
When checked, the tabbed version of the Tag Entry Screen will be used.
Tabbed entry non tabbed entry
Open Reminder window automaticallyWith this box checked, reminders giving guidance for entering source, citation, and tag data will open when the data entry screens are opened. If this option is disabled, you can always open any specific reminder window by clicking the Reminder button on the data entry screen. Reminders are not available for all source types, sources, and tag types. A green Reminder button on a Tag Entry, Citation or Source Definition Screen General tab indicated that a reminder is available.
The options on this screen control the parameters used to check for duplicates when adding new people to your data set.
When Item Tips are turned on and you pass the cursor over a field that is not fully visible, the field will be shown as an Item Tip.
Clicking on Slideshow will bring up (what else) your choices for a slideshowSelf explanatory I think
Middle.Show vertical and horizontal lines. With both turned on it looks like a spreadsheet.“show lines for empty rows” I did not get this to show anything.
With this option selected, you will get a prompt to confirm your selection of multiple witnesses from the Expanded Picklist.
You can change the way the program prompts you in a variety of ways.The next screen will show the help file for these prompts.
Prompt for marriage of parents If this is checked, when parents are entered you will be prompted to enter their marriage. Prompt for married name If this is checked, when a marriage is entered for a female, you will be asked if a married name tag should be created for her. If you create this tag, she will be listed under both names in the Picklist and Project Explorer. Copy date field from marriage If this is checked, you will be asked if you want to copy the marriage date from the marriage tag to the married name tag. Assign surname of father If this is checked, when you add a child, the child will be assigned the surname of the father. Access sort date field If this is checked, the cursor will stop in the sort date field on the Tag Entry screen. If it is not checked, the field will be grayed out and you will not be able to change it. The cursor will skip it when you are entering data. Validate LAT/LONG value If checked, an entry in the LAT/LONG will be validated to be sure it is an appropriate value. If unchecked, any value entered in this place field is treated as text and not a Latitude/Longitude value. Prompt to update sort date If checked, when you enter a date you will be asked if you want to update the sort date field with that new date. Prompt to copy principal sentence to other principal If checked, the sentence for the first principal will be copied to the second principal. Prompt to search for embedded citations when deleting a source Embedded citations that you have entered into event tag memos can reference a source that you are deleting. When you delete a source, you can, optionally, have the program search for any embedded citations that reference the deleted source and remove those embedded citations. Your choices are: Never prompt; do not search When you delete a source, event memos are not searched for embedded citations. Prompt me each time Each time that you delete a source, you will be asked as to whether you wish to search all event memos for embedded citations that reference that source. Never prompt; always search When you delete a source, there is a search for embedded citations that reference the source. With a large data set, the search for embedded citations in event memos can take a very long time. For this reason, the default selection is Never prompt; do not search.
You can change the way the program warns you in a variety of ways. To turn off the warning, deselect the box next to it. All warnings are on by default. Many warnings can be disabled from the warning when it occurs without the need to go to Preferences.