Download
1 / 27
270 likes | 296 Views
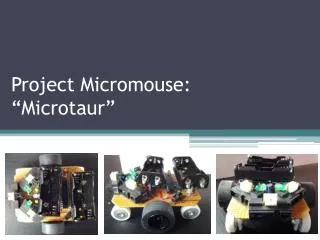
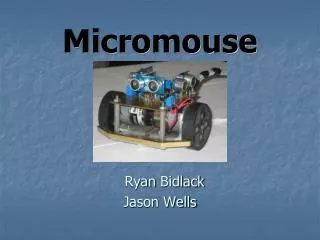
A small robotic mouse navigates a maze to reach a central point, using top-down sensors and intelligent algorithms. Detailed design process and completed goals outlined by the RabbitWagon team.

E N D
Micromouse 296Final Presentation Fall 2008 Group: Rabbitwagon
The Team • Richard Ordonez- Project Leader • Bob Barfield- Software Manager • Lance Lavarias- Mechanical Architect • Micheal Pascual- Hardware
Overview To create, a small autonomous robotic mouse that will: Navigate it’s way safely to a central point of a maze Map the maze Find the shortest route from the start point to central point of the maze. Contest rules must be followed UH Micromouse Maze
Initial Goals • Build a light and fast mouse • Implement top-down sensor technology • Build an Intelligent mouse • Wall hugger • Follow flood fill algorithm • Map and solve maze • FINISH
Design • Chassis • Stepper Motors • Top-down sensors • Wall hugger with good tracking
Chassis Design • A good chassis design should have the the following features: • Made of robust material • Narrow enough to fit in a cell with plenty room for correction on either side. • Able to rotate 180 degree turns without hitting walls • Shouldn’t have problems riding over cracks Previous Semester Designs
First Chassis Design Fossil Watch Box Too big for 18x18 cm cell Flimsy Aluminum
Second Chassis Design Robust and light-weight Aluminum chassis Narrow-fit to easily maneuver in any cell Sled-shaped bottom to go over bumps
Final Chassis Too Long Cut down sled For better fit in Cells.
Chassis Components • Jameco Stepper Motors 3) 8 Metal Hydride Batteries 2) Aluminum Wheels
Circuit Design Tower-like design • Bottom level: • Top-down sensors • Voltage regulator • Second Level: • Mosfets • Rabbit • Power
First LevelGraphical Representation of Sensor Design Ideal Sensor layout
Alignment Strategy • Sensors lay out is clock face • Crossed sensors give best alignment
Actual Sensor Layout Bottom view Top View
Major Sensor Problem All sensor connected 12 volts. (Red wires) DUMB! Reconnected to 5 volts (Yellow wires) SMART!
Second Level • Rabbit Microcontroller • Power/Ground • Switch • Mosfets 2 4 3 1
Programming • RabbitWagon Program Overview • Series of states • Used CoState functions in Dynamic C • Strategy • Wander as right wall hugger while mapping • Flood fill to solve • Speed up stepper motors for timed run
Summary Of Problems • Chassis • Body too big • Sled too long (not able to rotate) • Sensors • Burned out sensors due to too much voltage • Sensor board too close together • Too high • Motor Circuit • Step sequence
Rabbit microcontroller • Programming • DEAD Ports • Code/Programming • Co-states
Completed Goals • Completed Hardware • Got mouse to move • Rabbit read sensors • Tracking
Improvements • More compact with fewer wires • Stability • Side sensors • Tracking • Possibly use a pic microcontroller
Lessons Learned • More scheduled meetings • More design time • More coders • Put everything possible in a socket • Use patch panel between controller and rest of mouse • Simulate mouse with breadboard/LEDs while developing software